
It can feel daunting when you have finished a nice neatly stitched area and then are faced with taking a pair of super sharp scissors to it. If you do not already own a pair of sharp, fine-tipped Hardanger embroidery scissor which you guarded against anyone else touching then you might want to that a look at my comments on scissors clicking here.
Kloster sides of Hardanger satin stitches defined the Hardanger cutwork or openwork area. Click here if you need a brush-up on kloster sides and/or Hardanger satin stitches.
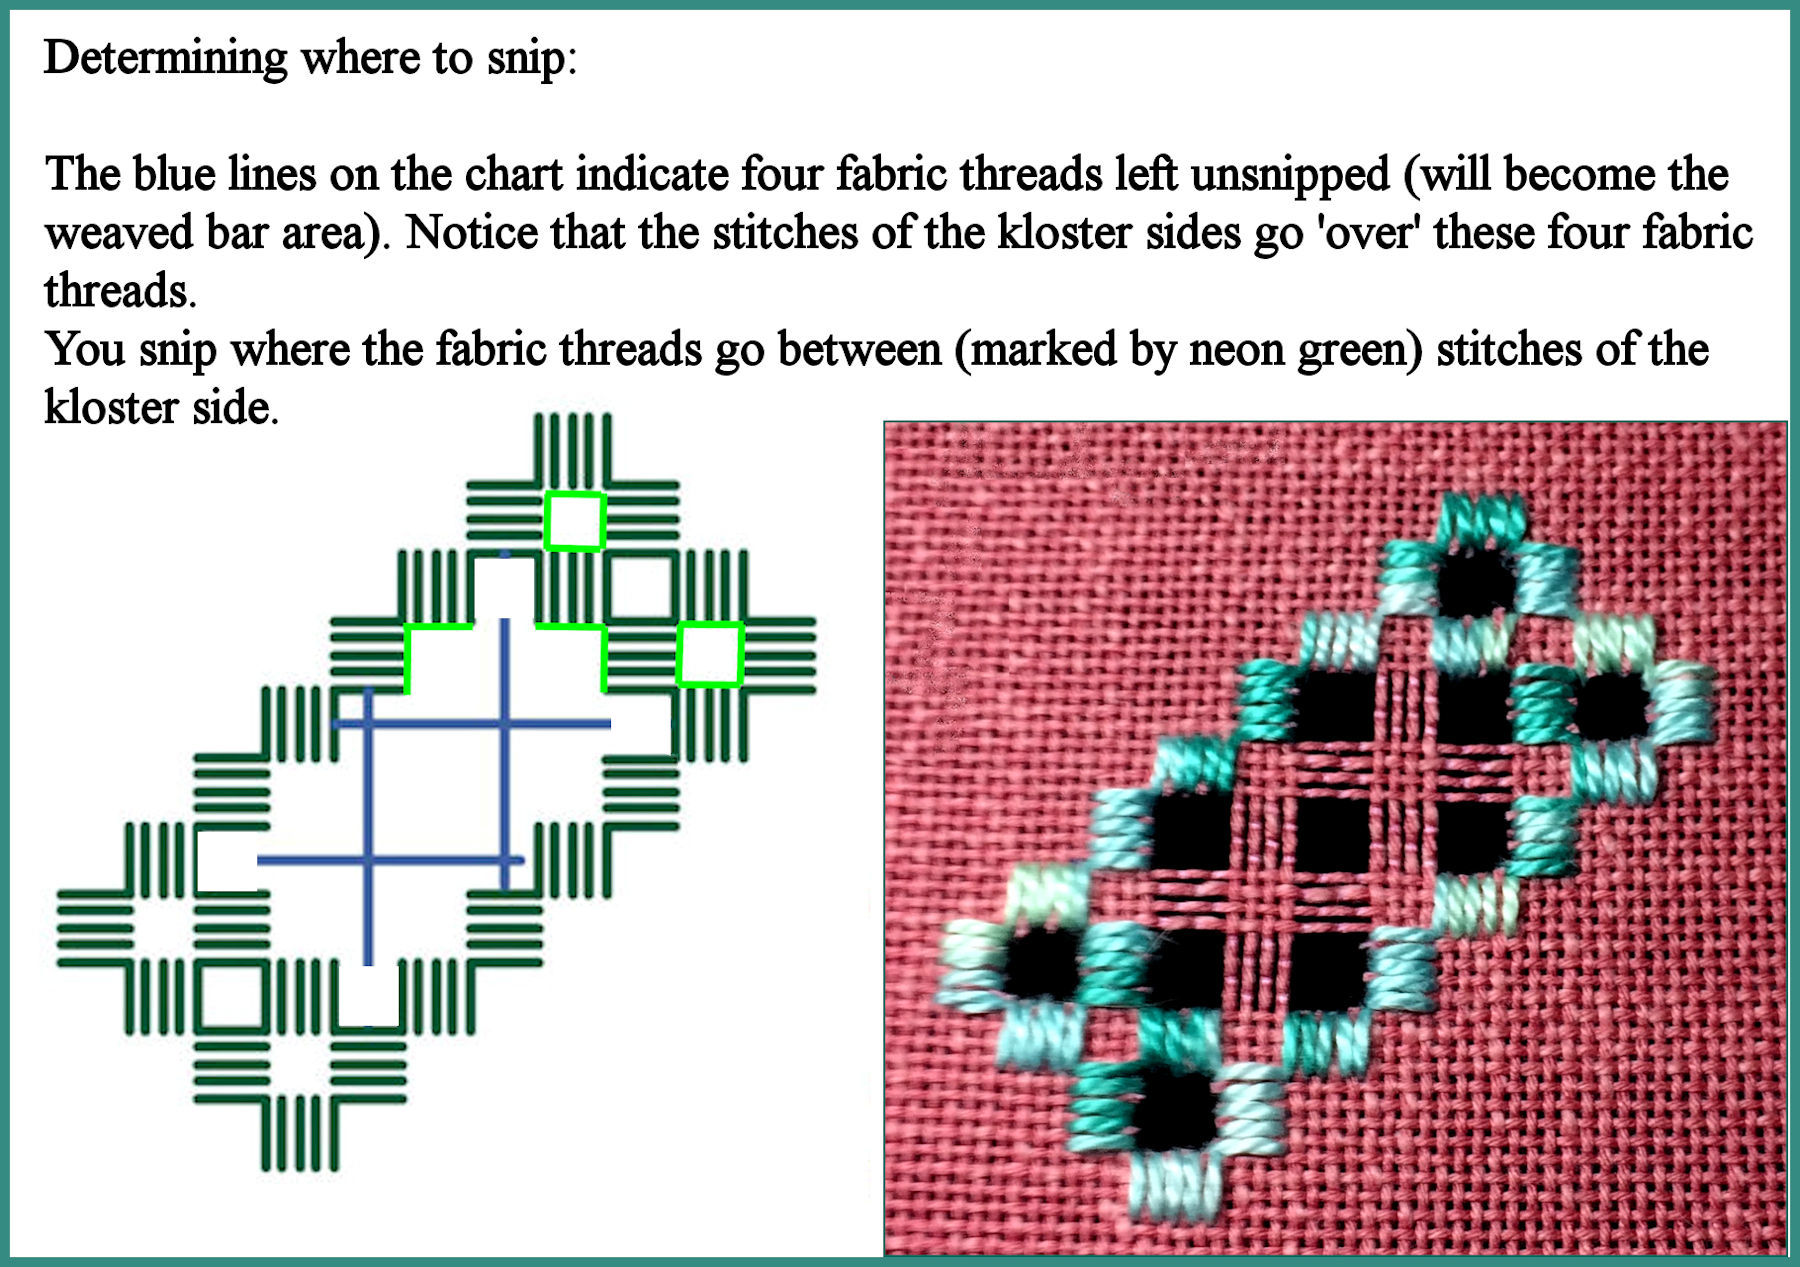


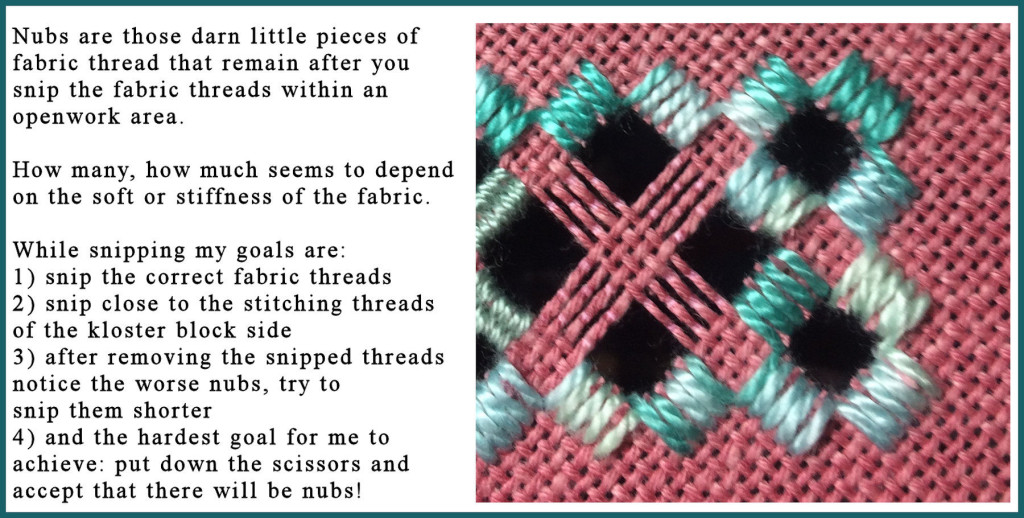
The max number of fabric threads that can be snipped from a kloster side is the number of hardanger satin stitches minus 1.
This photo shows a 13-stitch four-sided kloster block that is part of my Rosey Day design. The max number that could be snipped and removed is 12 fabric threads per side but this four-sided kloster block contains bar weaving and a dove eye.

Red and green dots on this chart indicate those fabric threads that were snipped and removed. The second and third fabric threads in from the corners were not snipped.

Click here to view my Hardanger Oops! blog page for the discussion of snipping problems and fix-its.
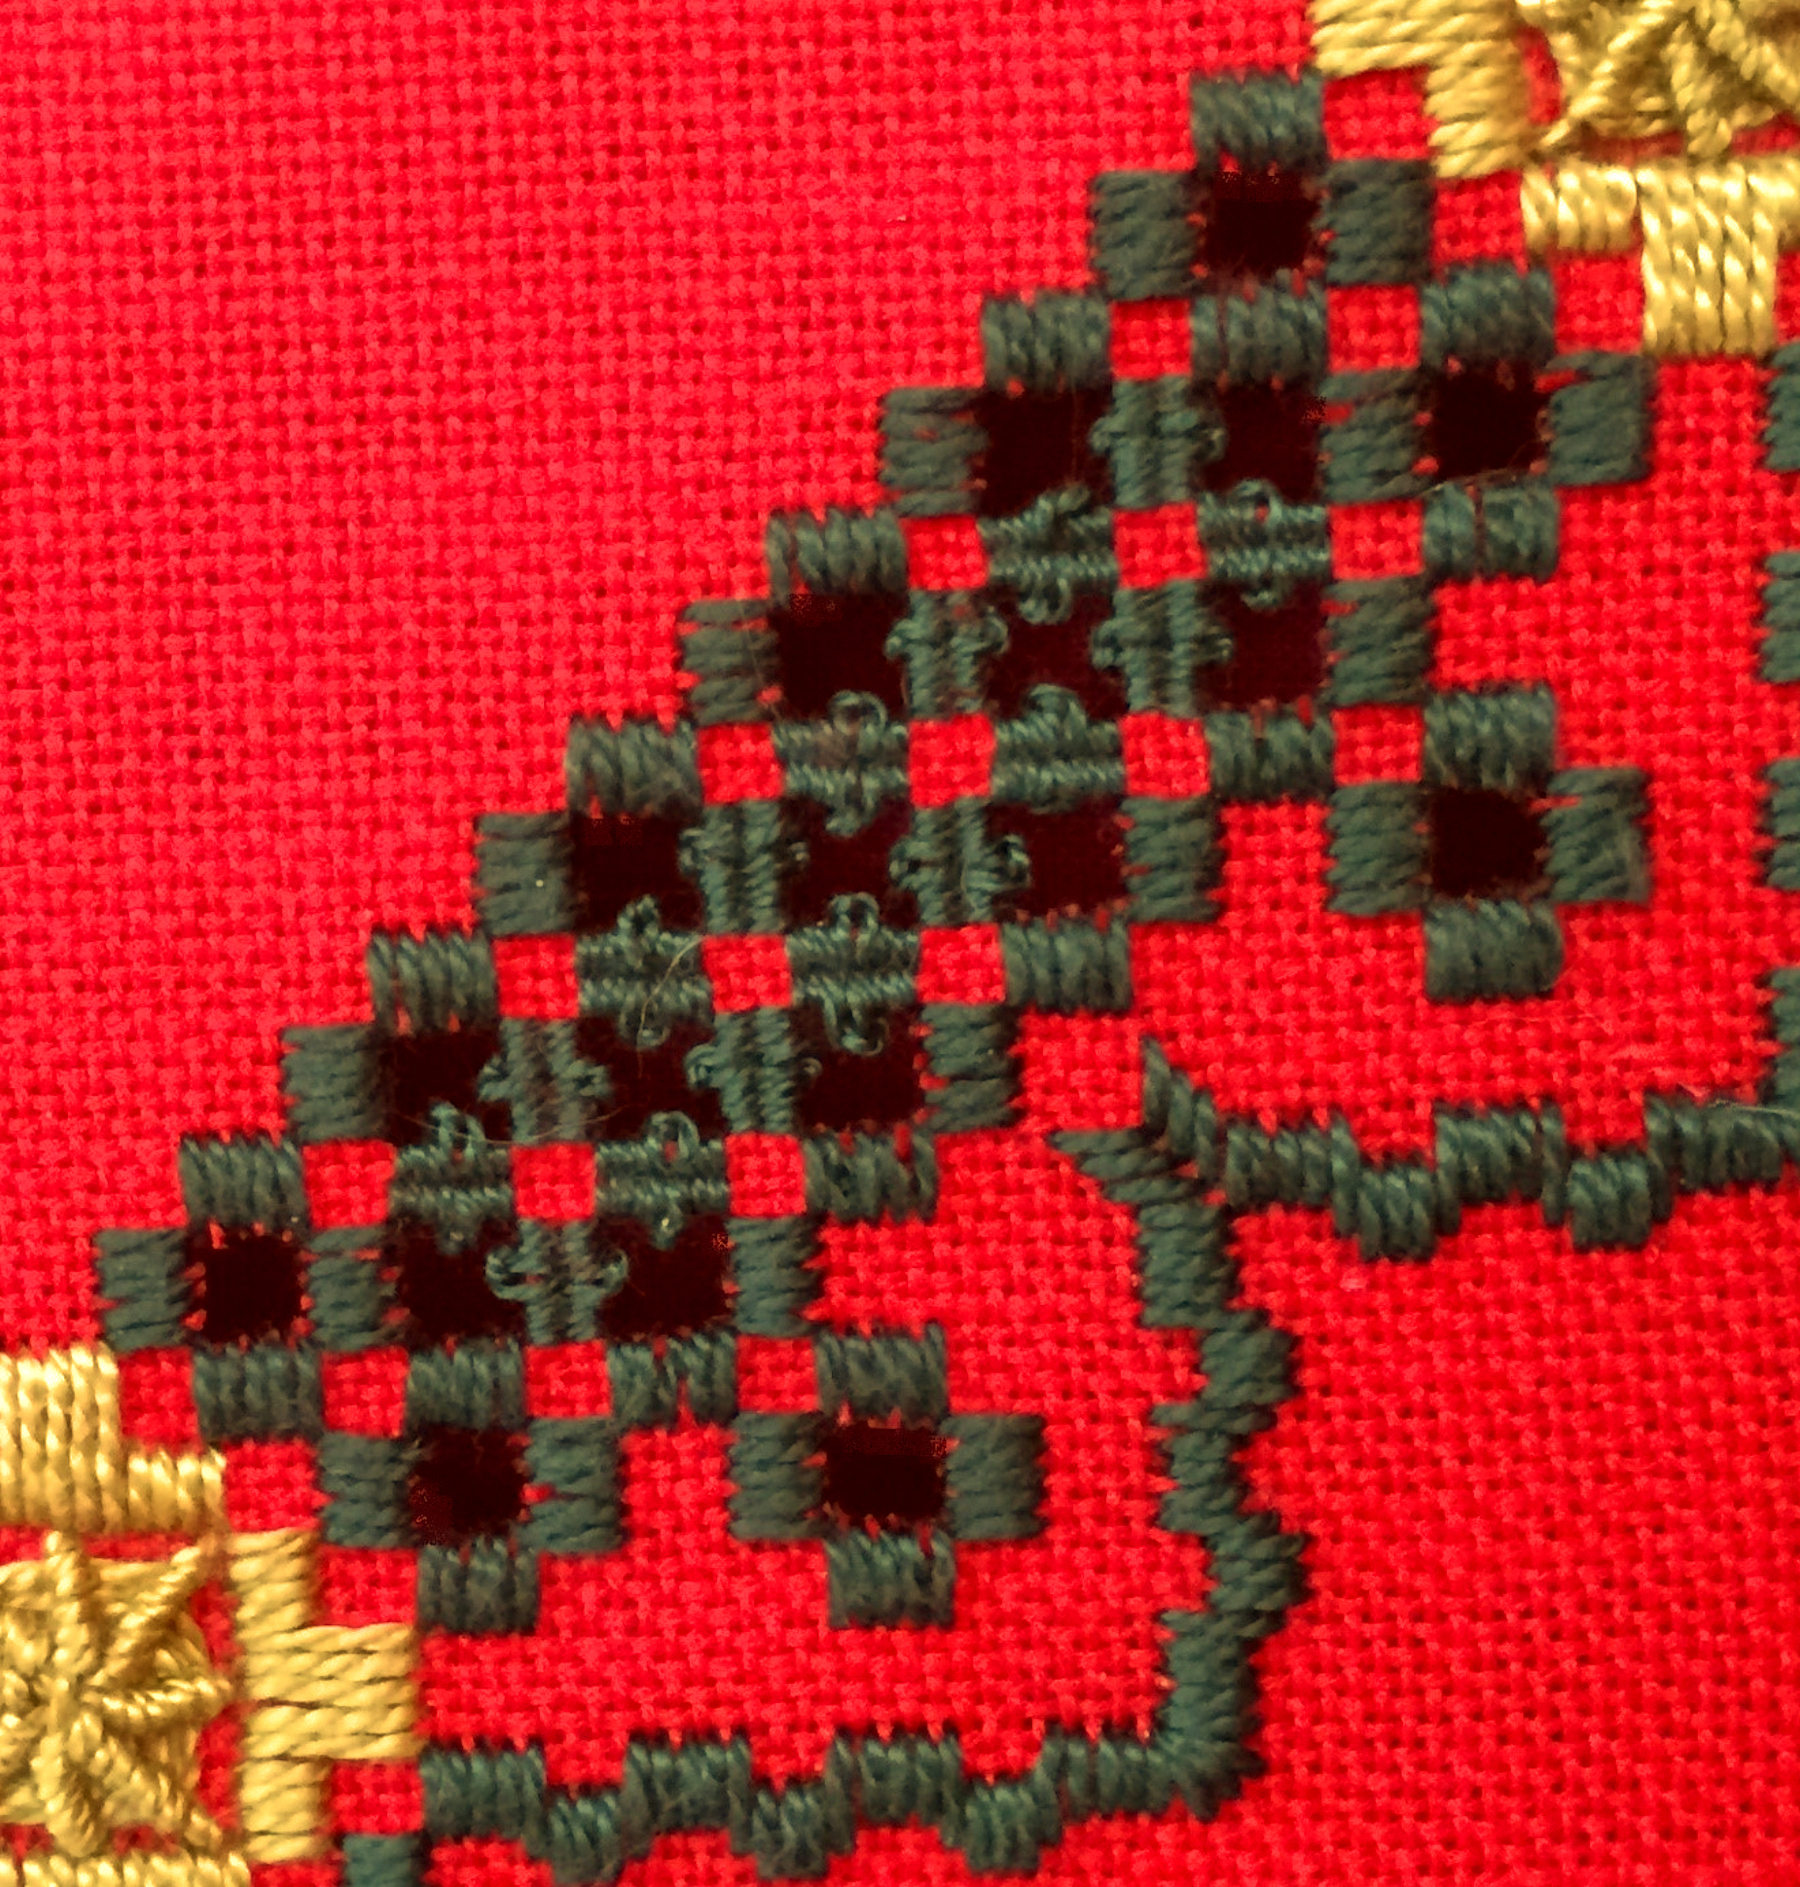
Another Example of cutwork:
 This photo shows a corner cutwork area in the Santa Nestled in Spruce Trees design. There are three areas of kloster blocks. The two number 1’s, worked in gold color thread, will be non-openwork areas. The one long-rectangle shaped area 2 will be openwork filled in with weaved bars and picot loops. The six number 3’s will be un-filled openwork areas. |
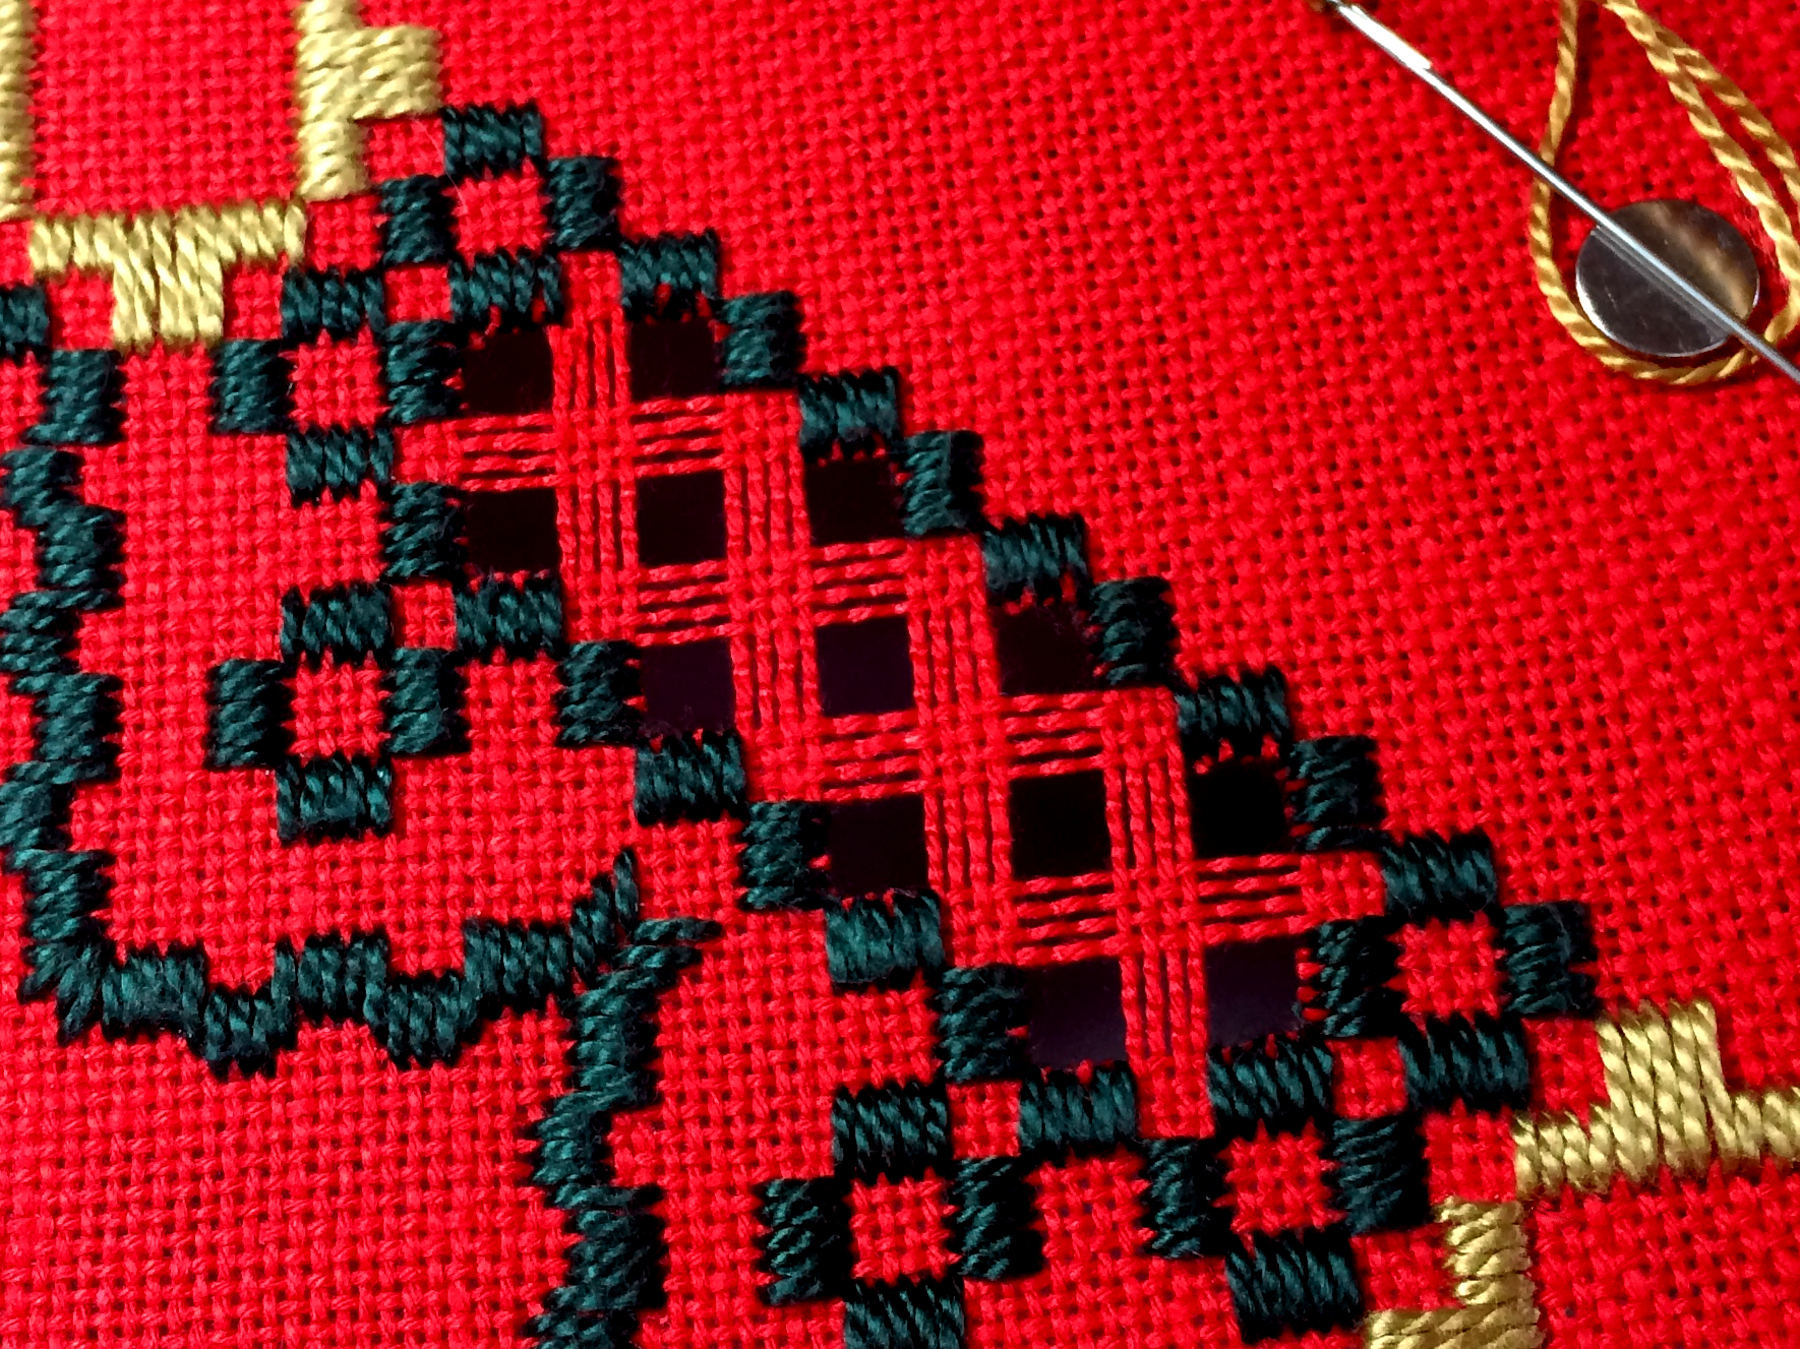 Fabric threads have been snipped and removed in the area marked 2 in the above photo. When snipping fabric threads you need to take your time, follow the charts and use very sharp, fine pointed scissors. I will not snip and remove the fabric threads within the six area 3’s until all of my bar weaving and picot stitching is completed in area 2. This is because you want to keep your fabric surrounding the weaving area as stable as possible until you finish that work. |

