
Stitching Probems:
Stitching problems can occur when you incorrectly stitch (see below photo) a hardanger satin stitch or if you go off-pattern. If I go off-pattern and need to redo that section of the chart, I normally snip every other stitch to help me remove the stitching thread without harming the fabric, carefully remove the stitching thread and then start again with a new stitching thread. I also have masking tape on hand when I remove stitching thread. Once I remove the stitching thread to correct the problem, I dab the masking tape about (on both sides of the fabric) to pick up any fuzz of stitching thread that has adhered to the fabric.
The four-sided kloster block shown in the front view looks great with each stitch going into its own fabric hole and the four shared fabric holes at each corner. Viewing the back side of this same four-sided kloster block shows a different story. The two neon green arrows point to the problems.

Problem 1 is where the thread goes diagonally to the corner of the next block.
Problem 2 is that you need the stitching thread to go over four fabric threads on top and bottom.
If you were not doing cutwork then though wrong you can leave this as is but it isn’t a Hardanger behavior you want to continue. With either problem I would correct them because when I was first learning I worked several Hardanger designs with four-sided kloster blocks that had no cutwork. Then months later, as my experience increased I went back, did cutwork and fill-in stitches. If I hadn’t corrected the problems as I was working the design…. well many months later I would had probably already used up the stitching thread in another project and have none on hand for a restitch of the area. Also, I proudly display my worked pieces around the house and it would be a bit embarrassing for a friend to view my piece, flip it over and see errors.
My approach to correct the above problems: I would snip my stitching thread at the loop formed by Problem 2, take out enough stitches to give me the length (probably most of this four-sided kloster block) needed to weave in the thread ends and use another length of thread to restitch that area.
Within cutwork, if problem 2 is left as is the block will fail when you snip out the center fabric threads and that takes quit a bit of work to correct.
If you do cutwork before realizing Problem 2 occurred, once the center area was snipped out you’ve got that loop of the stitching thread and that small area of unsupported fabric. I would snip the loop, take out the least number of stitches to give me the lengths for weaving in the stitching thread ends and then before restitching the stitches I would paint both sides of that small area of fabric with fray check (or similar product), let it dry to be a stiffer fabric and then very, very slowly and carefully (as in gingerly) do the stitches again with a new stitching thread.
Snipping Probems:
Oops: Two Oops that can occur with cutwork is the snipping of the stitching thread within a kloster block or snipping the fabric thread.
Stitching thread: If you partially snip a stitching thread of a stitch of a kloster side a dab of fray check might repair the problem. If you have completely snipped through a stitching thread or if you are going to hand wash your piece I would remove the stitching thread, secure ends and rework that area.
Fabric thread: Fixing the incorrectly snipped fabric thread isn’t hard, but takes a bit of patience.
Below is one approach for fixing incorrectly snipped fabric threads. Clicking any of these photos should open up to a larger view.
Center photo shows the 12-sided kloster block I worked as an example for this discussion.

This photo shows front side of the worked design.
Steps that are important to fixing an incorrectly snipped fabric thread area:
- use same or very similar thread as your replacement fabric thread
- unweave and move aside the incorrectly snipped fabric thread(s)
- secure new length of fabric thread
- make sure as you weave with your new fabric thread that you match the weave (into the fabric thread) of the snipped fabric thread you are replacing
- work carefully to not skew the stitching threads or the structural integrity of the kloster block sides that you are working through
- secure the tails of the incorrectly snipped fabric threads into kloster block sides
White paper placed behind the snipped fabric threads to help you see them.
This photo shows back side of the worked design.
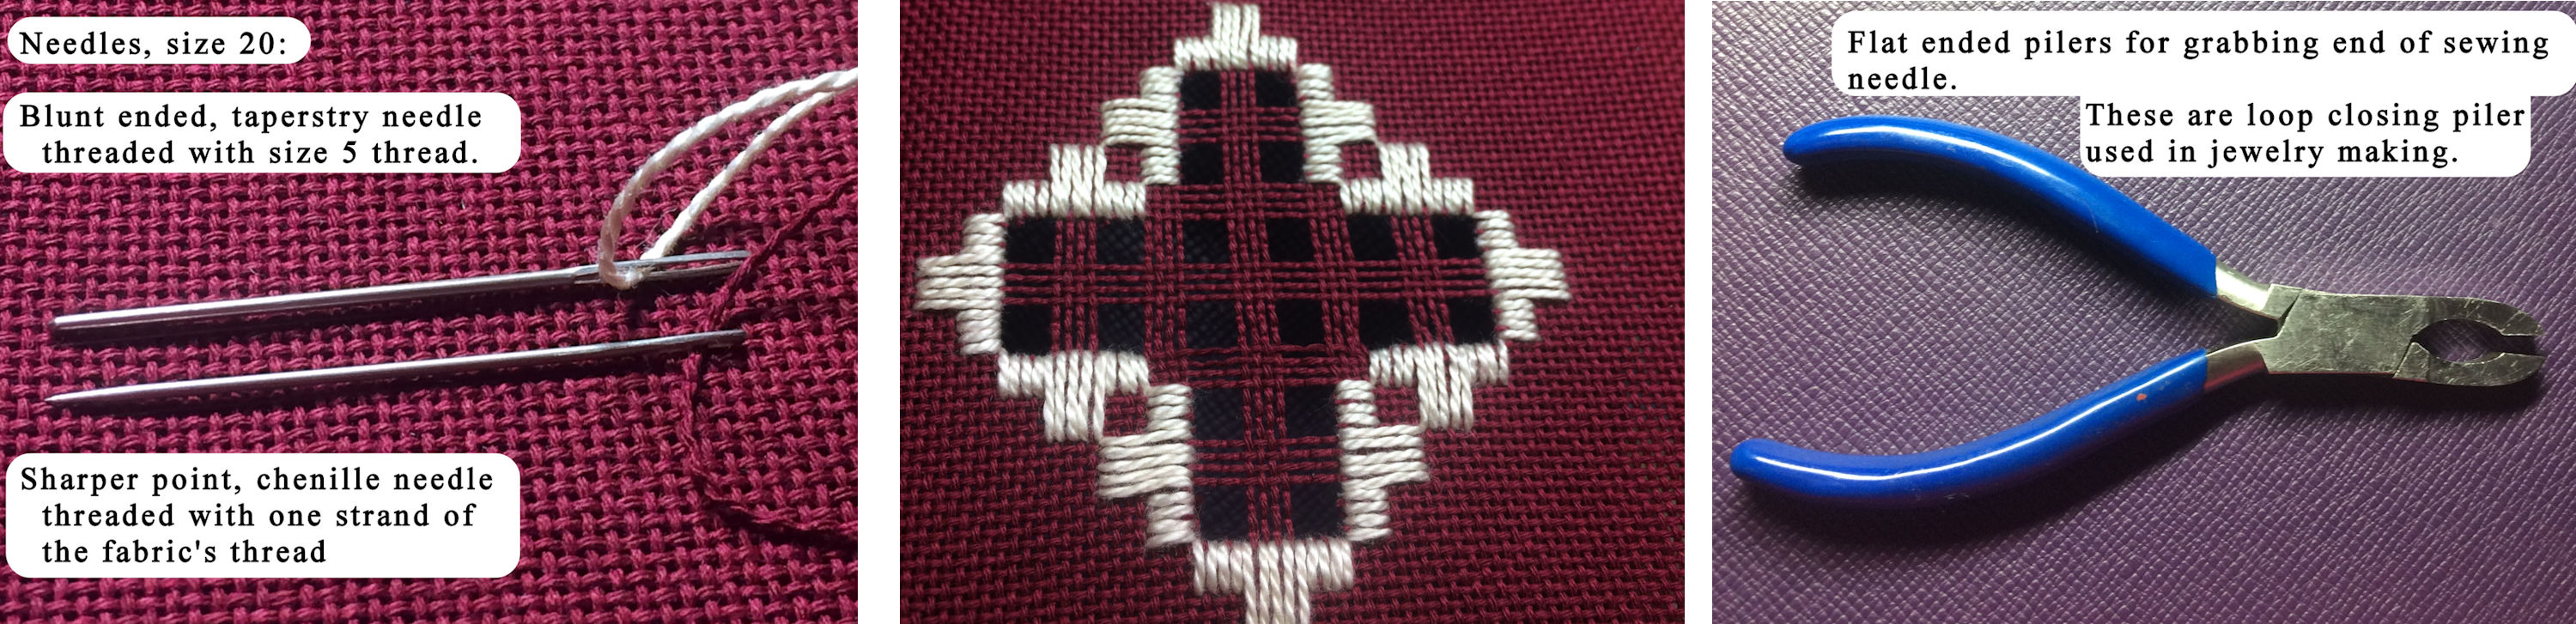
| To replace a fabric thread: strip a length (single fabric thread) from the raw edge of your fabric or use a length of (size 8 or 12) thread (in a matching color). I like to use the fabric’s thread as it definitely will be the same thickness as the fabric thread that I am repairing.
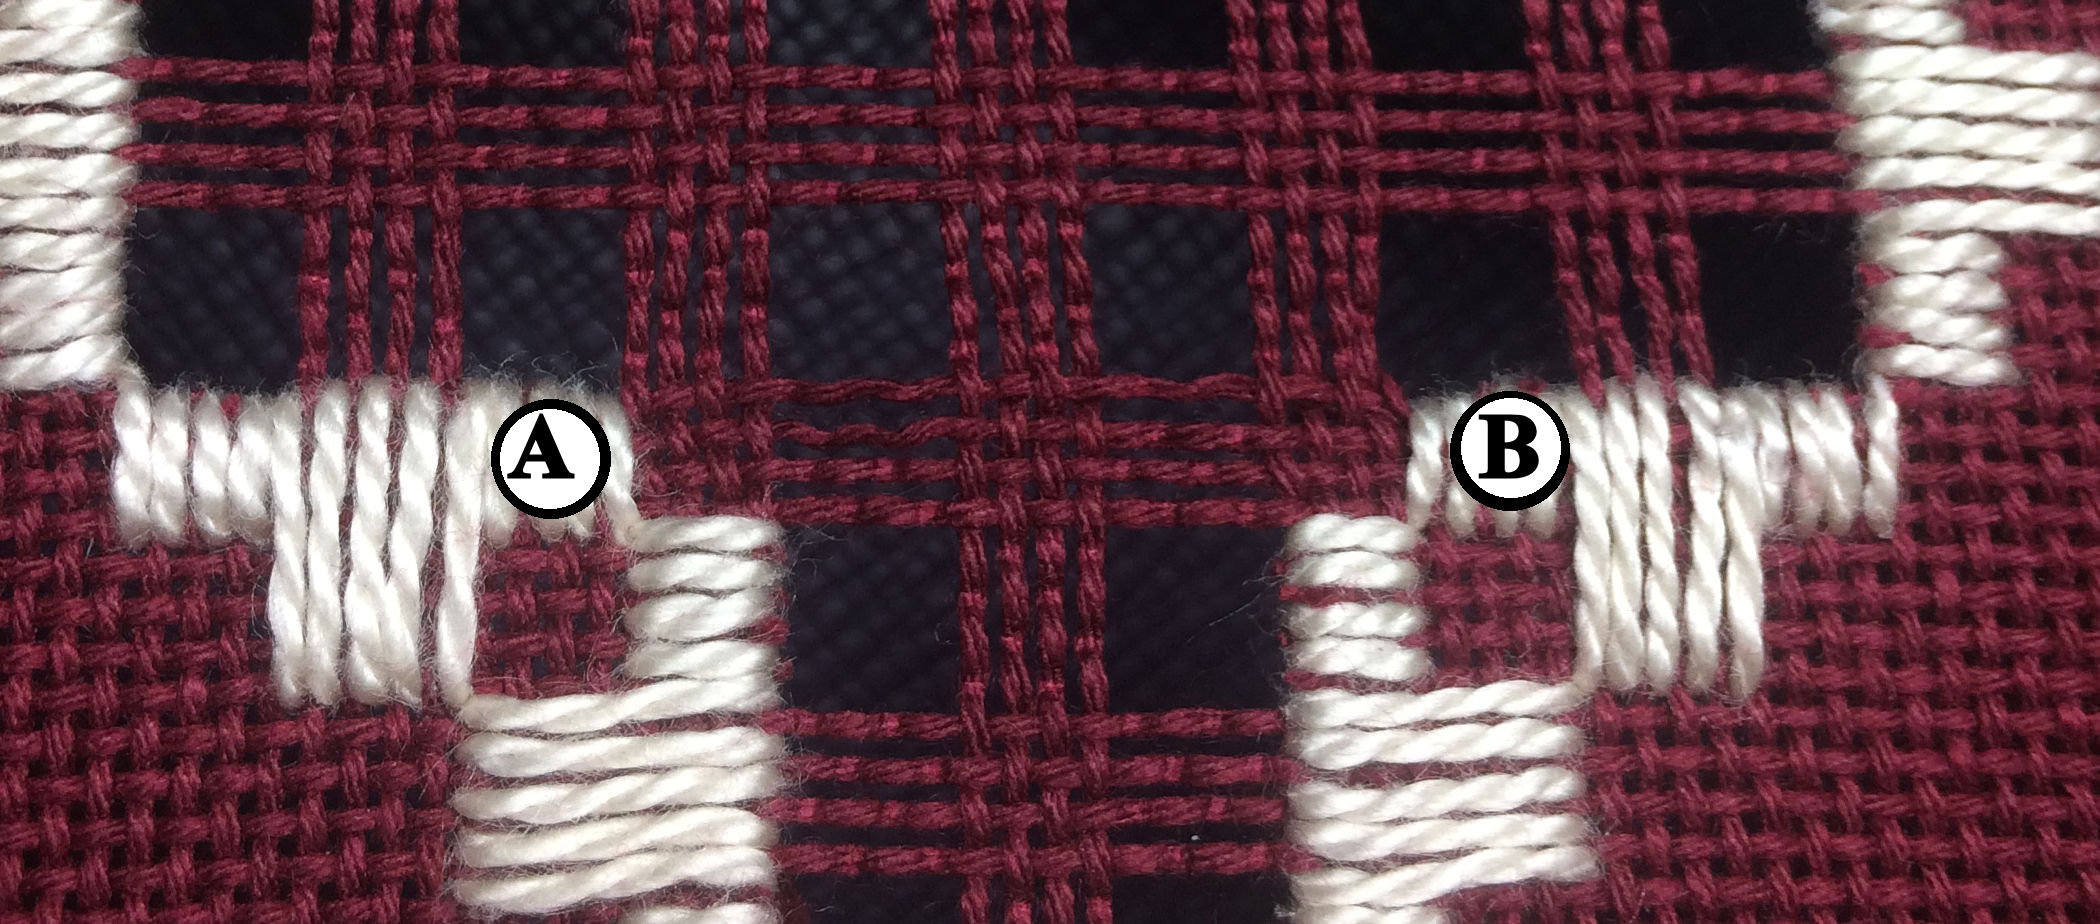
Secure start end of new thread within a kloster side. Normally when securing the start end of a new thread I would do so within the backside of the nearest kloster block side. But I am concern that the kloster block side designated by A and B will be a bit unstabled so (as shown in the next photo below) I went to a kloster block side slightly away from the work area of fixing these two incorrectly snipped threads.
I weaved through the new fabric thread closest to the unsnipped fabric thread first. |
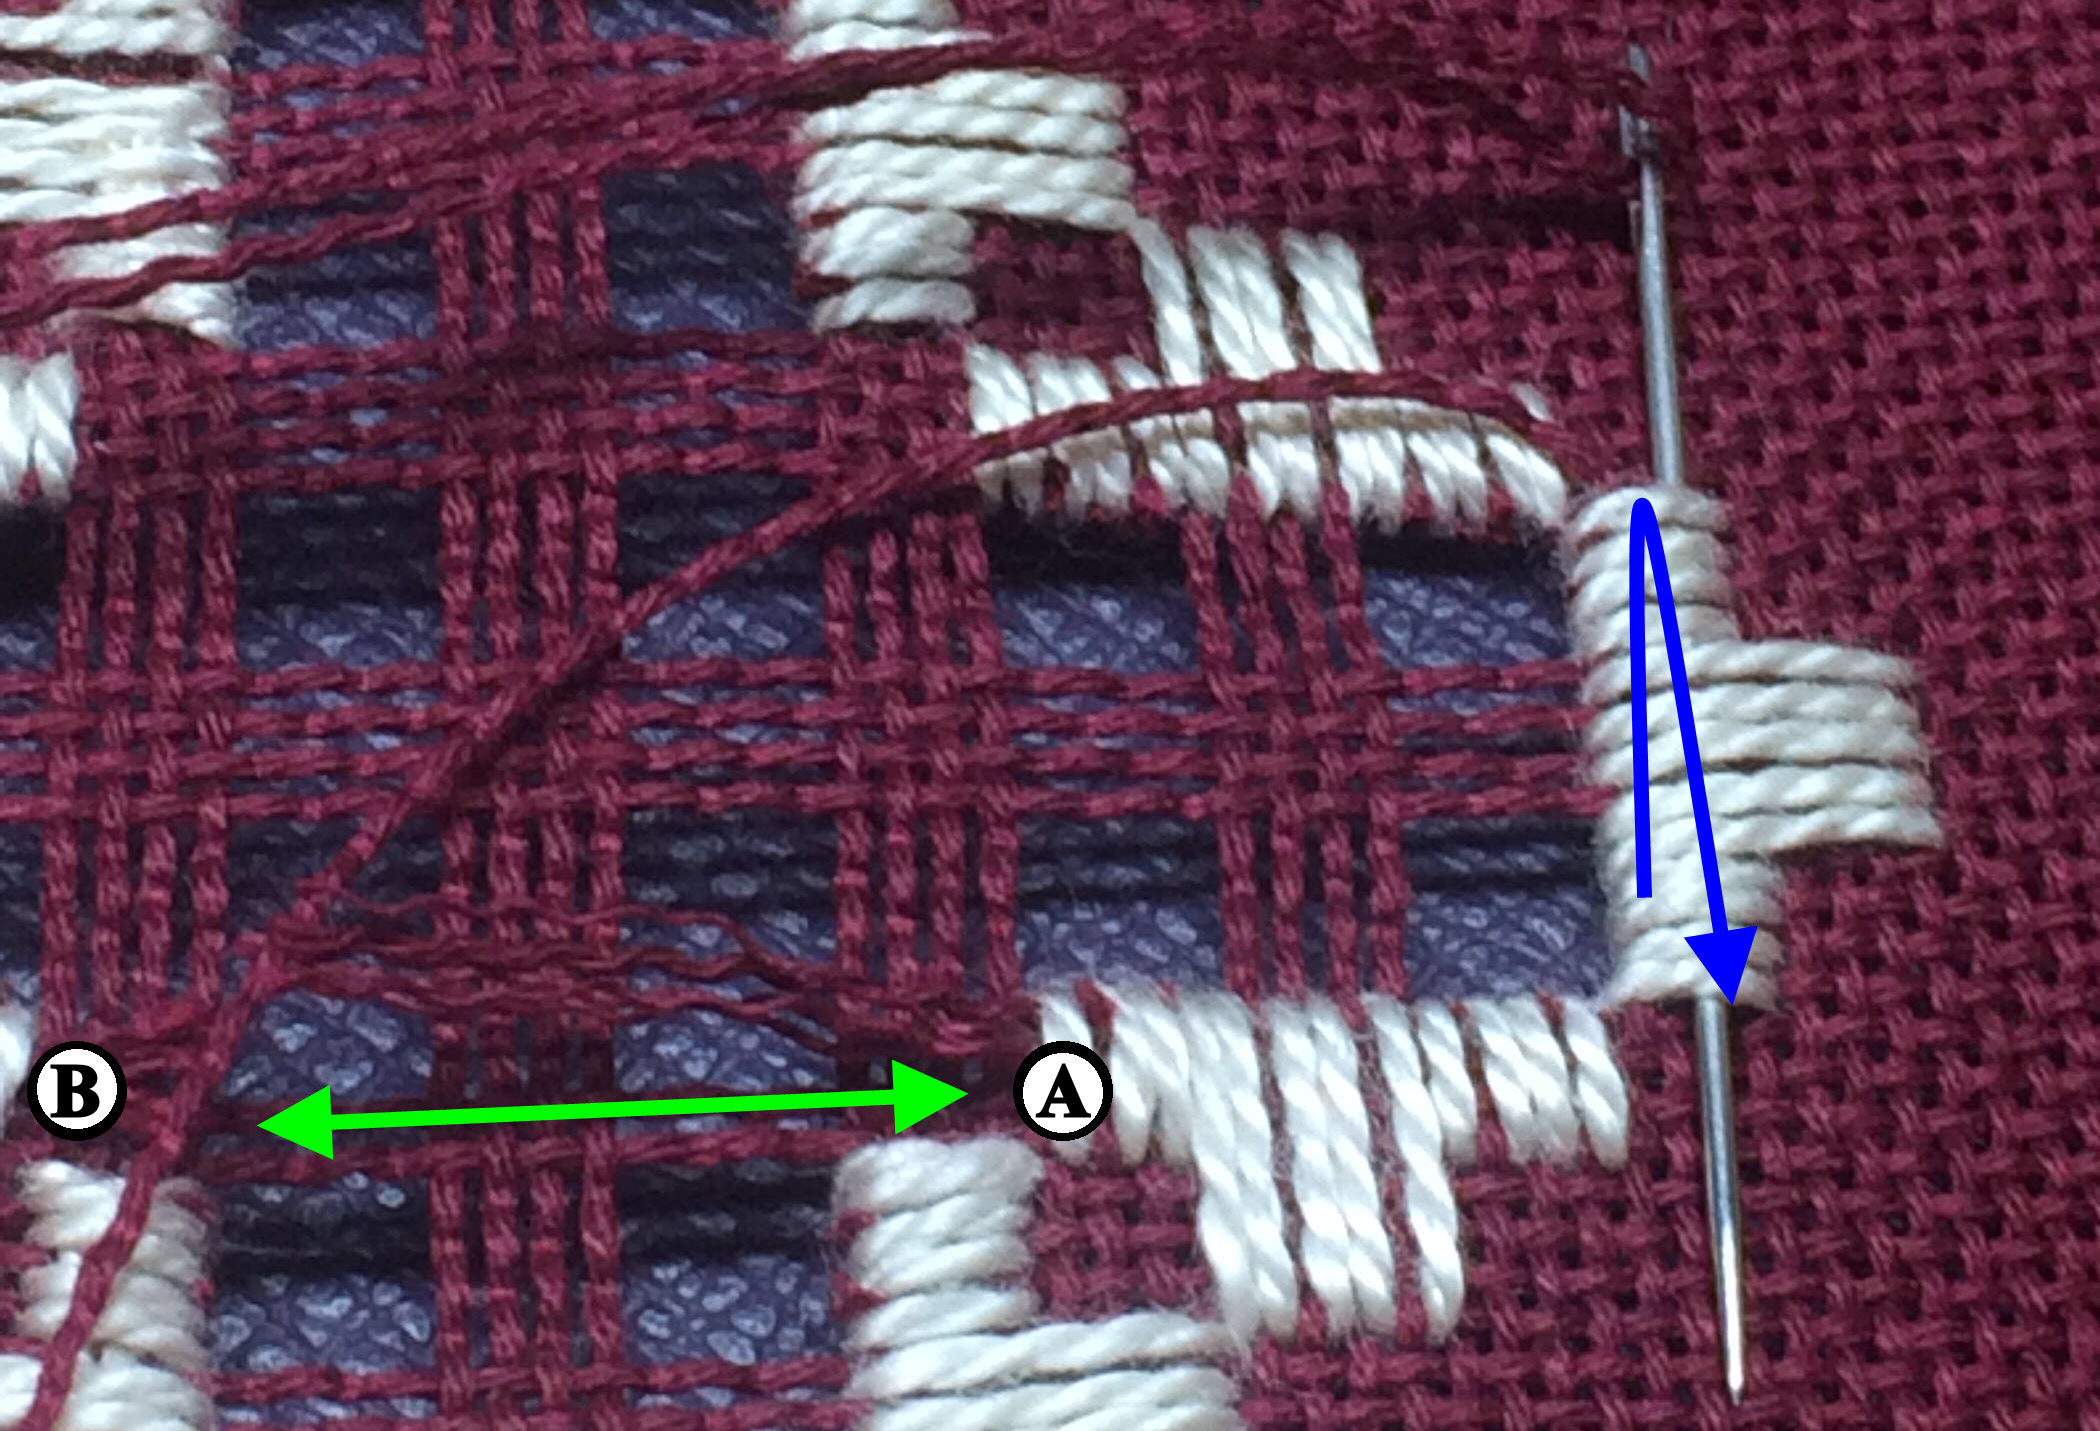
Blue arrow (on right side), securing start tail. Carry new fabric thread to A.
This photo shows back side of the worked design.

Right photo, weaving new fabric thread across the problem area.
Yellow lines placed onto photo, holding the un-weaved incorrectly snipped fabric threads aside.
Neon green arrow, left side of the right photo: this is when I used the flat ended pliers. To grab tip of needle and pull it through. Do so carefully in order not to skew the threads of the kloster block side.
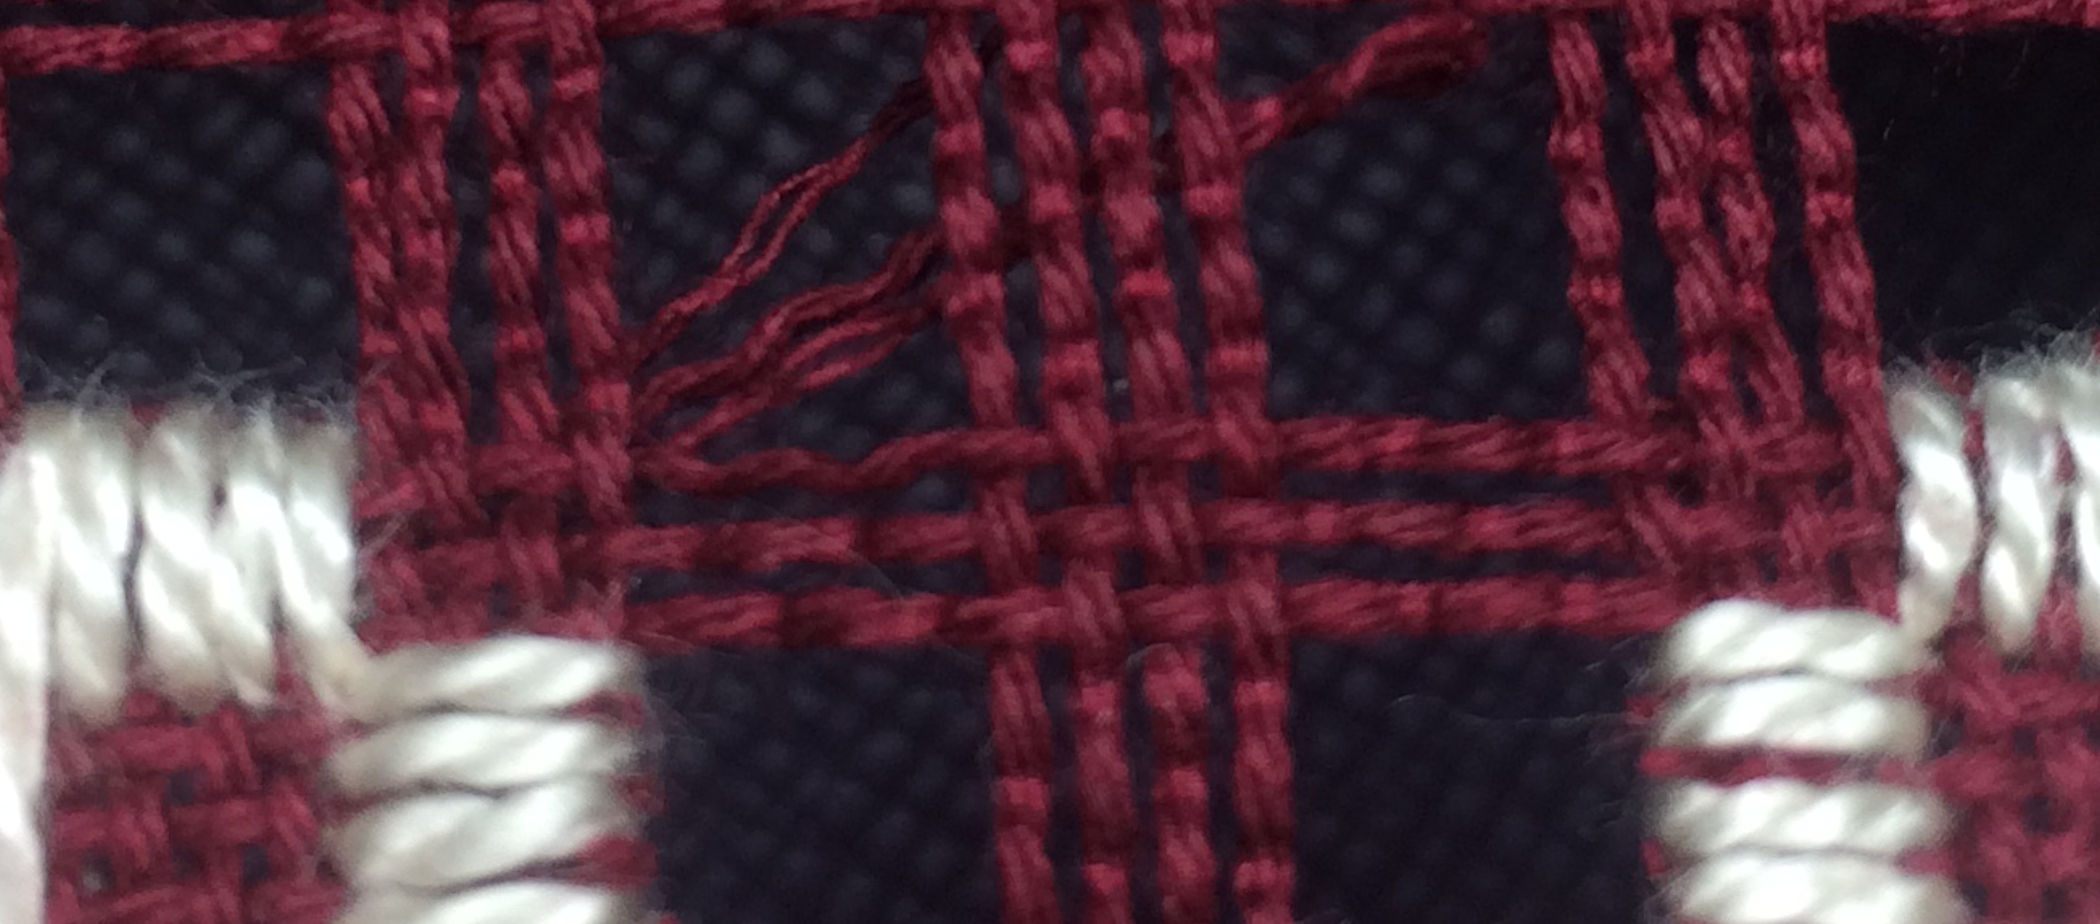
This photo shows front side of the worked design.

Drawing and photo shows back side of the worked design.
This photo shows front side of the worked design.