
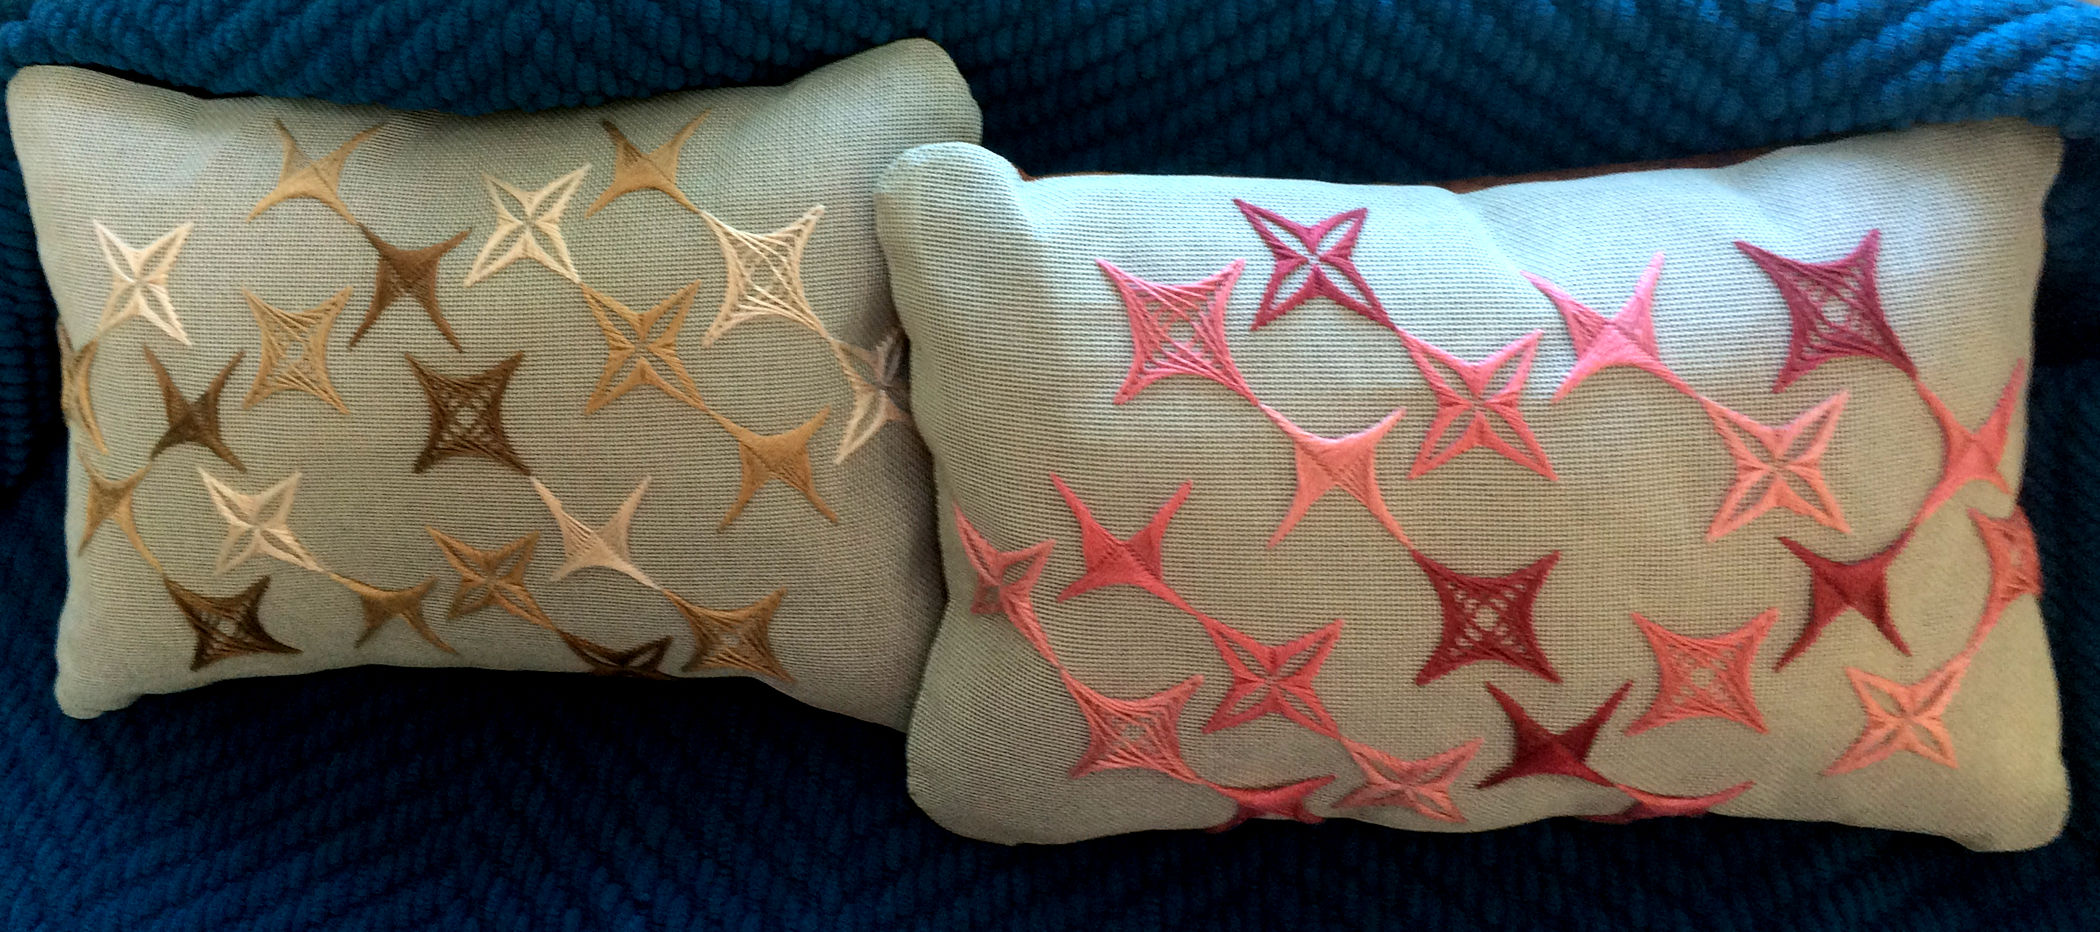
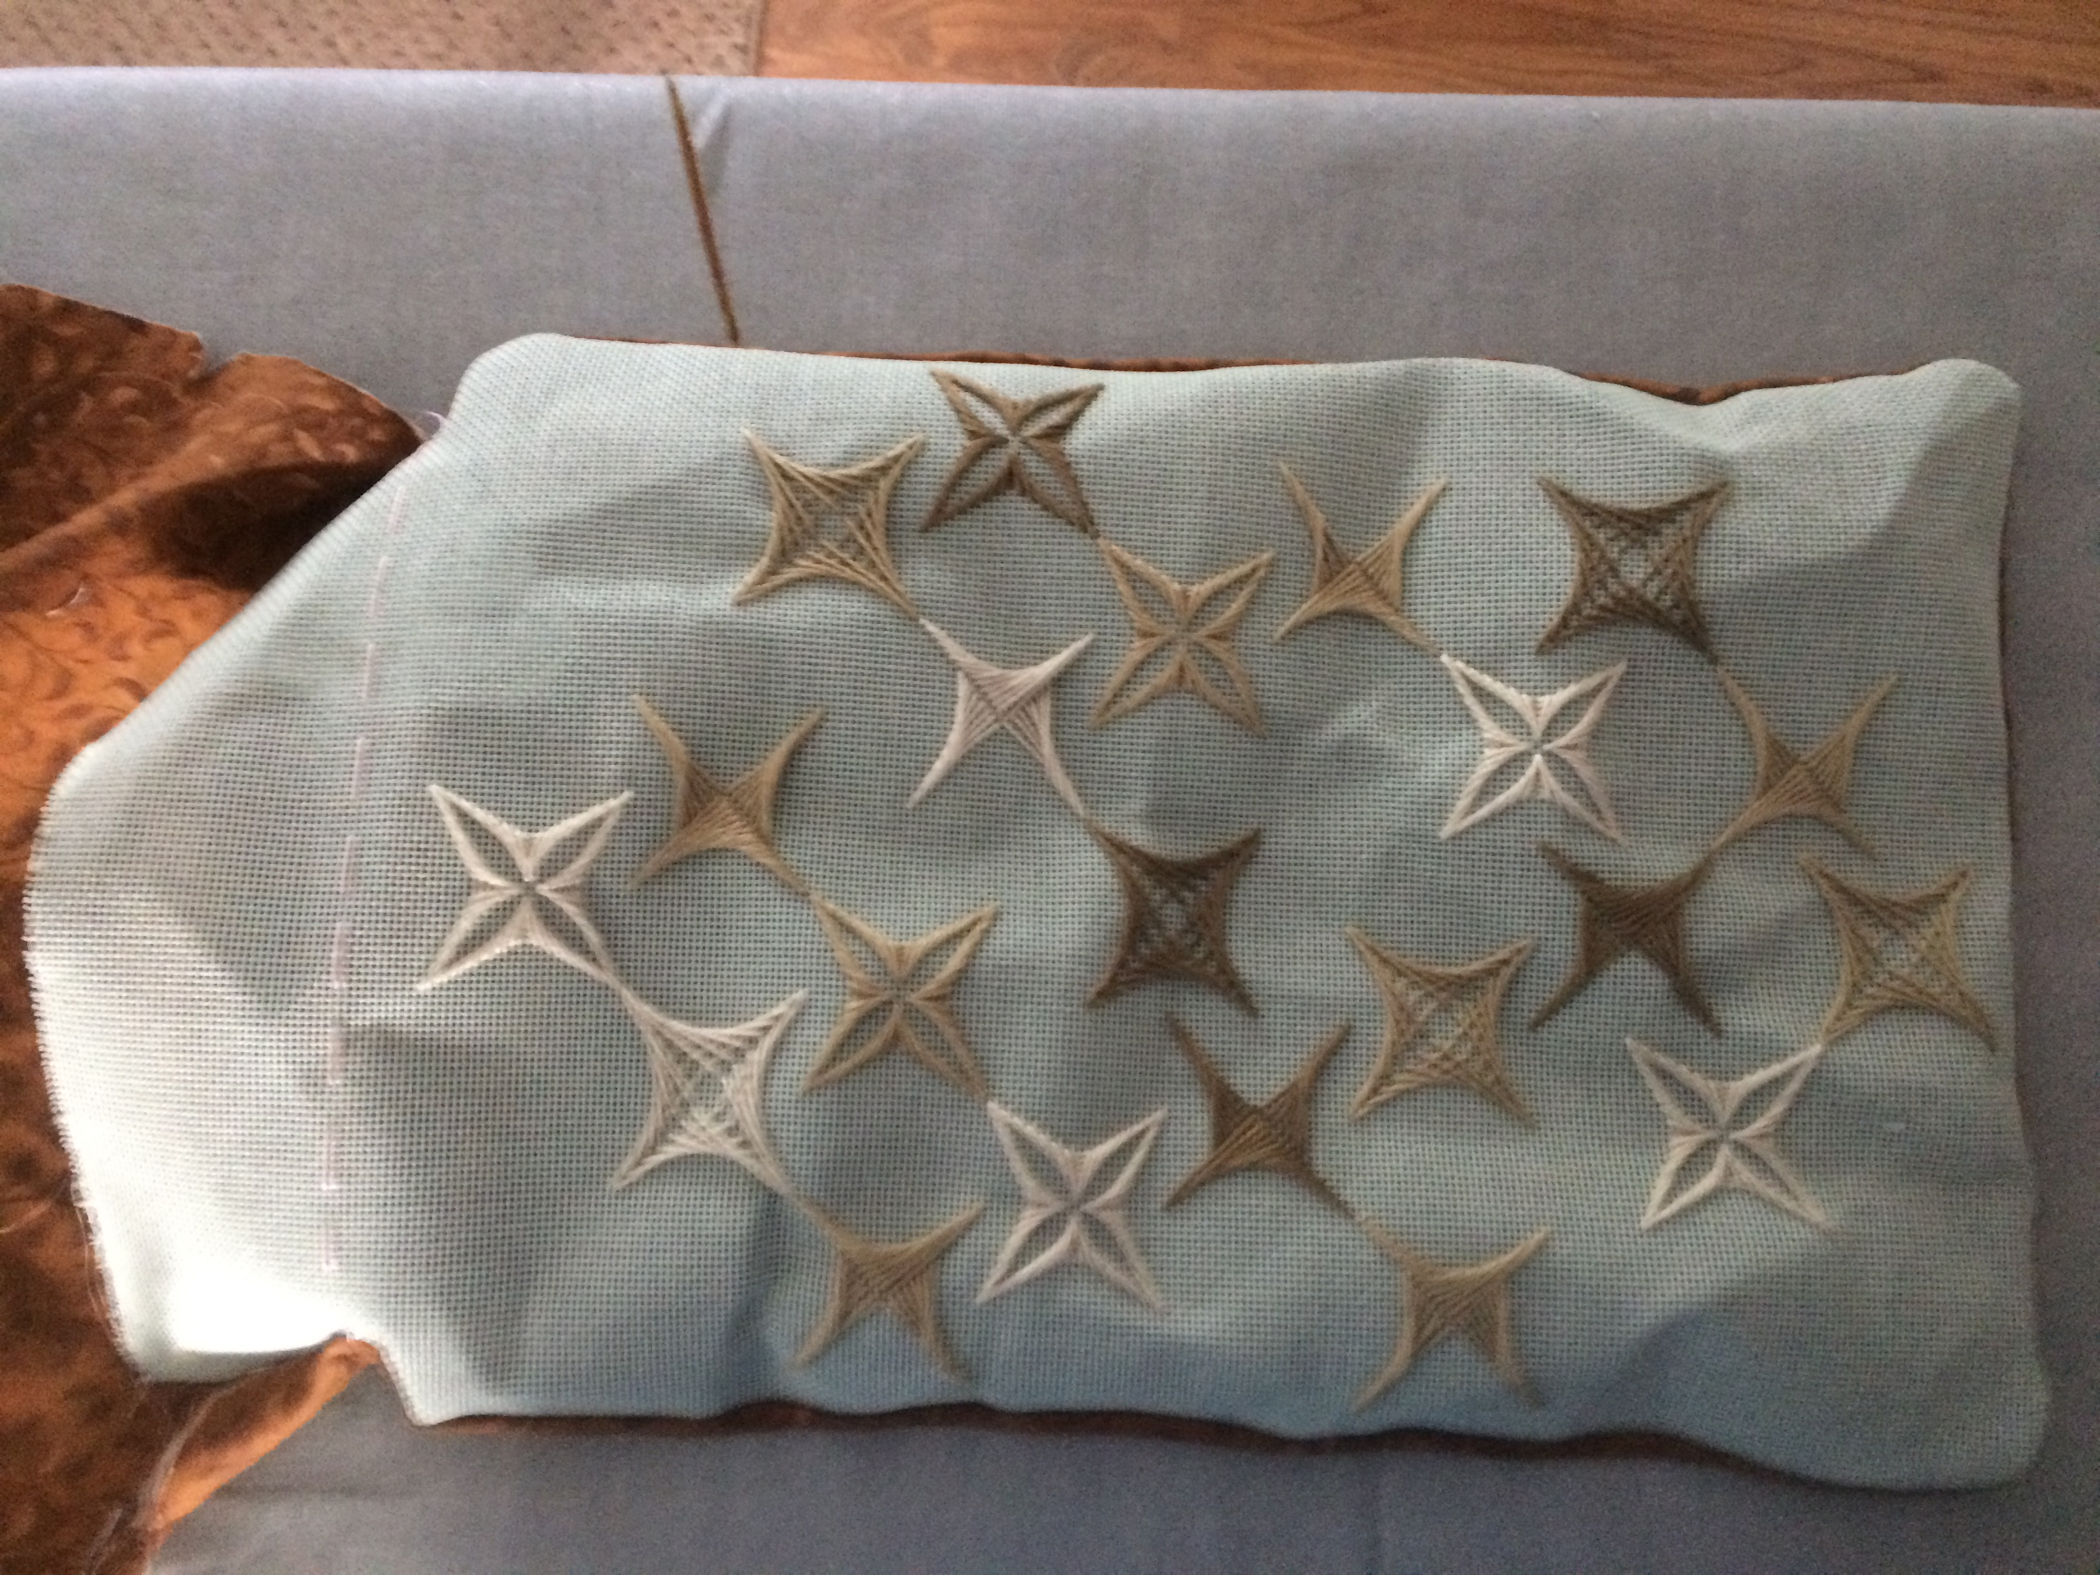
I work leaning back in a recliner chair and find myself tilting my head slightly forward as I stitch so my neck gets tired. My Starburst design, worked on 18 count mono canvas, count size is 239 by 155 which finishes to be a worked area about 13.5 by 8.75 inches. Nice size for a head and neck pillow.
I also found that this size pillow makes a nice lap cushion for when I want to chill out web surfing on my iPad. So I made two of these pillows. One for behind my neck and the other for use on my lap to sit my iPad on it.
Click on any of the presented photos to view a larger image.
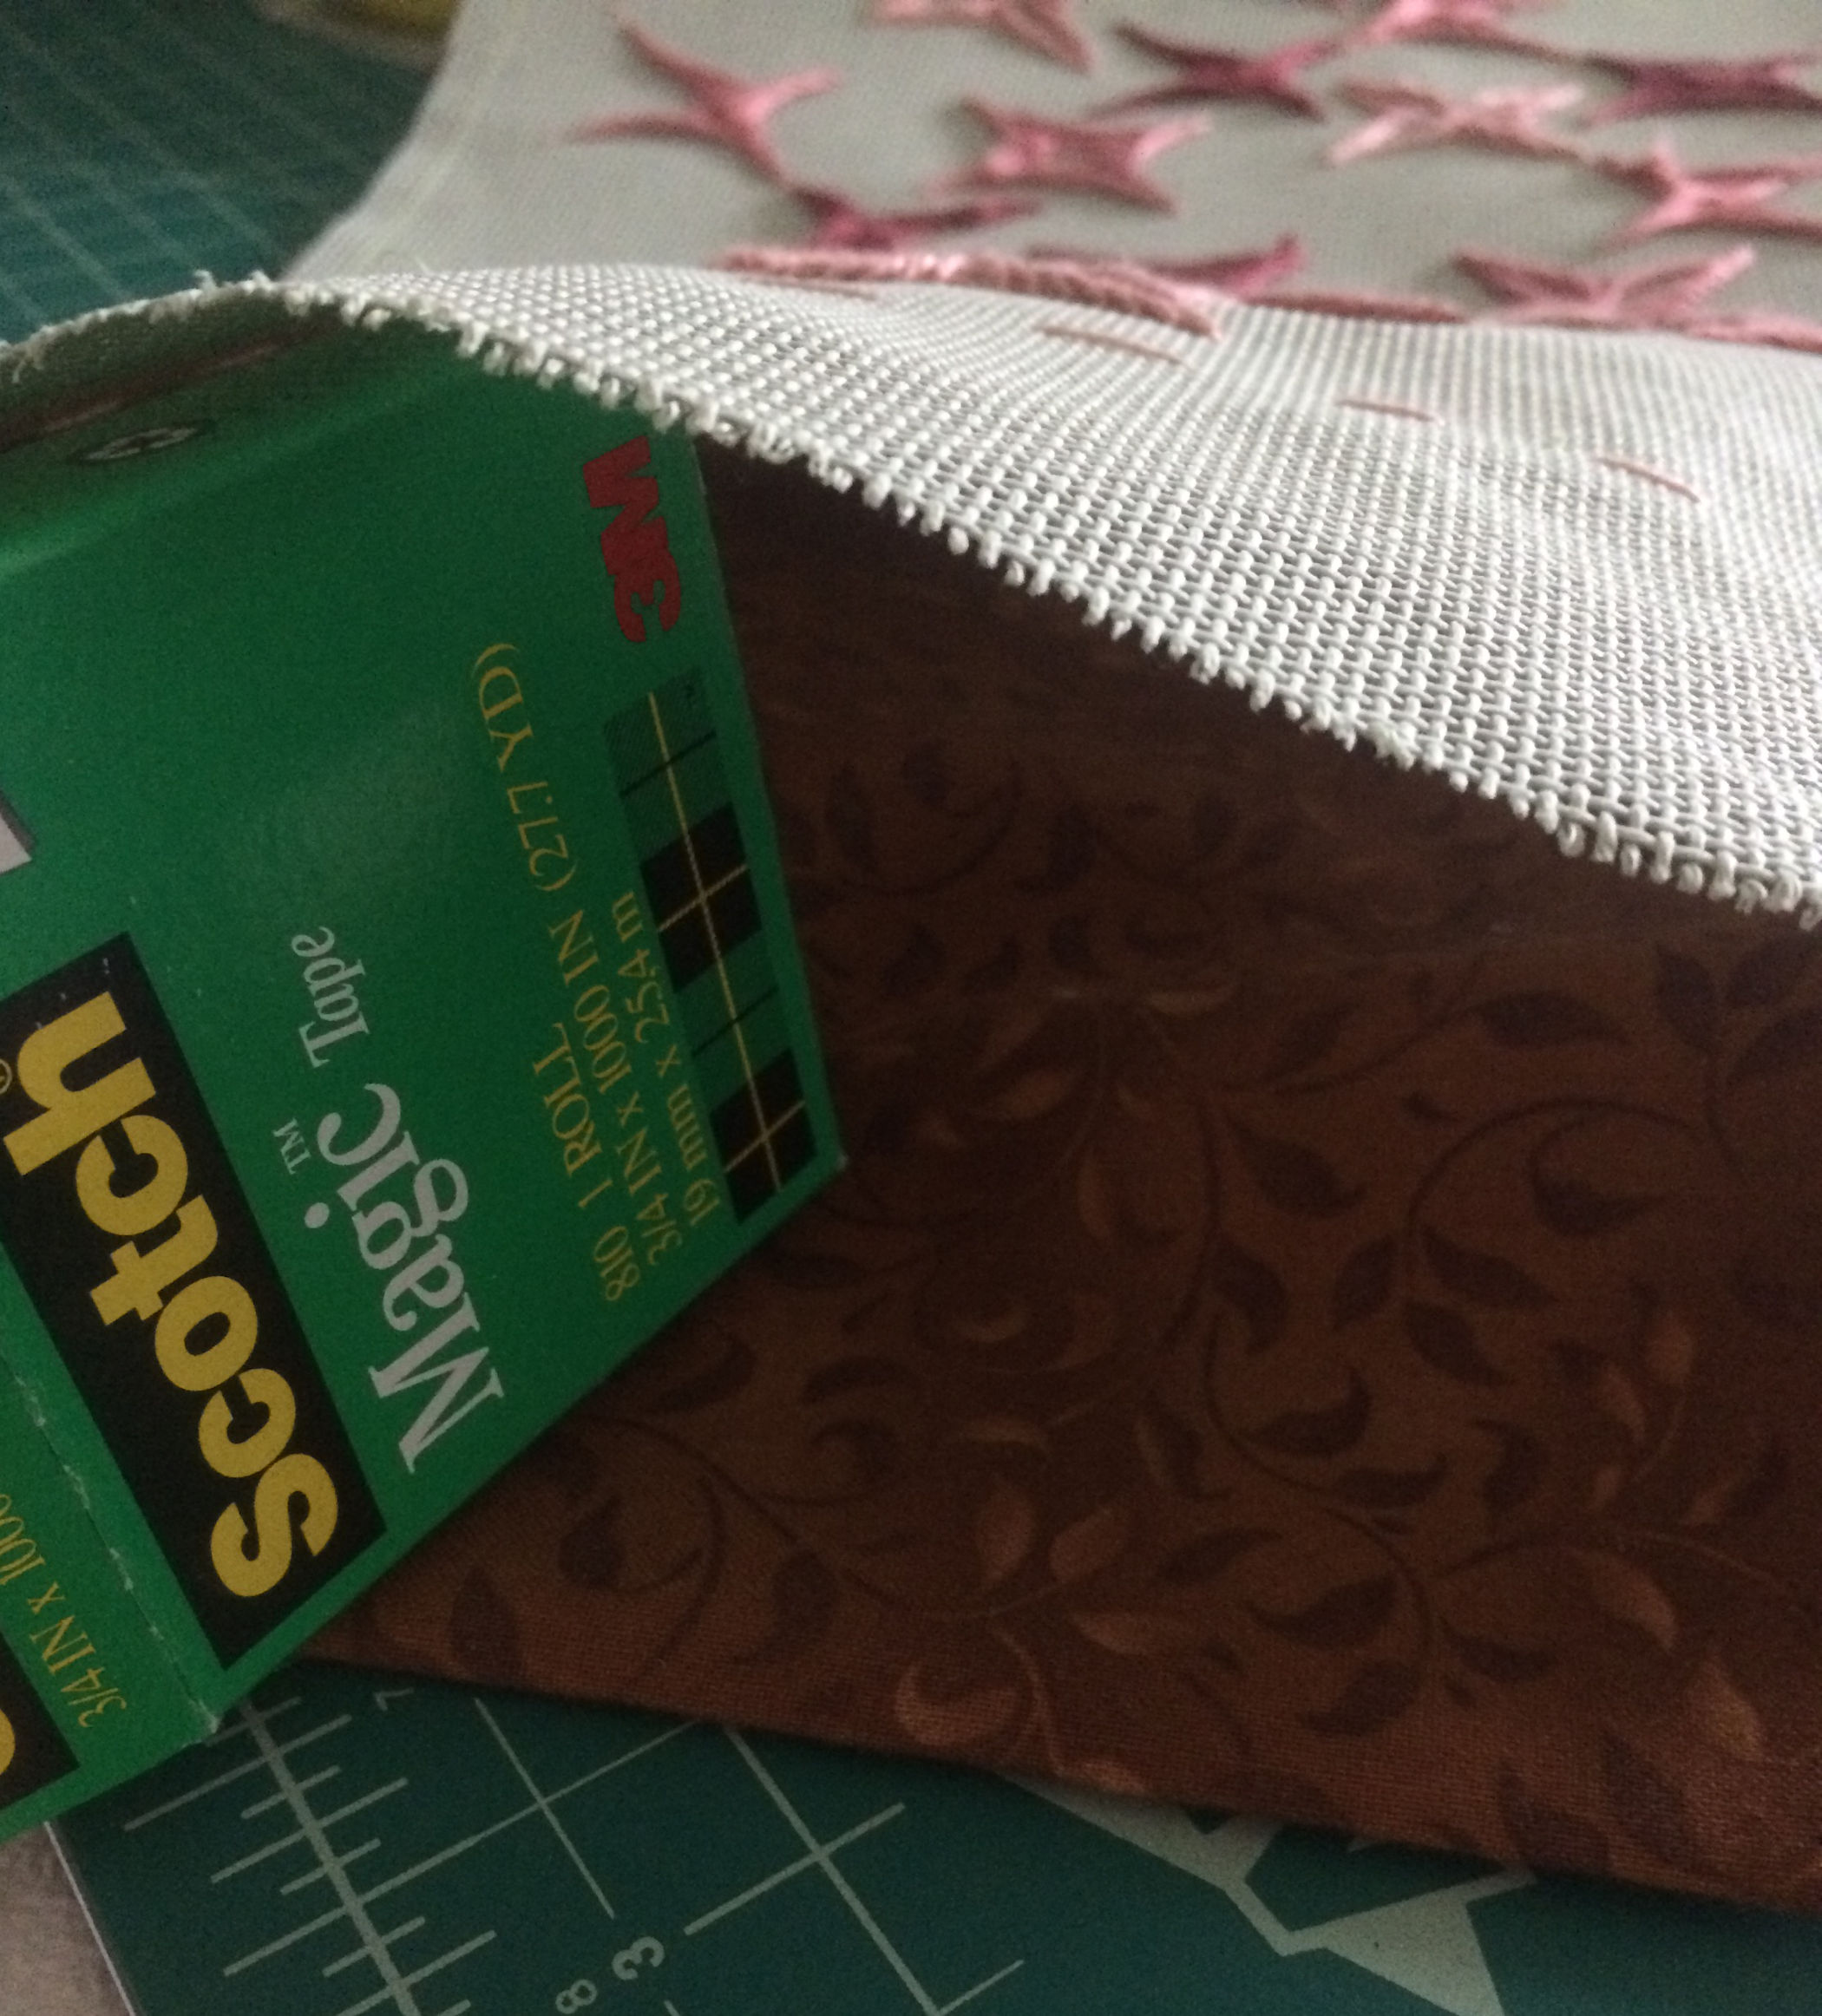
 I wanted a finished pillow just slightly larger than the 13.5 by 8.75-inch worked area of this design. A running stitch 12 fabric holes from the worked design (shown in this photo) gave me about half-inch of unused fabric outside of the worked design area. For this worked design it can be hard to distinguish front side from back without looking closely at the worked design. I marked this photo with “front” and “back” to help you determine which side is facing you in these photos. |
Getting ready to sew:
The fabric material that I selected is a printed leafy brown (overdyed) fabric (100% cotton) called Essentials Climbing Vines (light brown) from Wilmingtonprints fabric. You will see in my photos of other pillows that I have used this fabric several times. I like the pattern and colors so much that I even went back to the fabric store and purchased several more yards so I can use it in a Fall color quilt that I plan to stitch.
Pre-wash: Not wanting to chance the overdyed colors rubbing off on upholstered furniture I gently prewashed the material and ironed it before using it to create a pillow.
This printed fabric is 44-45 inches in width. Cut or hand rip the fabric to have a 15-inch length along the selvage edges. Fold (to have 22-inch width) the printed material (good side out) to form an envelop (pocket). This is where the stuffing will be placed.
The layers:
These pillows have three layers of fabric.
Fold the printed fabric (good side out) to form two layers. The third layer is your worked design placed back side facing up.
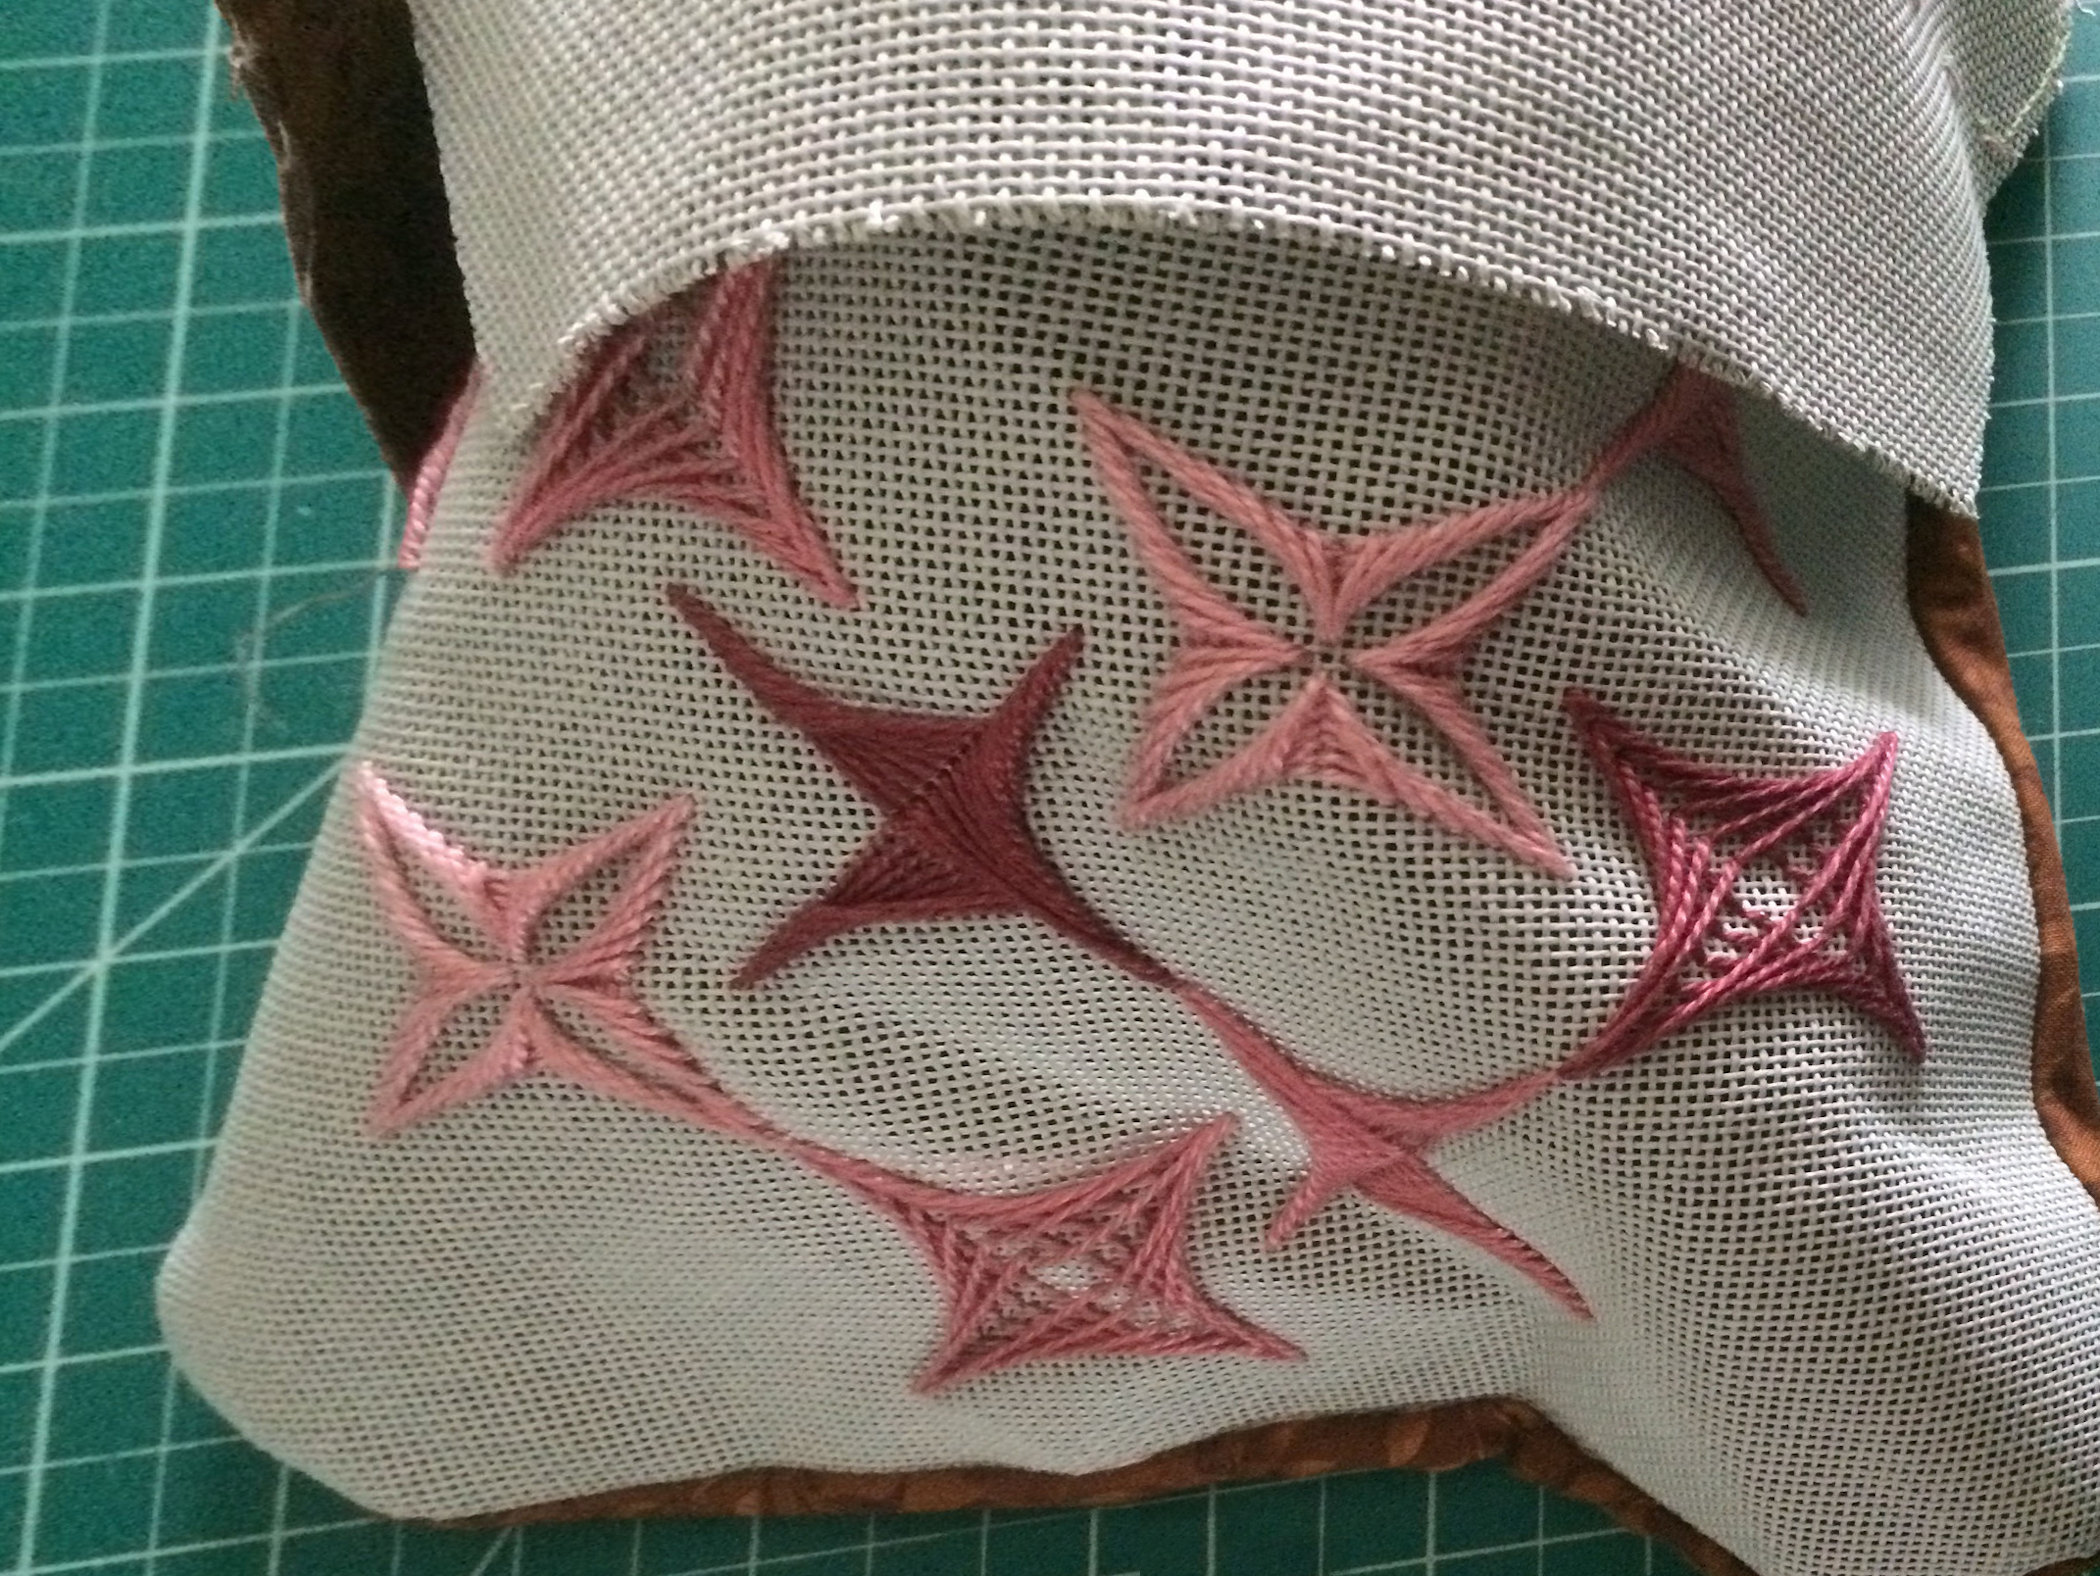
Once stitched and trimmed you turn the pillow right side out by sliding your hand into this area shown held opened by the green box of tape.
Machine stitch three sides:
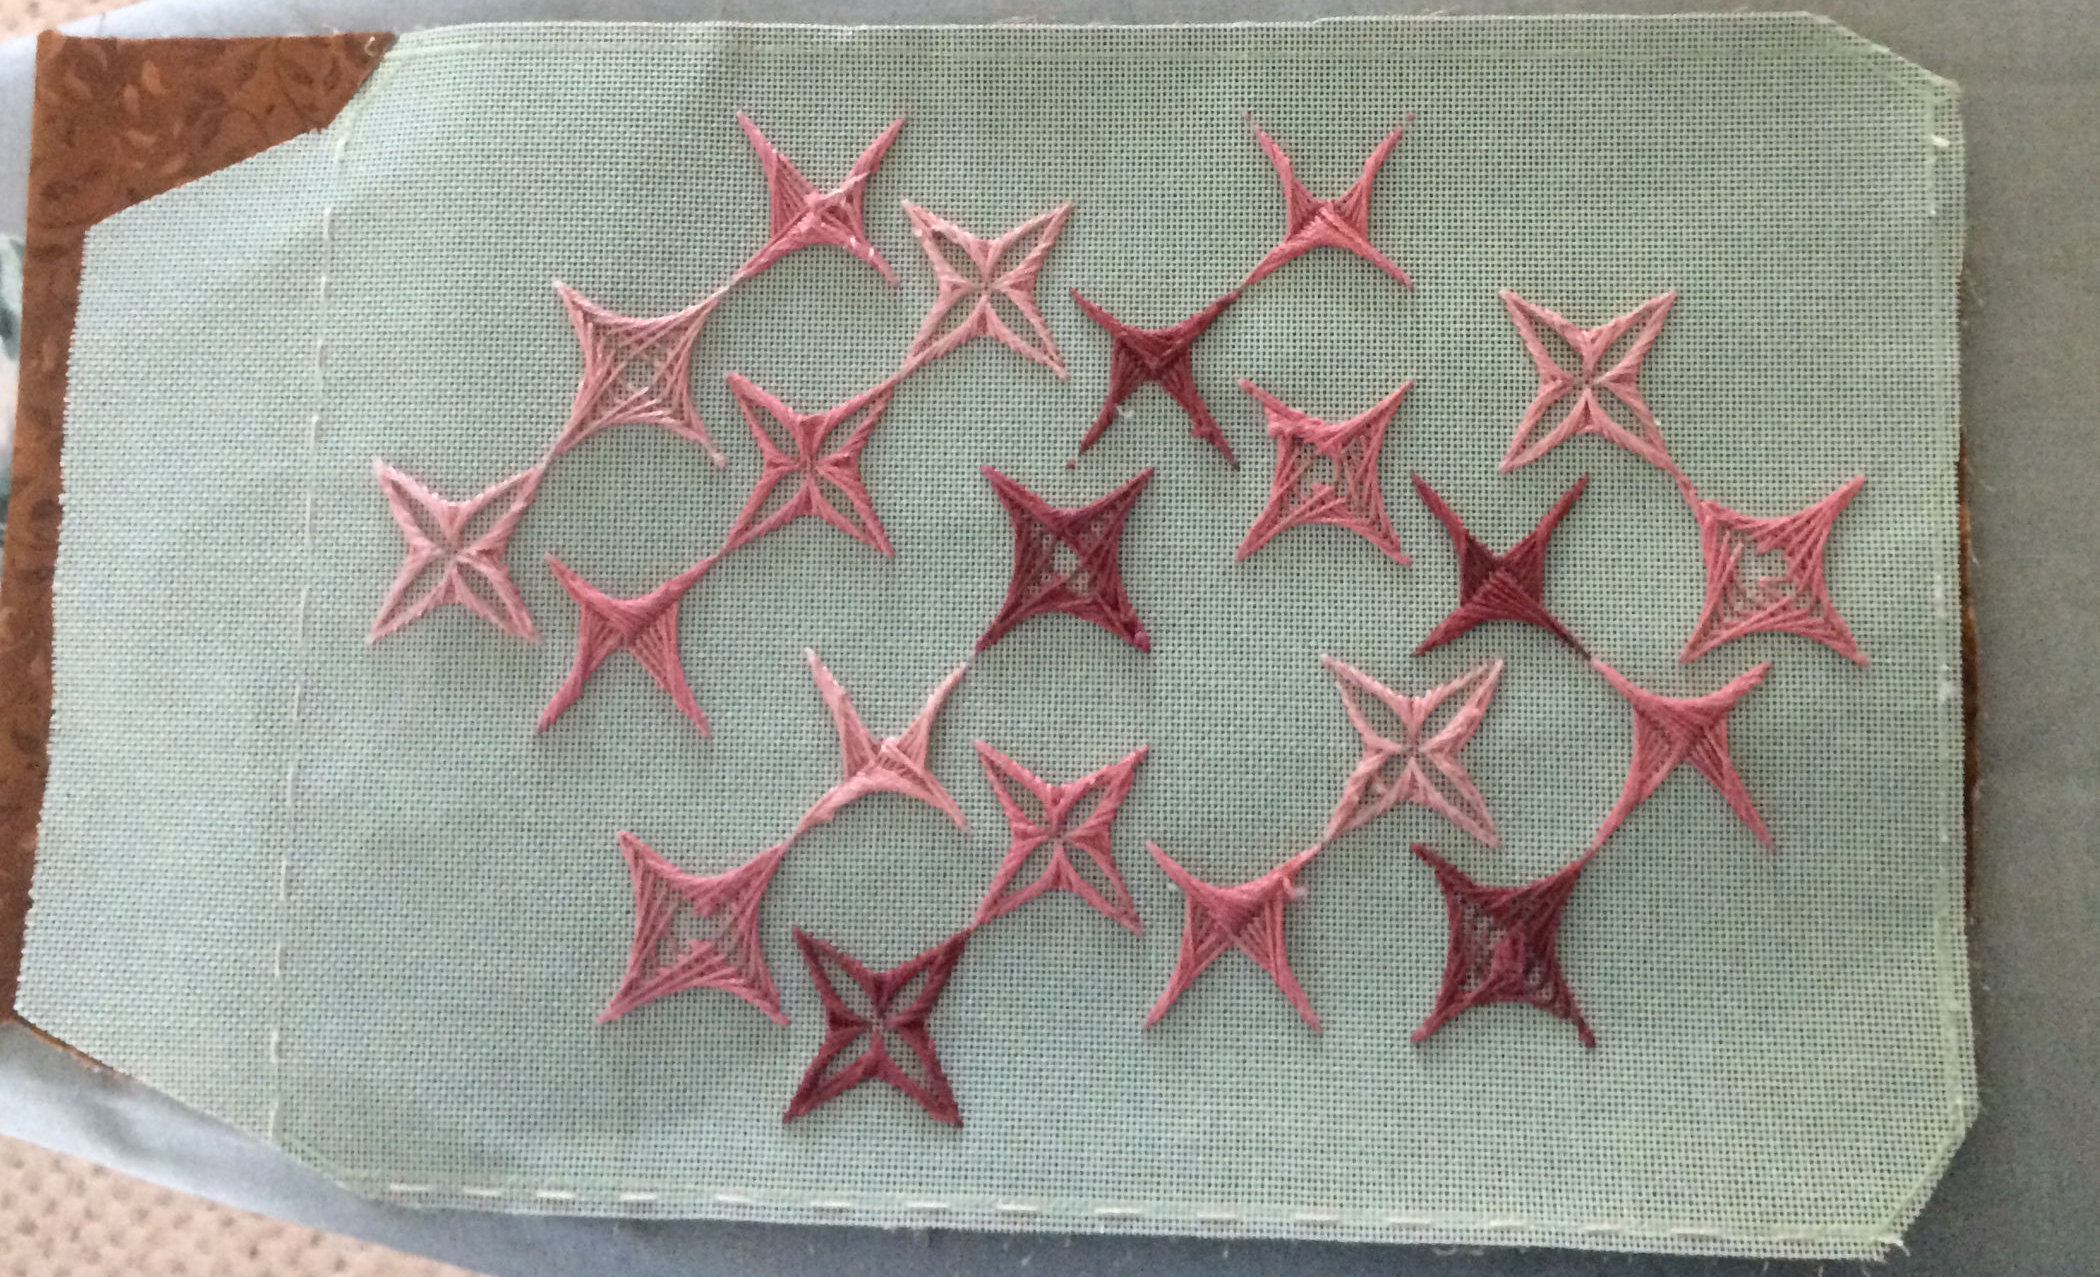
This photo shows the machine stitching is two fabric holes inside the running stitch and excess material trimmed off two fabric holes outside of the running stitch. Remove running stitching of the three stitched sides before pulling the pillow to be right side out. |
Pulling the pillow to be outside out:
It is through the unstitched fourth side’s open area that you stick your hand in between your worked design and the printed material. I would suggest to remove any rings, bracelets, etc.. while doing this in order not to snag any stitching thread of your worked design.
With your hand inside (between the work design and top printed fabric) gently grab the back corners and the back seam.
Take your time pulling the pillow to be right side out as the stiffness of the embroidery fabric bunches until pulled completely through.
Use your finger tips to push the corners out. With previous pillows I used my large general purpose sewing scissors until I got too aggressive and jam the scissor tips out of a corner, almost ruining that pillow.
When the pillow is all the way turned out do a check of your corners and other machine sewn areas.

After turning right side out:
If you have high confidence in the color fastness of these layers lightly spray starch and ironed the pillow between two slightly damp towels. Else dry iron.
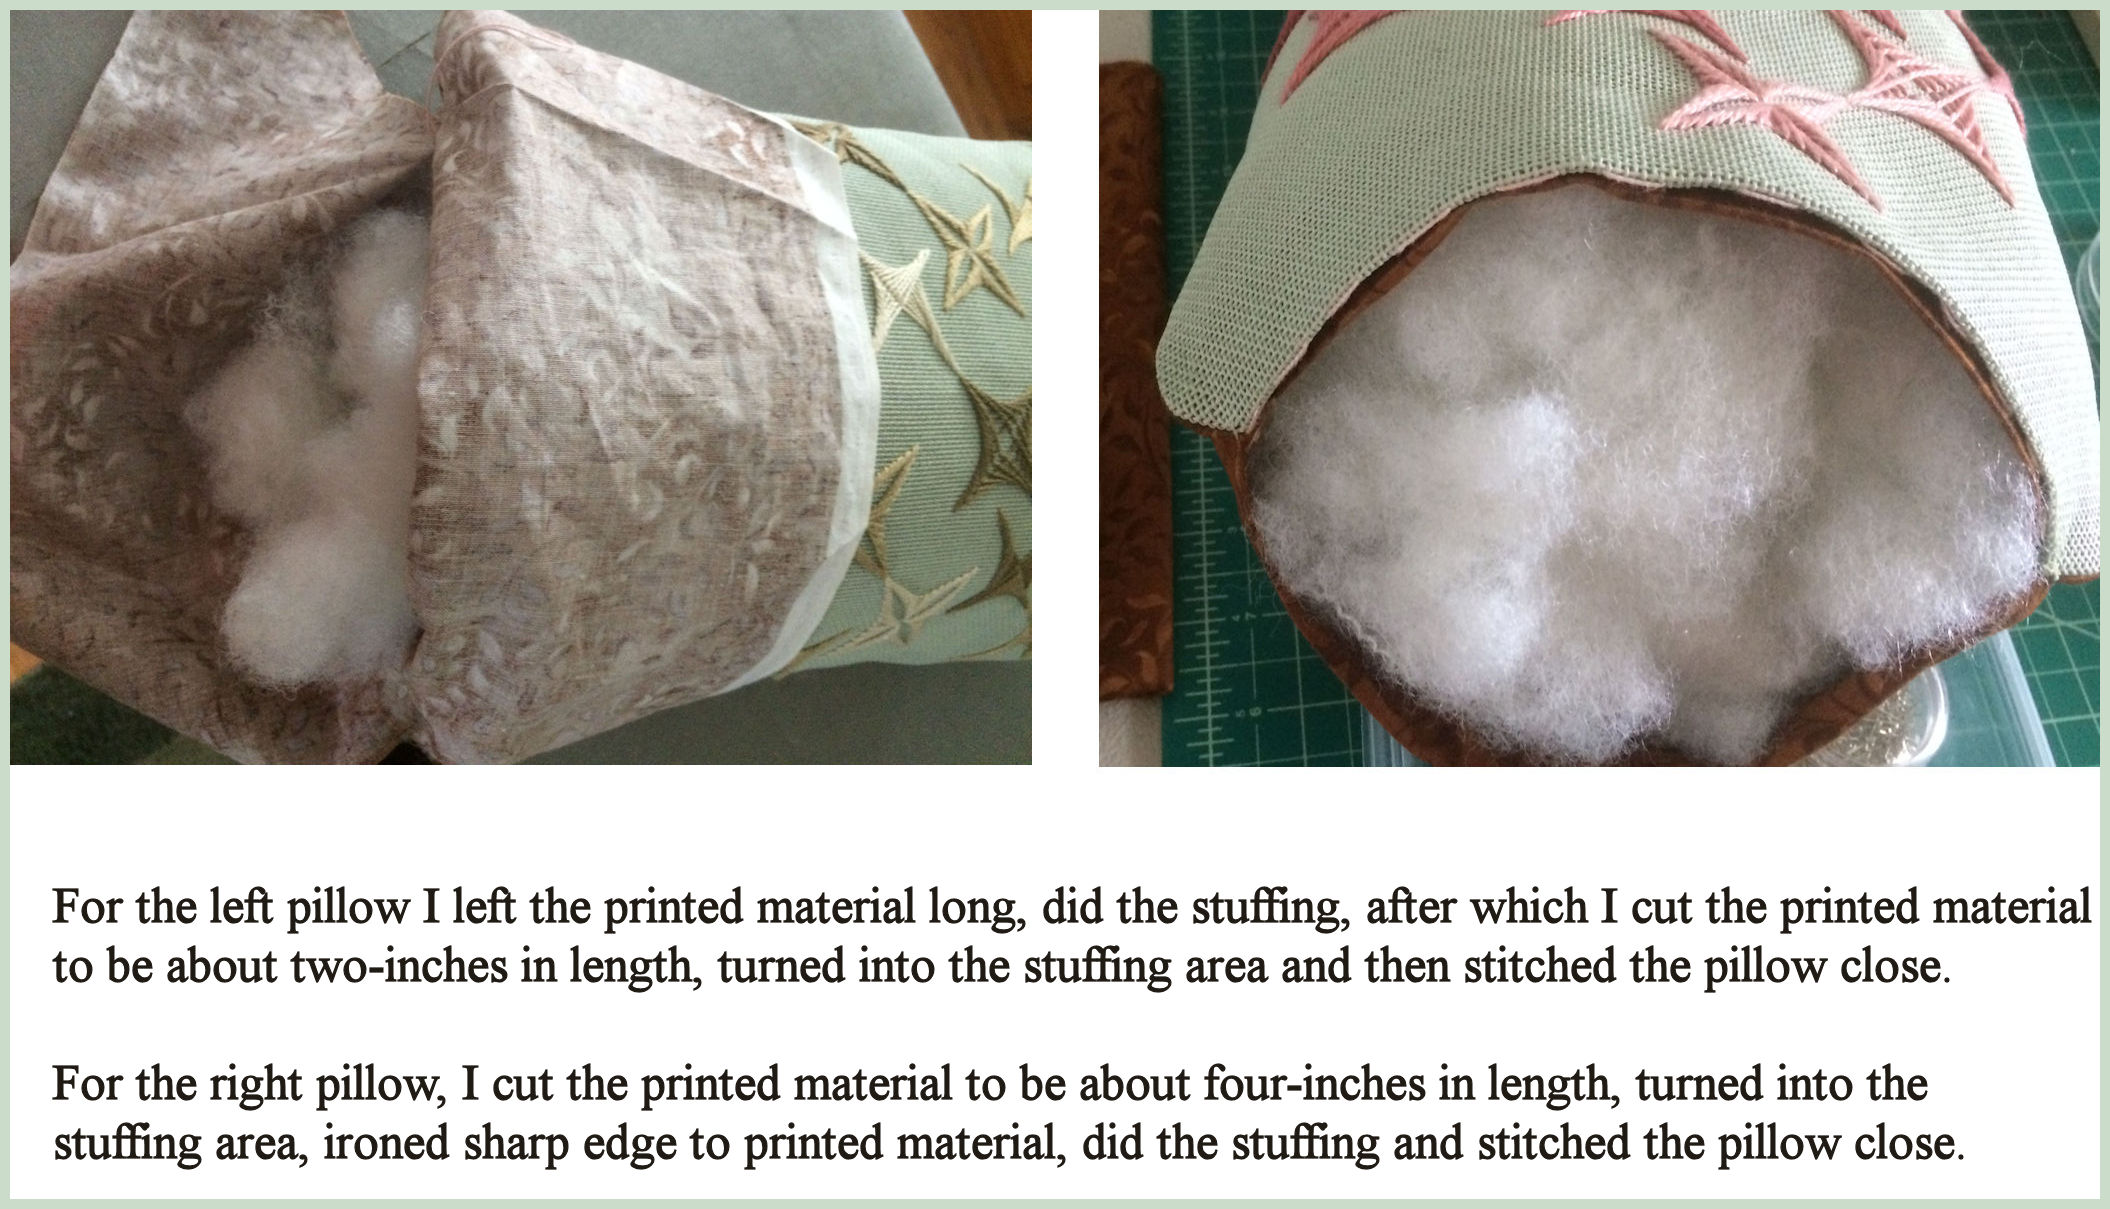
 Photo: the left pillow was ironed after being pulled through and the right pillow is still rumpled from being pulled through. Notice, for both pillows, the front side of the worked design is now facing outside. For both pillows I have left the fourth side’s running stitch alone (not pulled out) to aid me with closing the pillow (once the stuffing is in). For the left pillow I have trimmed the worked piece (the mono canvas) to have an inch lip. I turned-in that fourth side along the running stitches and pressed it to form a sharp edge. I will leave the lips of the printed material long until I place stuffing into the envelop formed by the printed material. |
At this stage the layers of the pillow are:
Top layer: Front side of worked design is facing out.
Second layer: Behind the worked design is the front side of the printed material (to keep any stuffing from peeking through the fabric holes of the mono canvas).
Third layer: Envelop (pocket) formed by the folded printed material. This is where you will place the stuffing in between the back sides of the printed material.
Bottom layer: Front side out of the printed material.
Stuffing the pillow:
I think of the area formed by the two layers of the leafy brown material as the stuffing envelop for the filling.
I like to use loose filling. Rip/pull into 2-3 inch fluffy balls and pushed into the pillow’s inside. Make sure not to stuff any filling directly behind your worked piece.
Adding the filling into the stuffing envelop I first push filling into the corners, then along the sides and finally into the center.
I under stuff more than over stuff. After I took below photos I removed several handfuls of the stuffing in the rose threads pillow (right photo).
Both of the above approaches worked well, but I did find the right pillow easier to align the three layers for pinning (see below photo) as all three layers were sharply ironed along that edge.
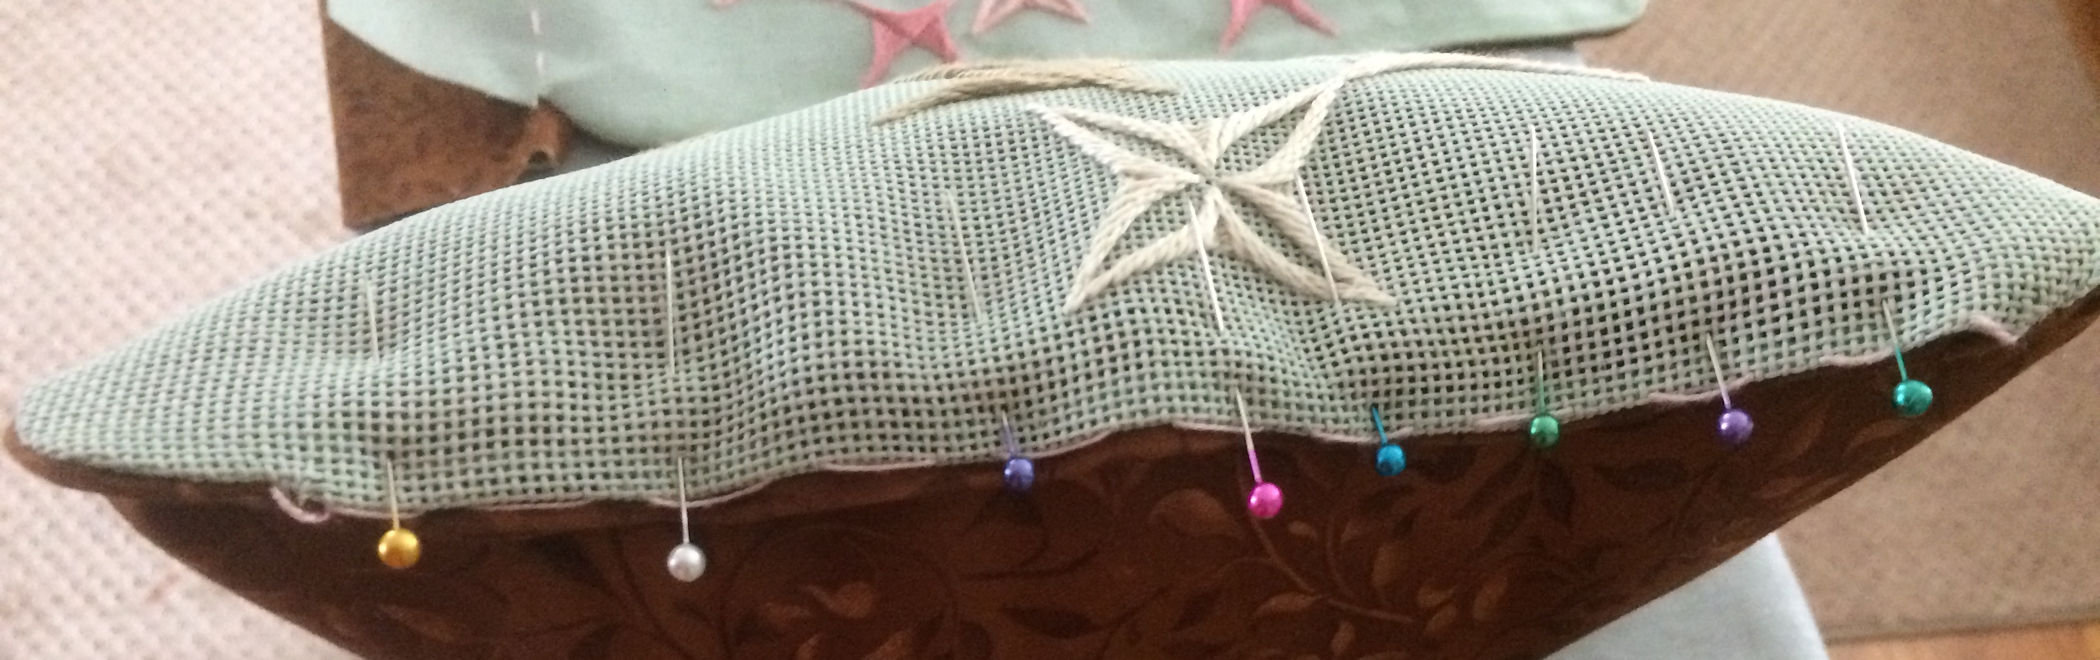
You can see in the above photo that the running stitch (pink thread) is still there. I left it until I started the closing stitching so I had a nice straight edge on the fourth side to stitch along.
One thing I did wrong was to stuff the rose thread pillow before it had completely dried from steam ironing. This created a rumpled look to the mono canvas fabric whereas the other pillow had dried overnight after I steamed ironed it and that pillow looks a lot crisper.
Finished pillows: