
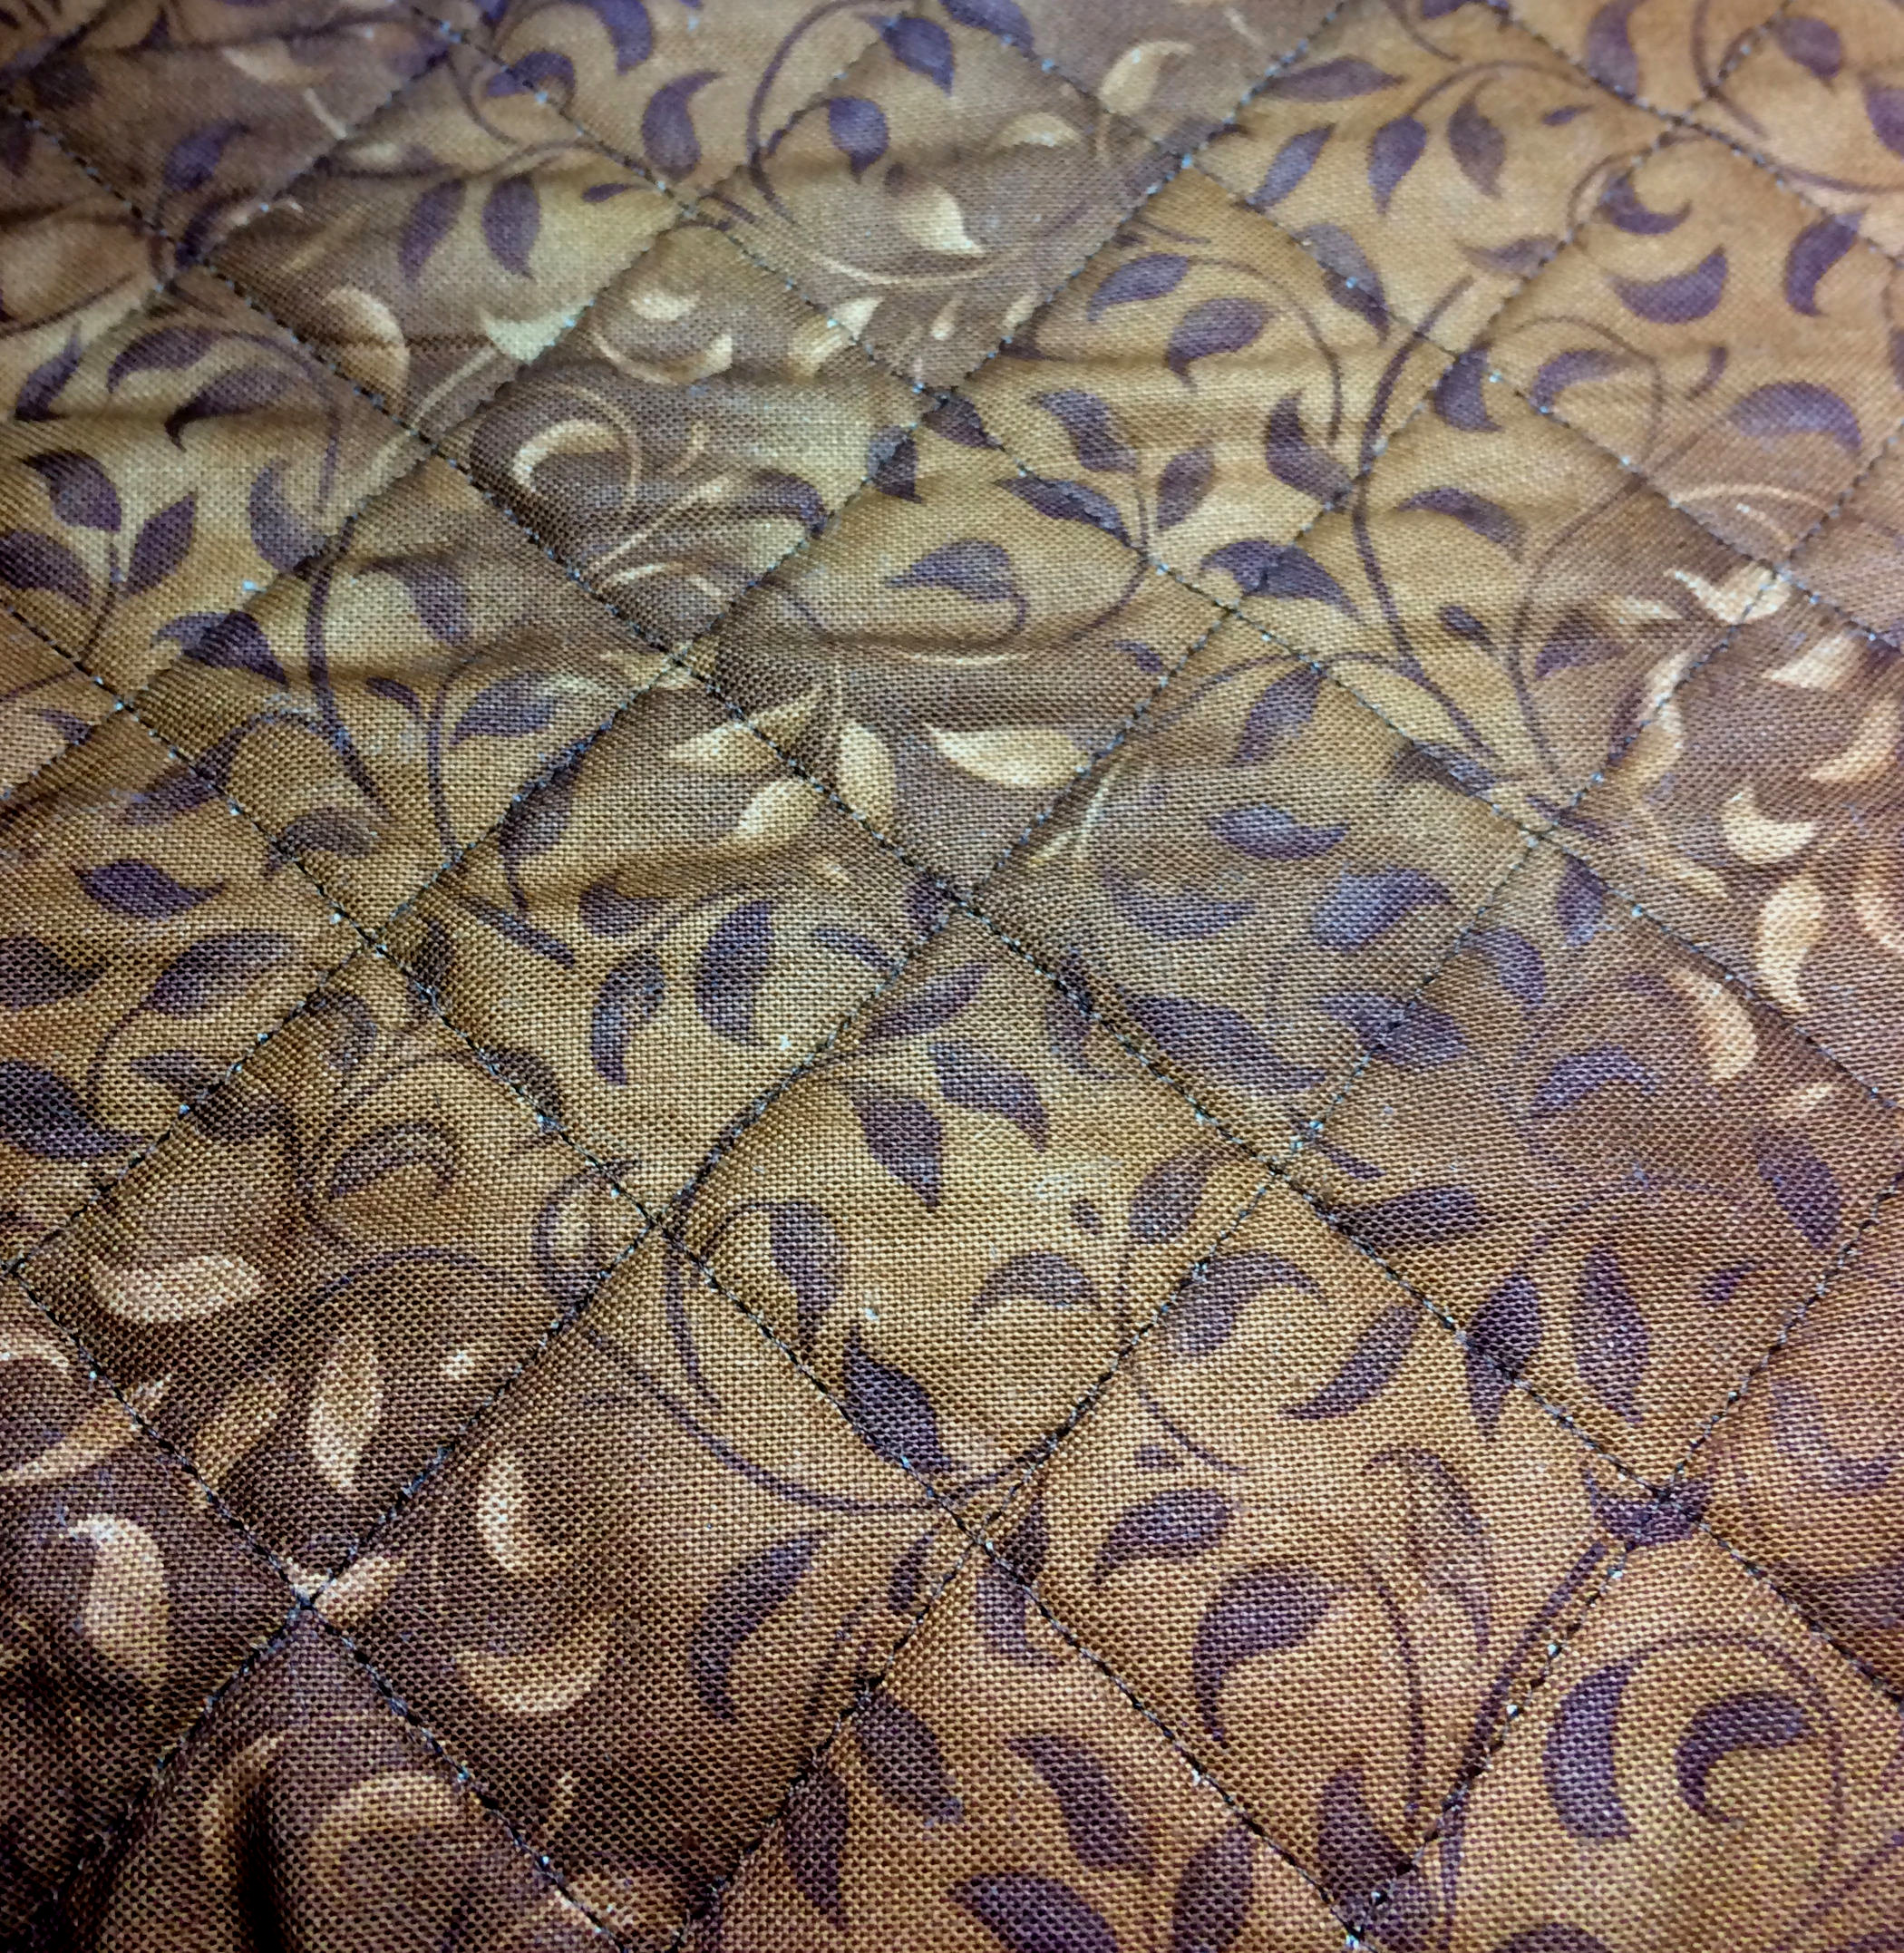
Quilting a grid design using a regular pressure foot or a walking pressure foot with rod guide.
The pressure feet that I used are shown and discussed at the bottom of this blog page.
The quilted pillow back has three layers called a sandwich: lining fabric, quilt batting, and printed back fabric.
Finished size will be 13-inch square. I start with a 16-inch size sandwich square so that I have edge areas for my fingertips as I sew the grid.
When discussing this sandwich I will use “lining fabric” to indicate the white (or blue) solid color fabric and “top fabric” to indicate the brown leaf printed fabric.
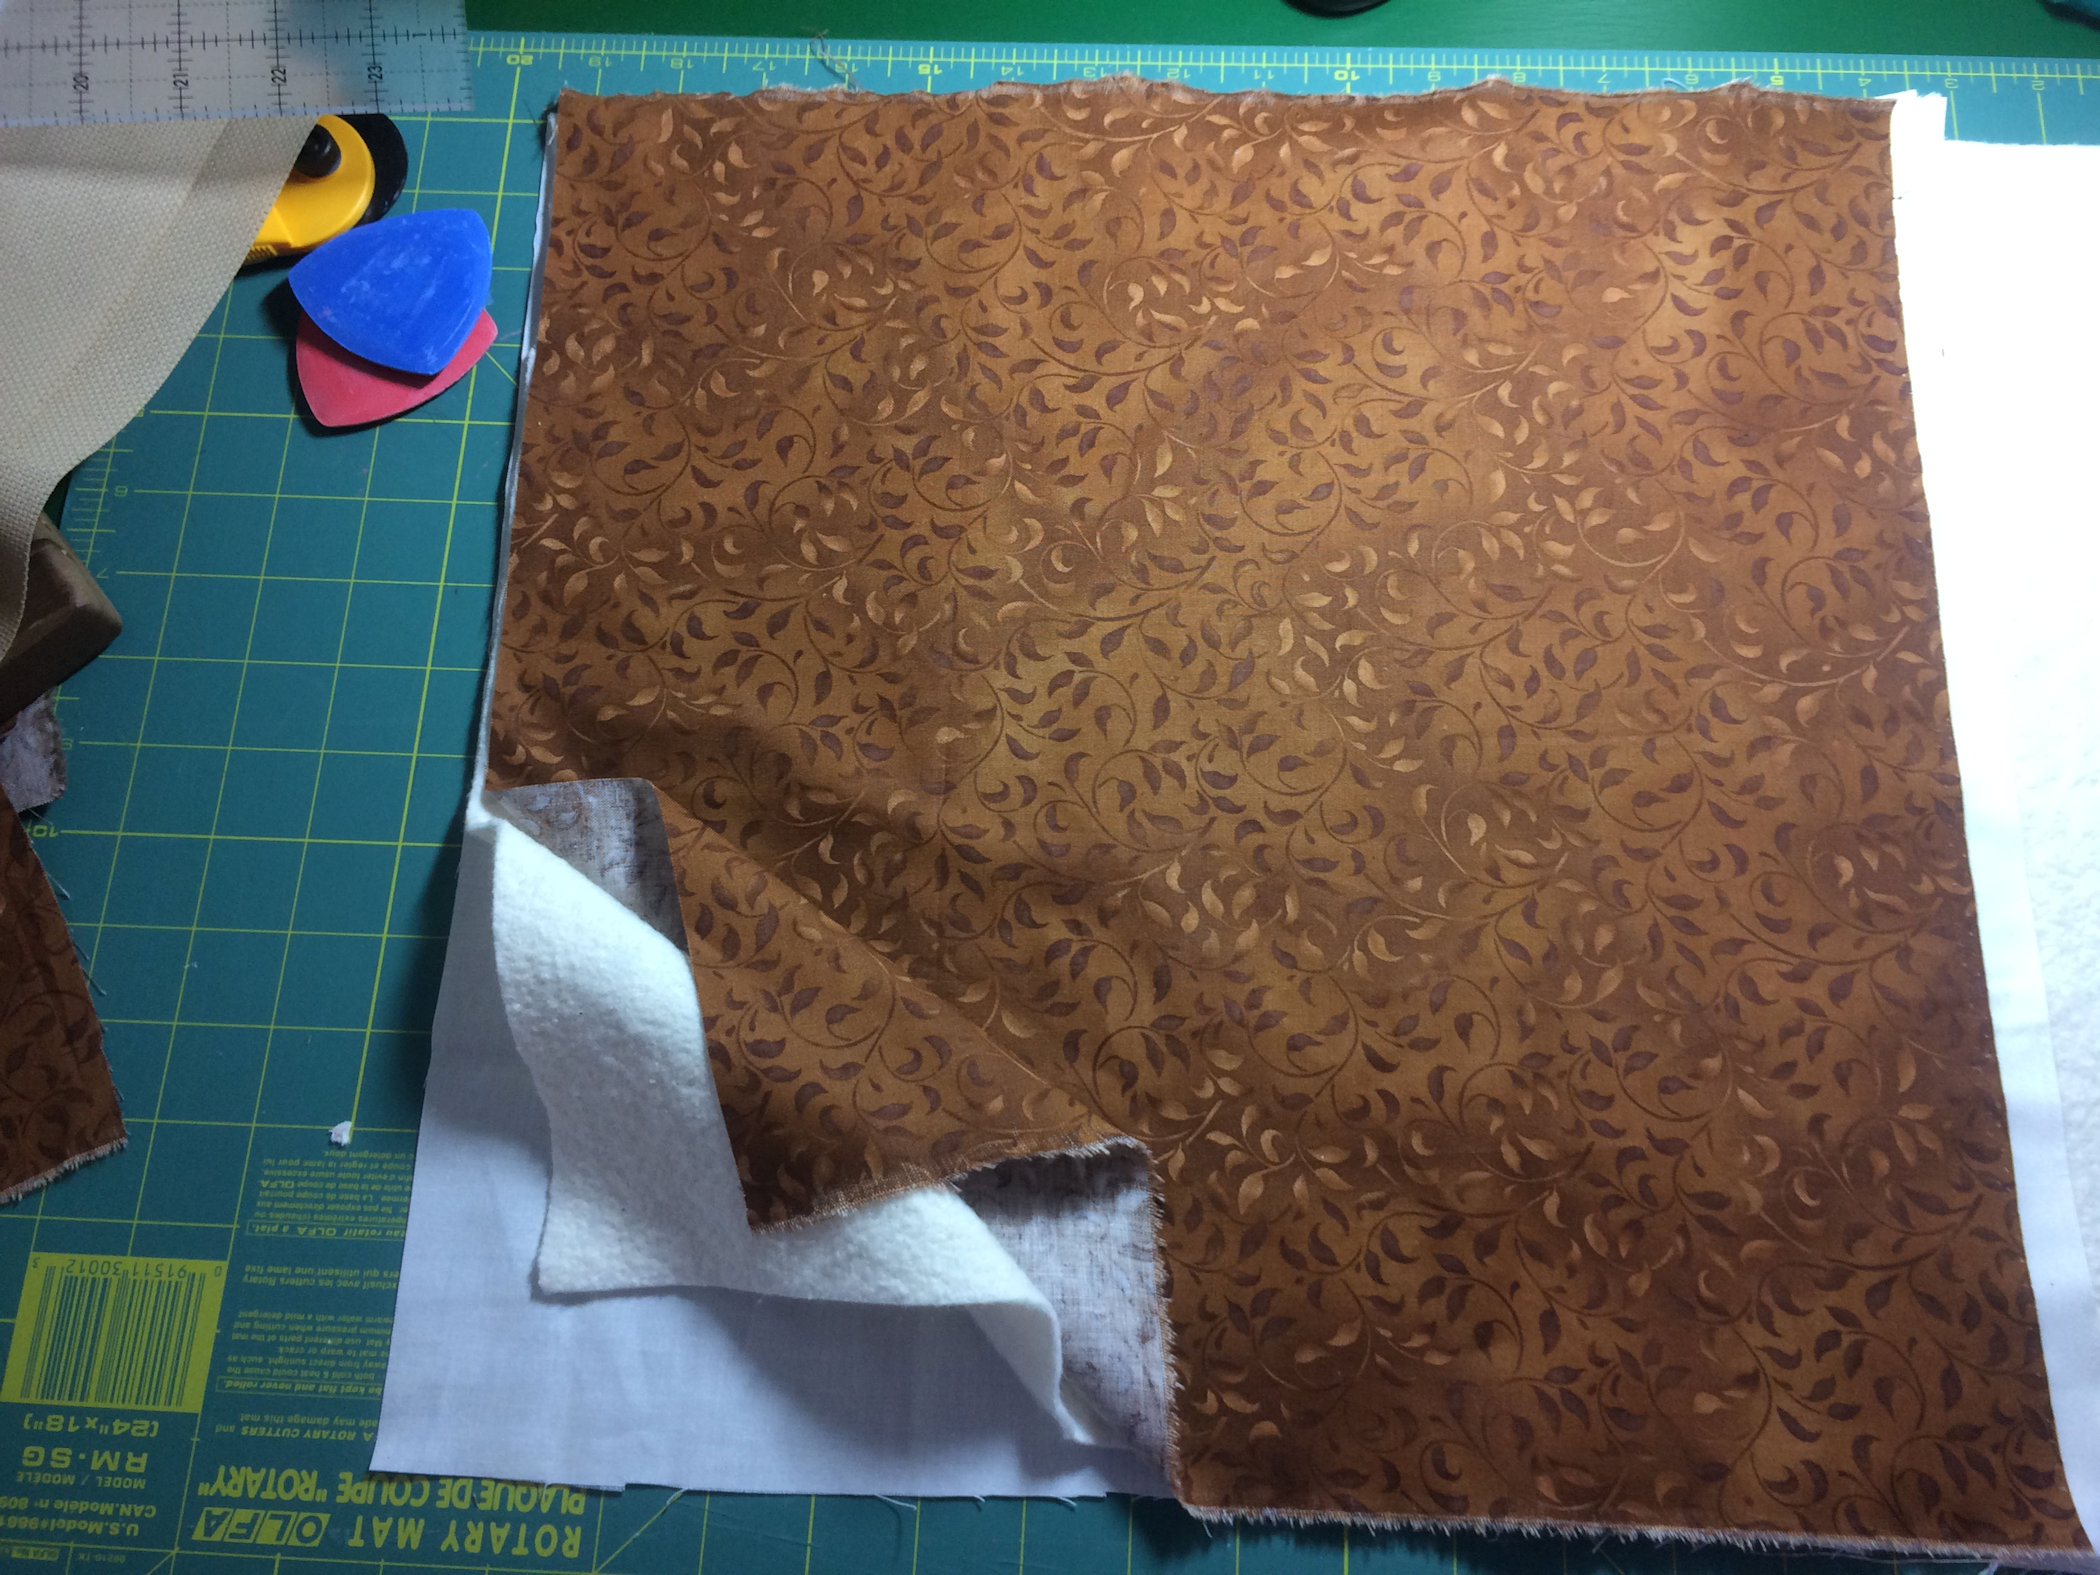 The batting for the middle layer of this sandwich is 100% cotton and the top and bottom fabrics are also 100% cotton. Once I chalk marked the white lining fabric with the grid, I layered the three fabrics with the chalk marked side of the bottom fabric facing out, batting in the middle and the brown leaf fabric on top and facing out. Using a hot, dry iron pressed (not ironed where you slide the iron over the sandwich) the layered fabrics. Ironed this way, the texture of the batting slightly “holds” onto the two 100% cotton fabrics. If you are using 80/20 polyester batting you can not press the sandwich together with a hot iron as it might melt areas of the batting. Instead you need to do a lot of pinning to keep the sandwich layers from moving as you sew. Same is true if you are using a regular pressure foot and not a walking foot. You will need to do a lot of pinning to keep the sandwich layers from “walking” as you stitch. |
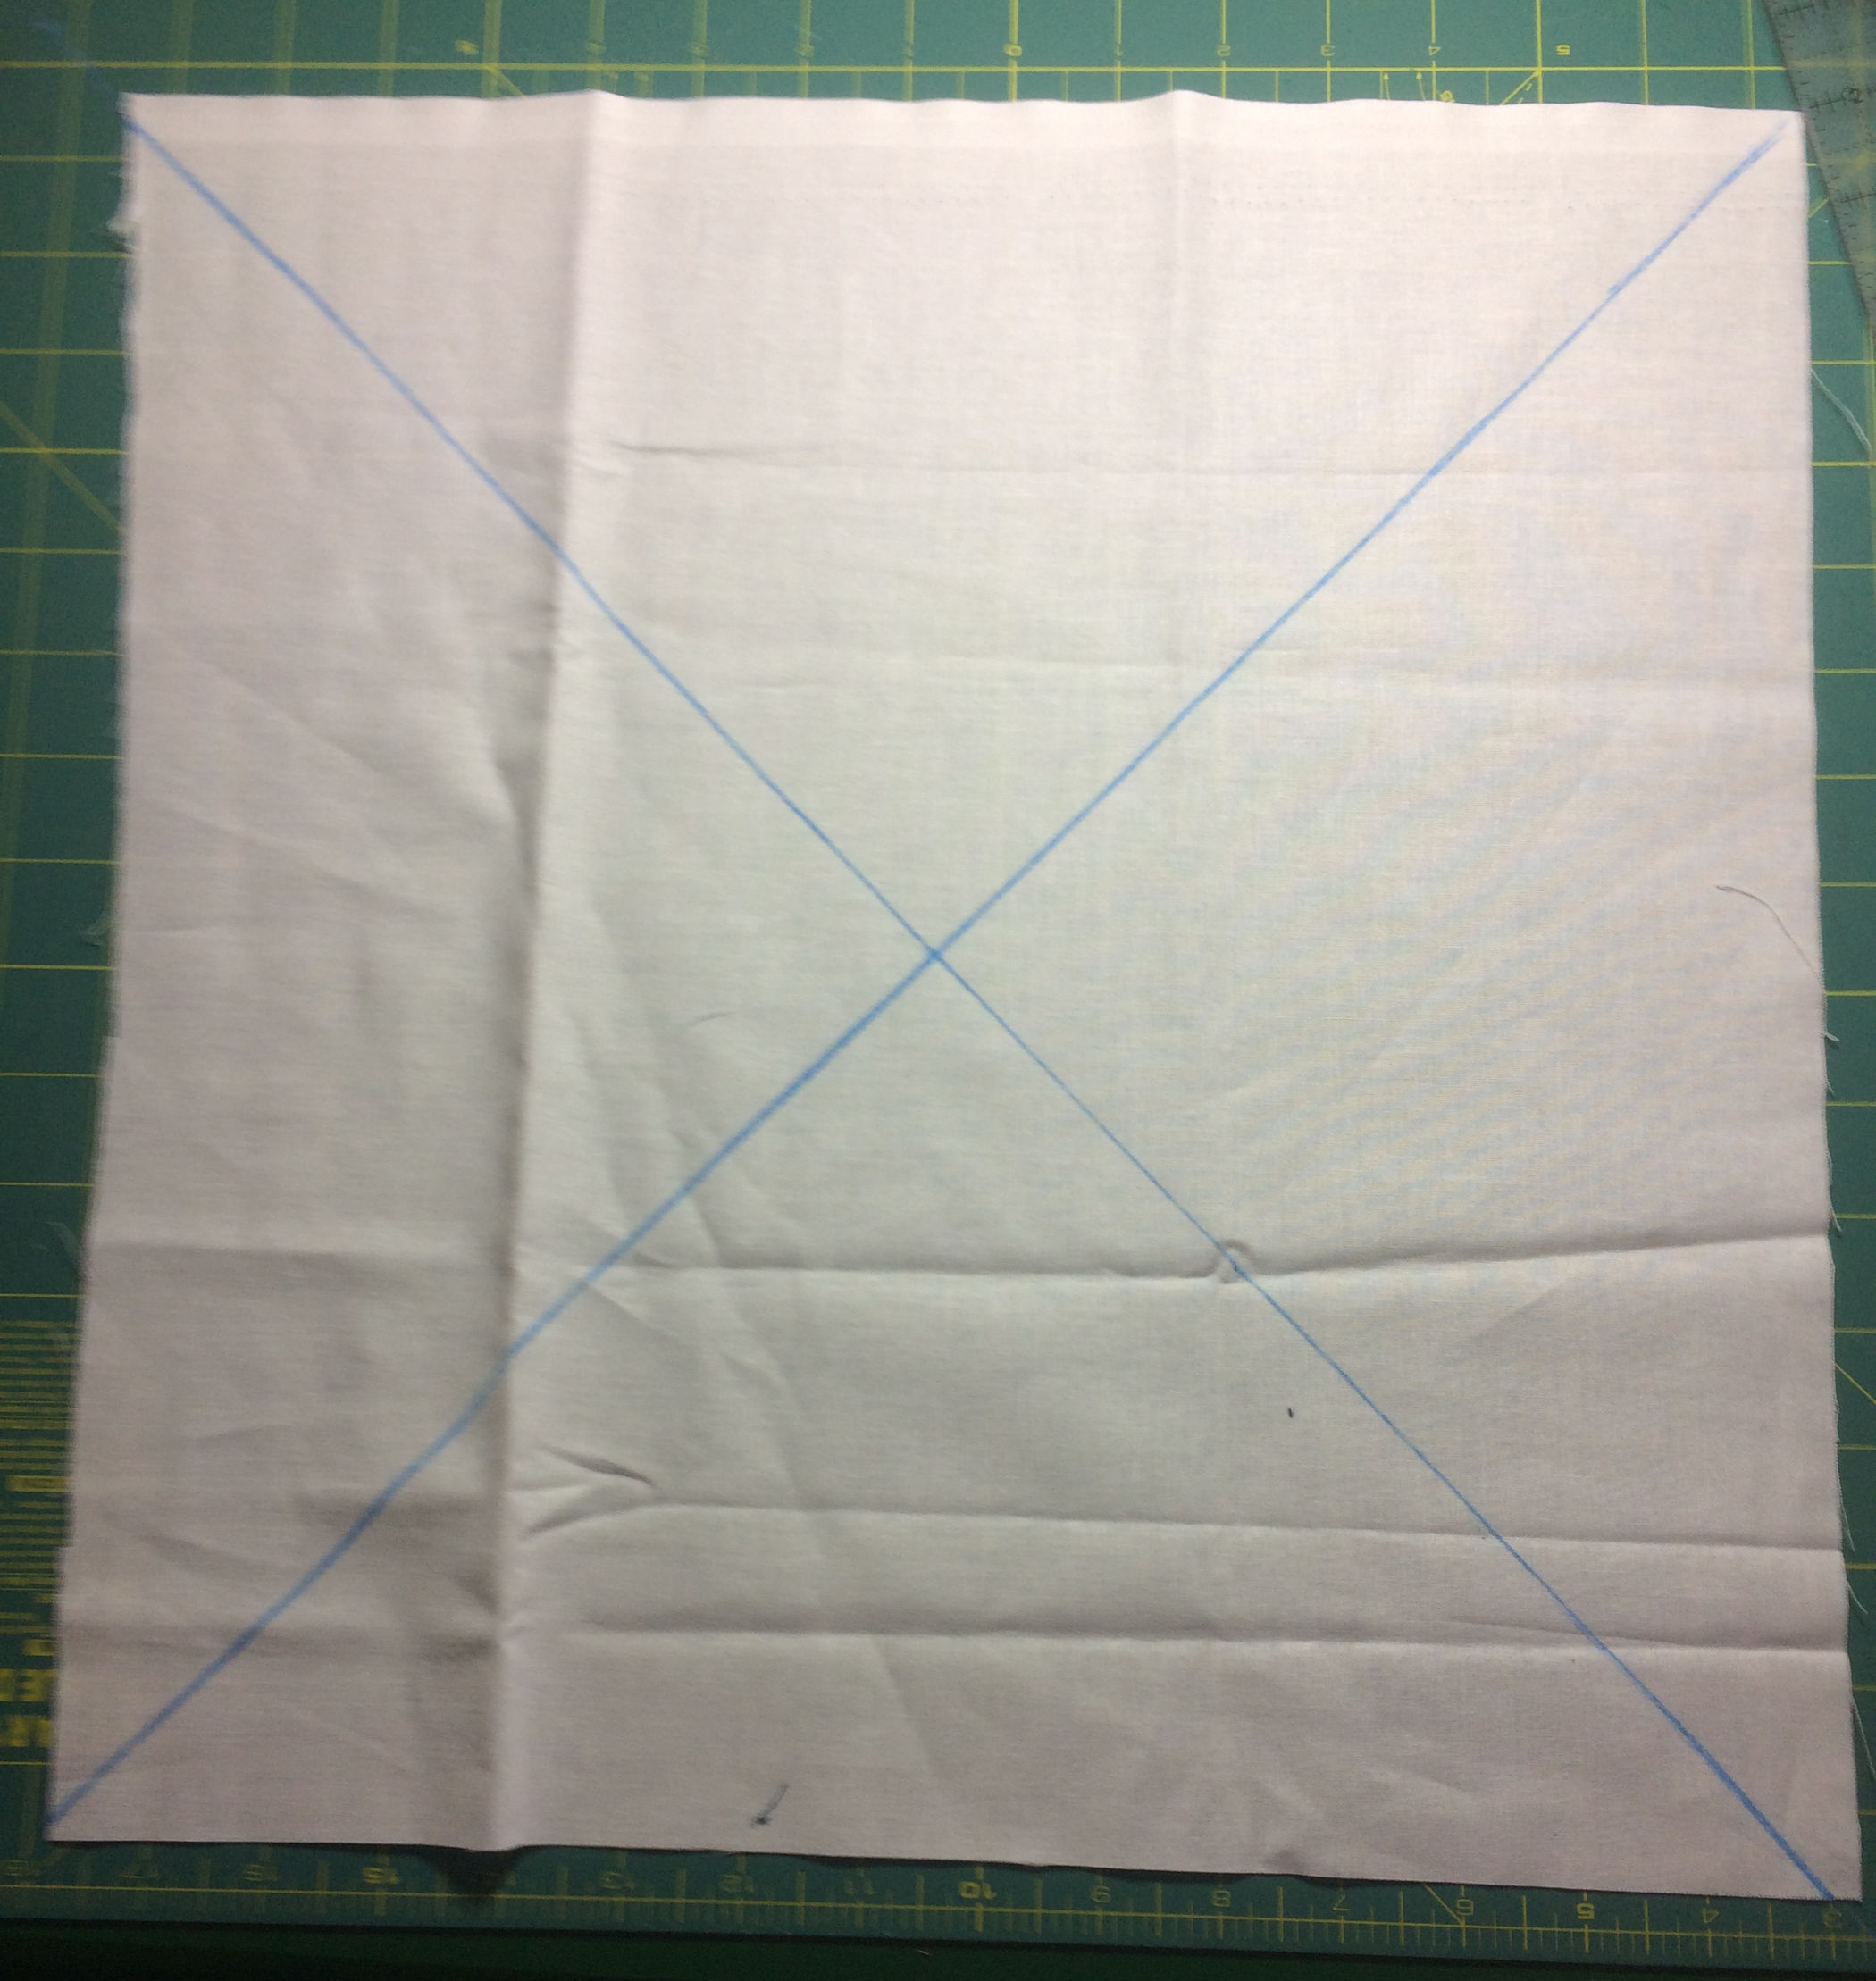
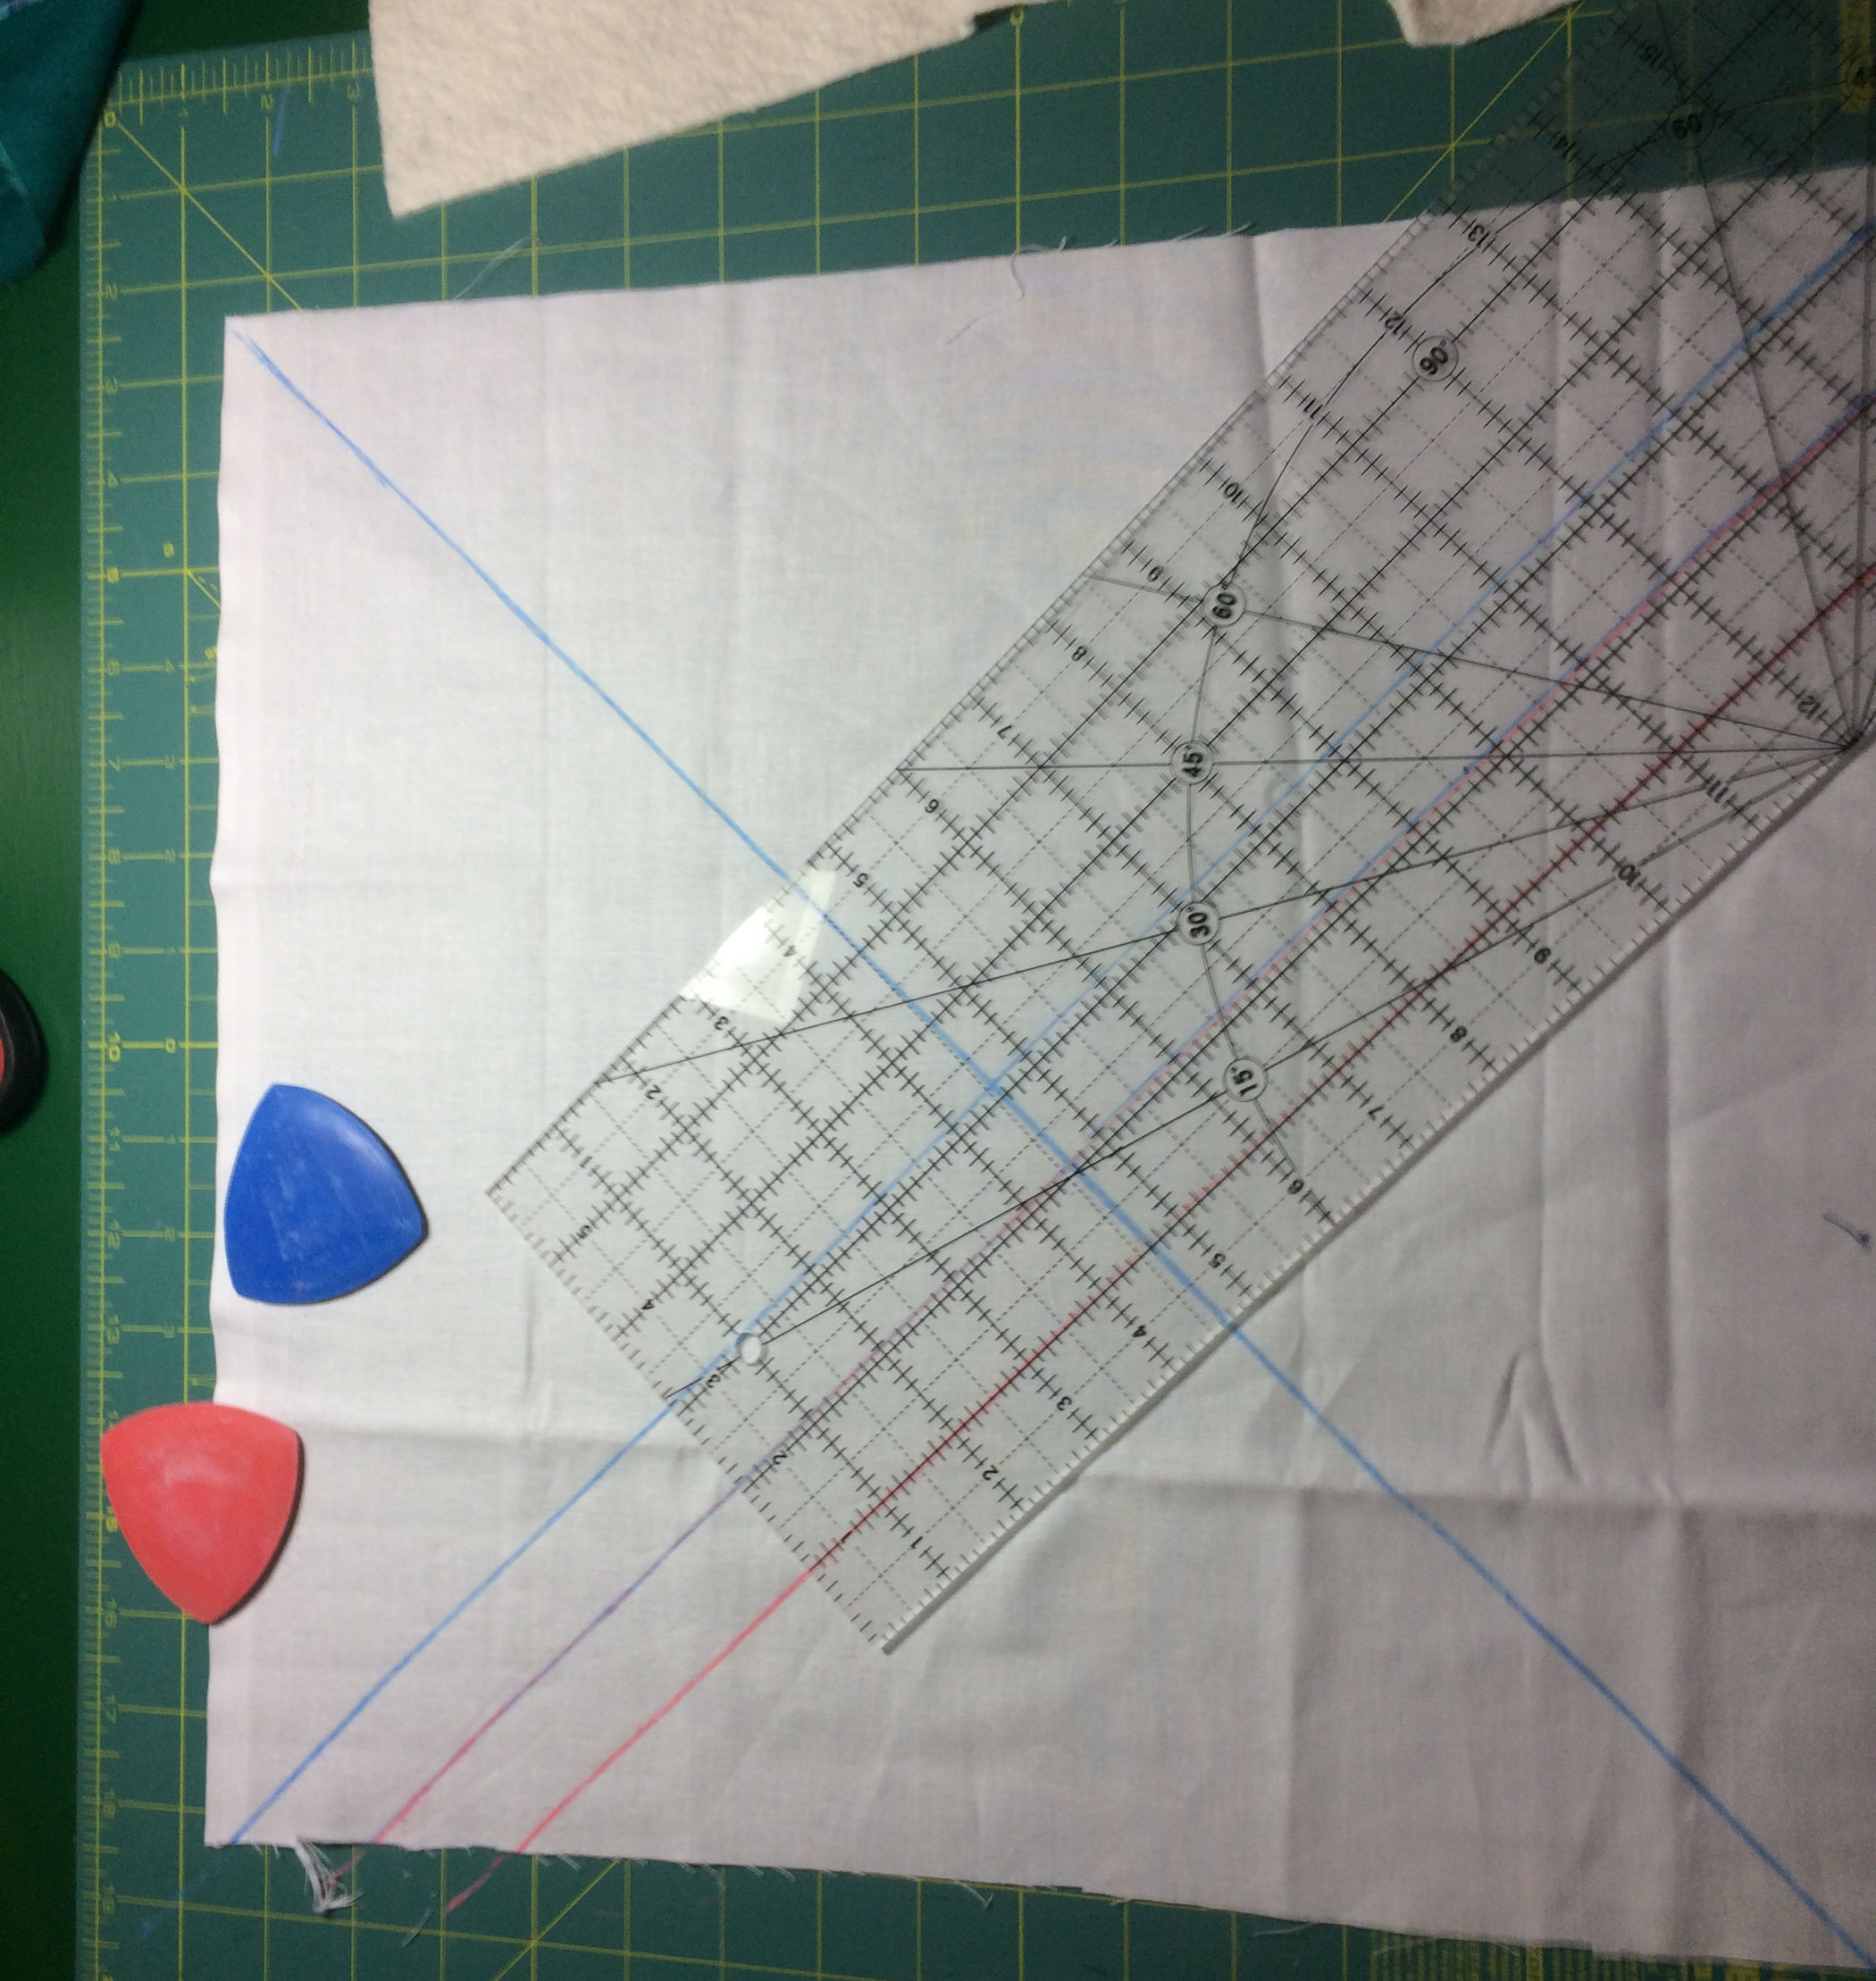
| Marking the Grid: |
|
Sewing the Grid:
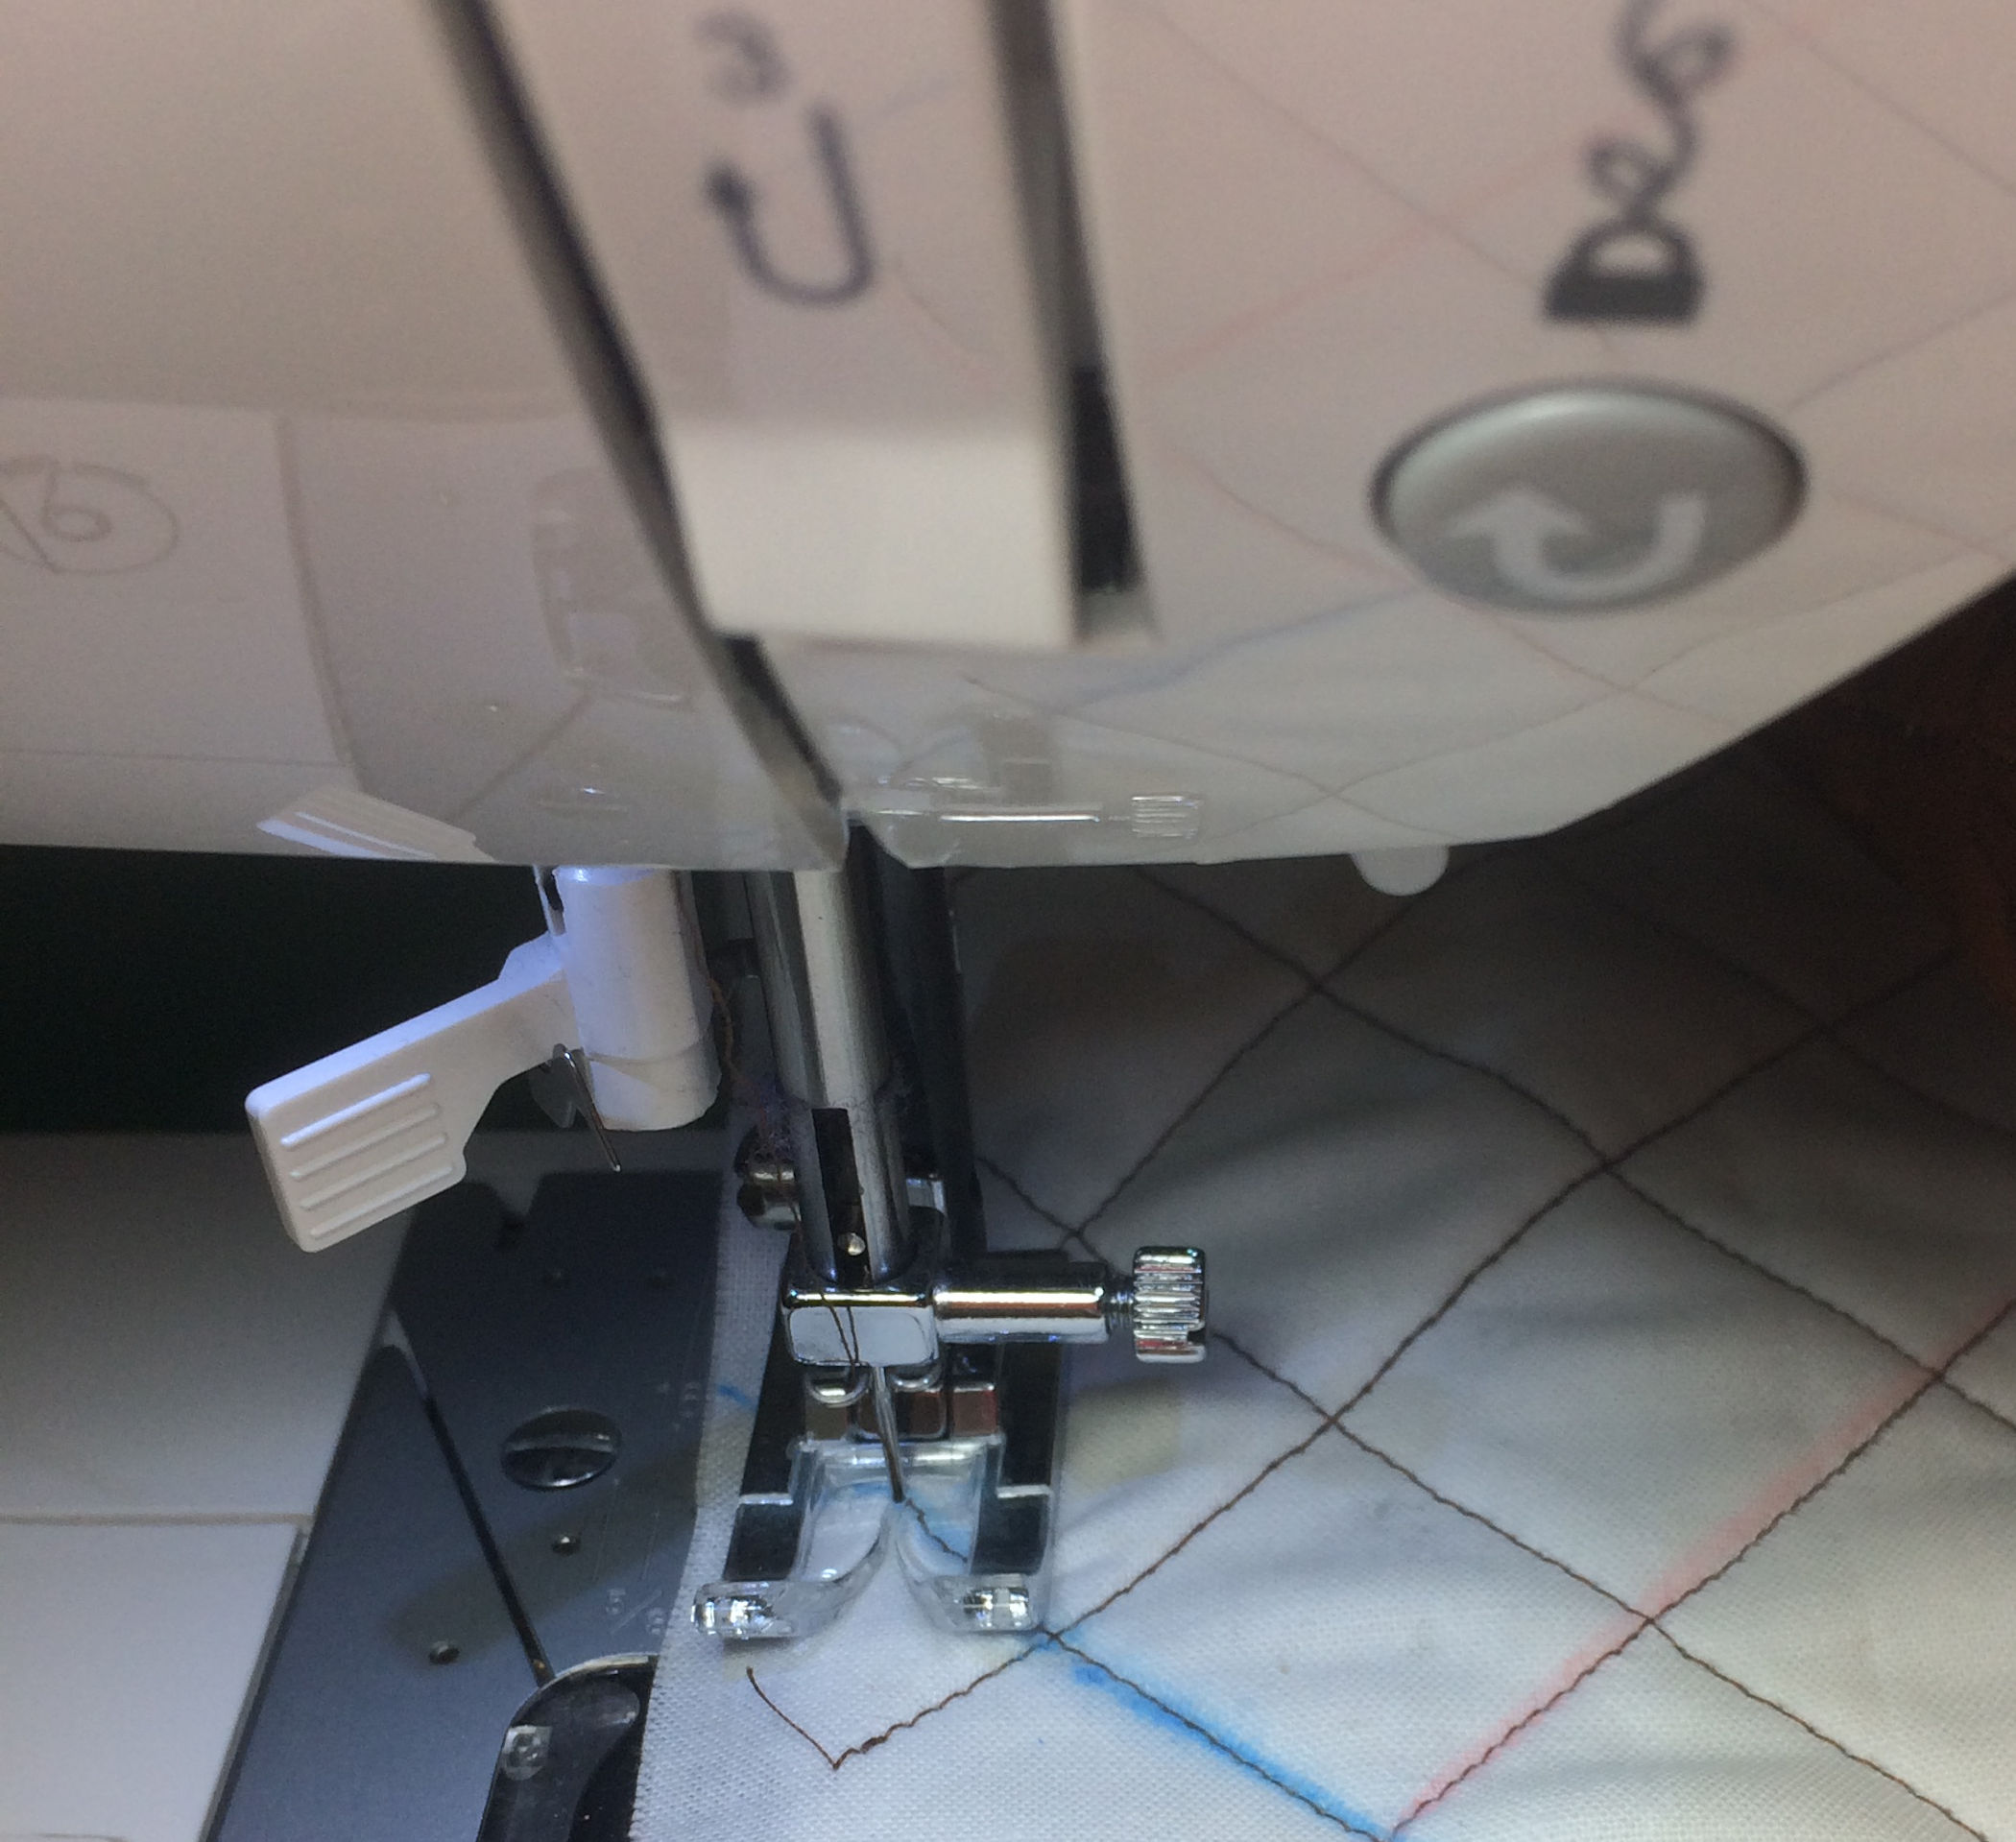
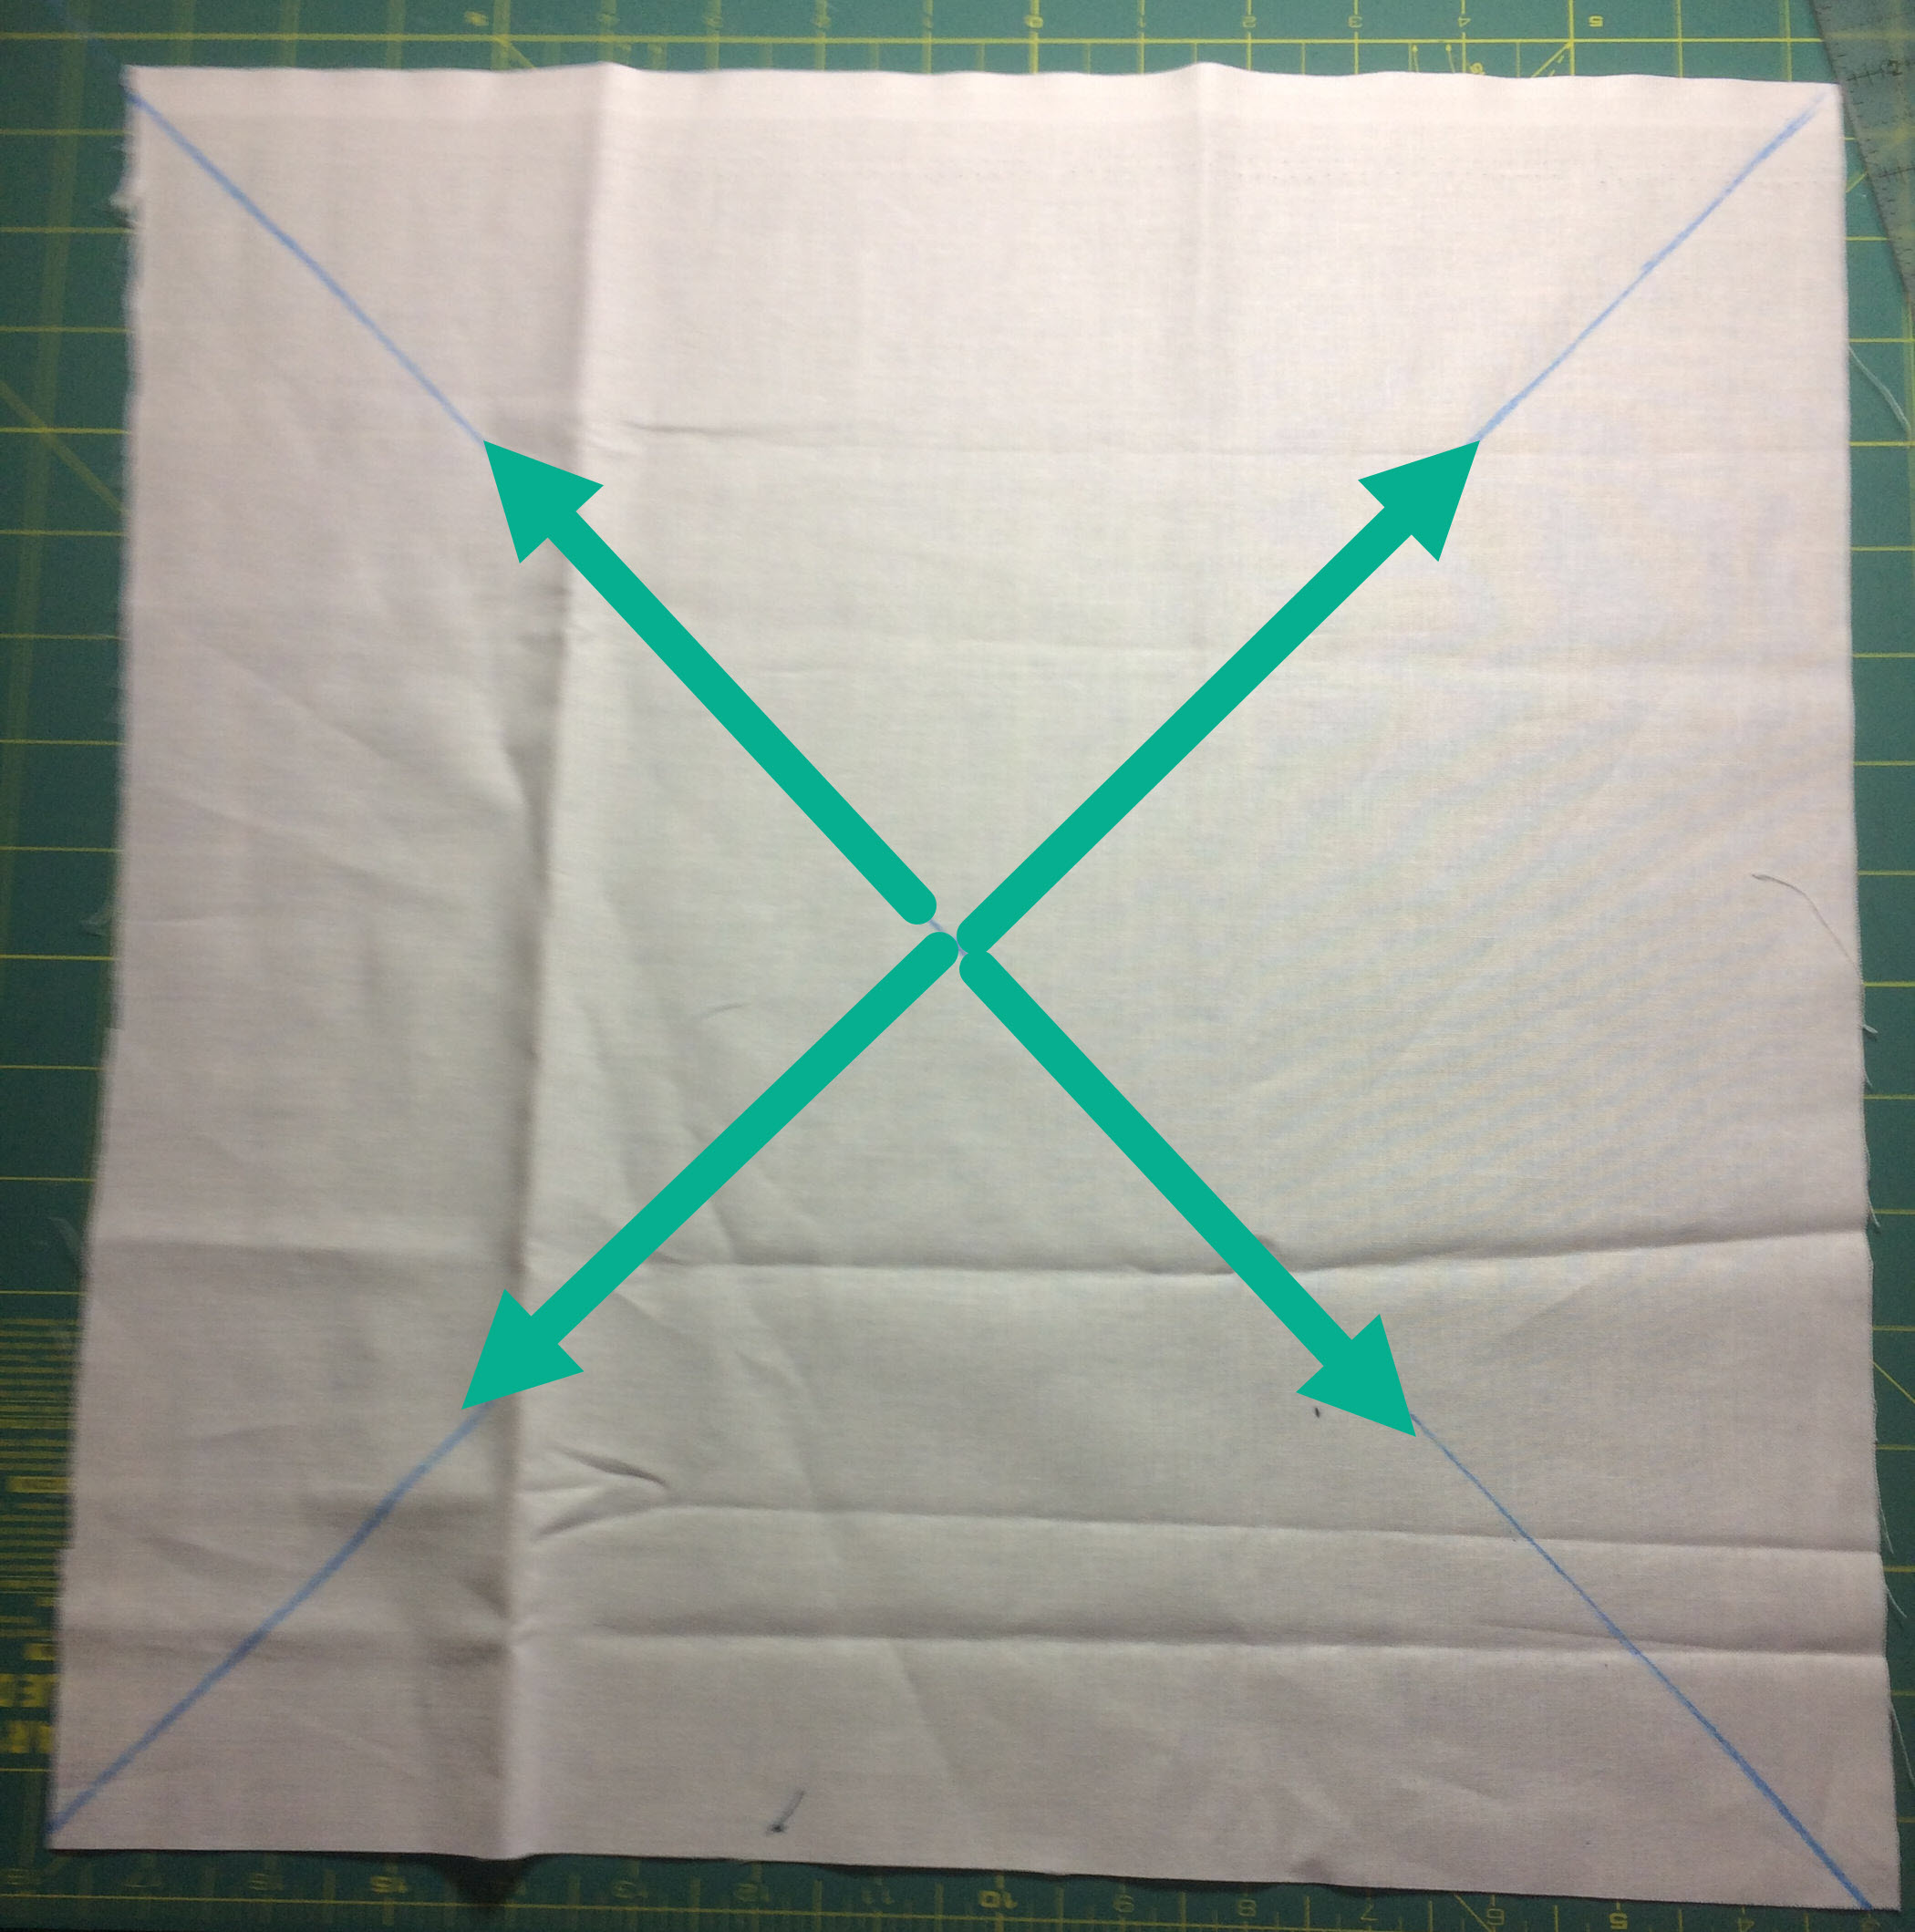 Whether using a regular flat pressure foot and the sandwich is pinned or using a walking foot with heat pressed sandwich, sew slowly. Stitch the X with four separate lines, each starting at the center of the X. Use your hands to guide (not push or pull) the sandwich as you stitch. 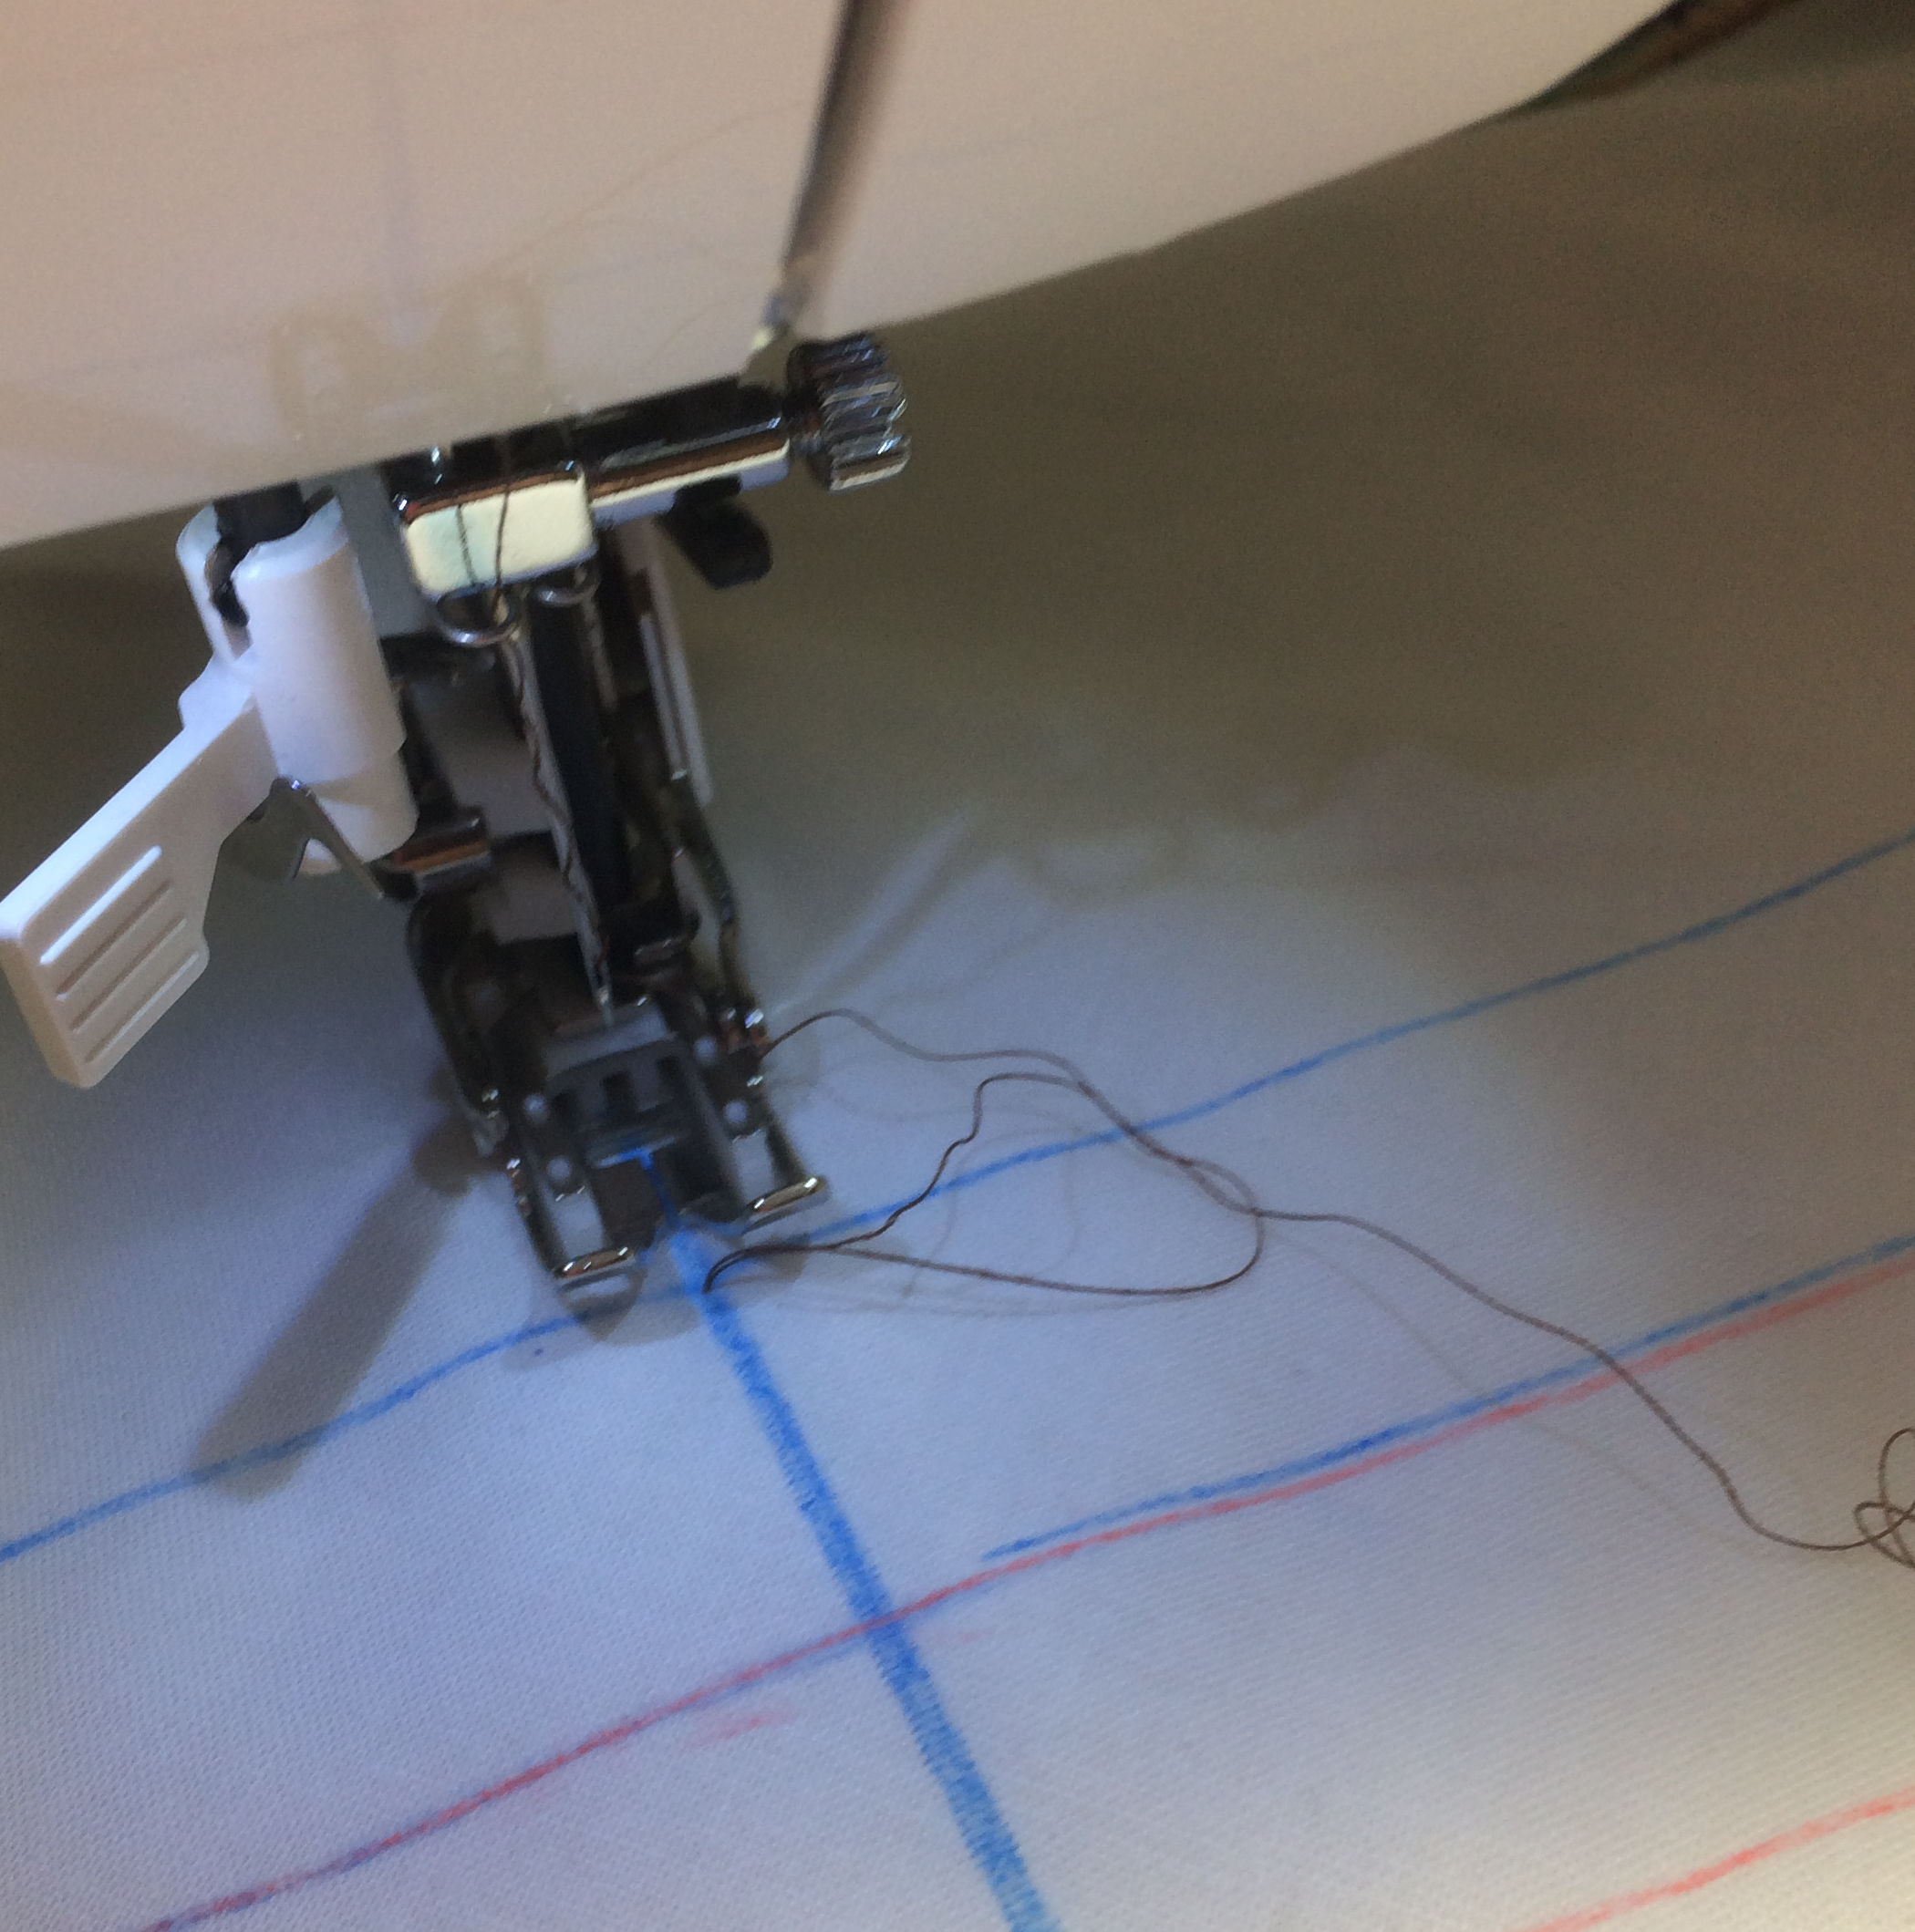 To make sure your bobbin thread does not jam up underneath as you begin to stitch each leg of the X, do one stitch then use the top sewing thread to pull the bobbin thread up through the sandwich. Hold bobbin and top thread aside as you begin the stitching line. After each stitch line of an X’s leg go back and tie off the bobbin thread that you pulled through. If stitching cotton thread, the tie off should hold. If polyester thread, the tied knot may become undone due to polyester thread being slippery. |
 Orange arrow points to the tied off bobbin and top thread of the first leg. Neon green arrow points to where I have brought the bobbin thread of the second leg to be on top. Fuchsia arrow marks line of the second leg. For the second leg, I placed the needle an inch or so back on the stitching of the first leg then I will proceed with stitching the second leg. Third and fourth legs are the same. Start at near center of the X by bringing bobbin thread to the top, stitch the leg, tie off the bobbin and top threads. |
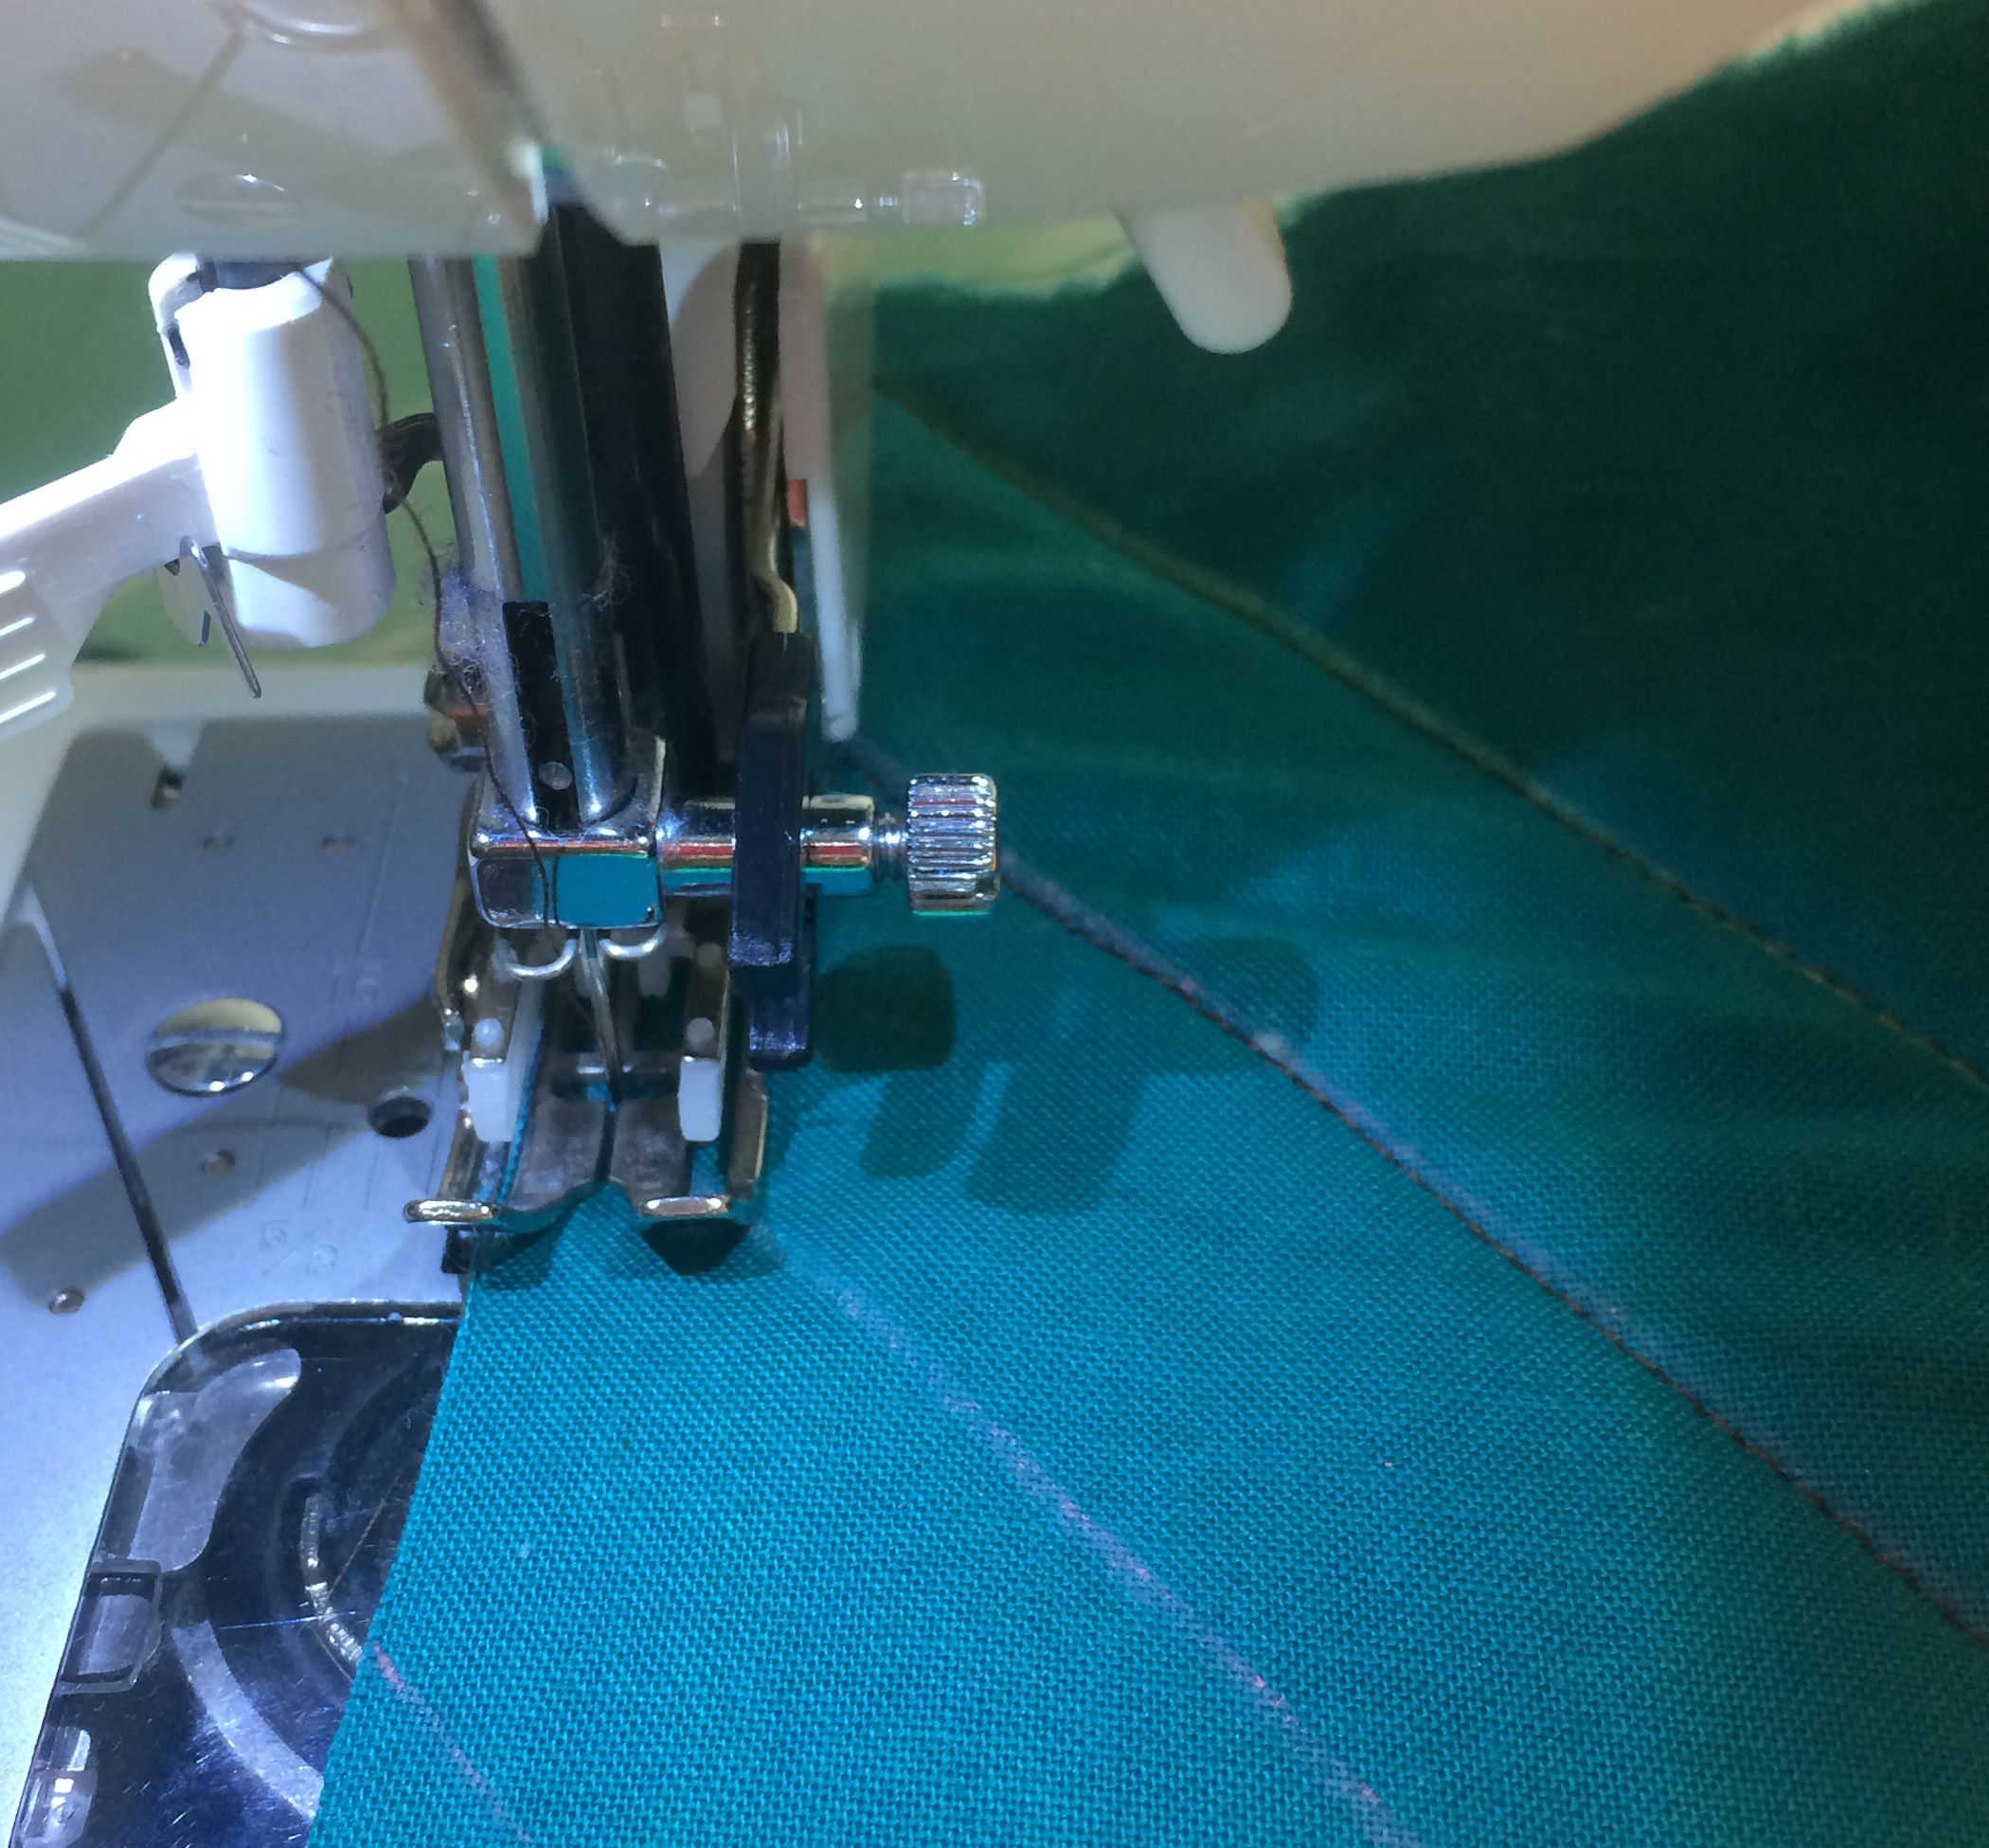
Sewing chalk marked grid. Each parallel line should be sewn in the opposite direction.
  the four legs of the X. Fuchsia dashed arrows shows travelling from one parallel line to the next. Notice along the bottom of the photo that the fuchsia dashed line travels along the edge of the sandwich. Sewing the grid with a regular pressure foot or a walking foot without a rod guide: use traveling an edge to sew neighboring parallel lines in opposite directions.  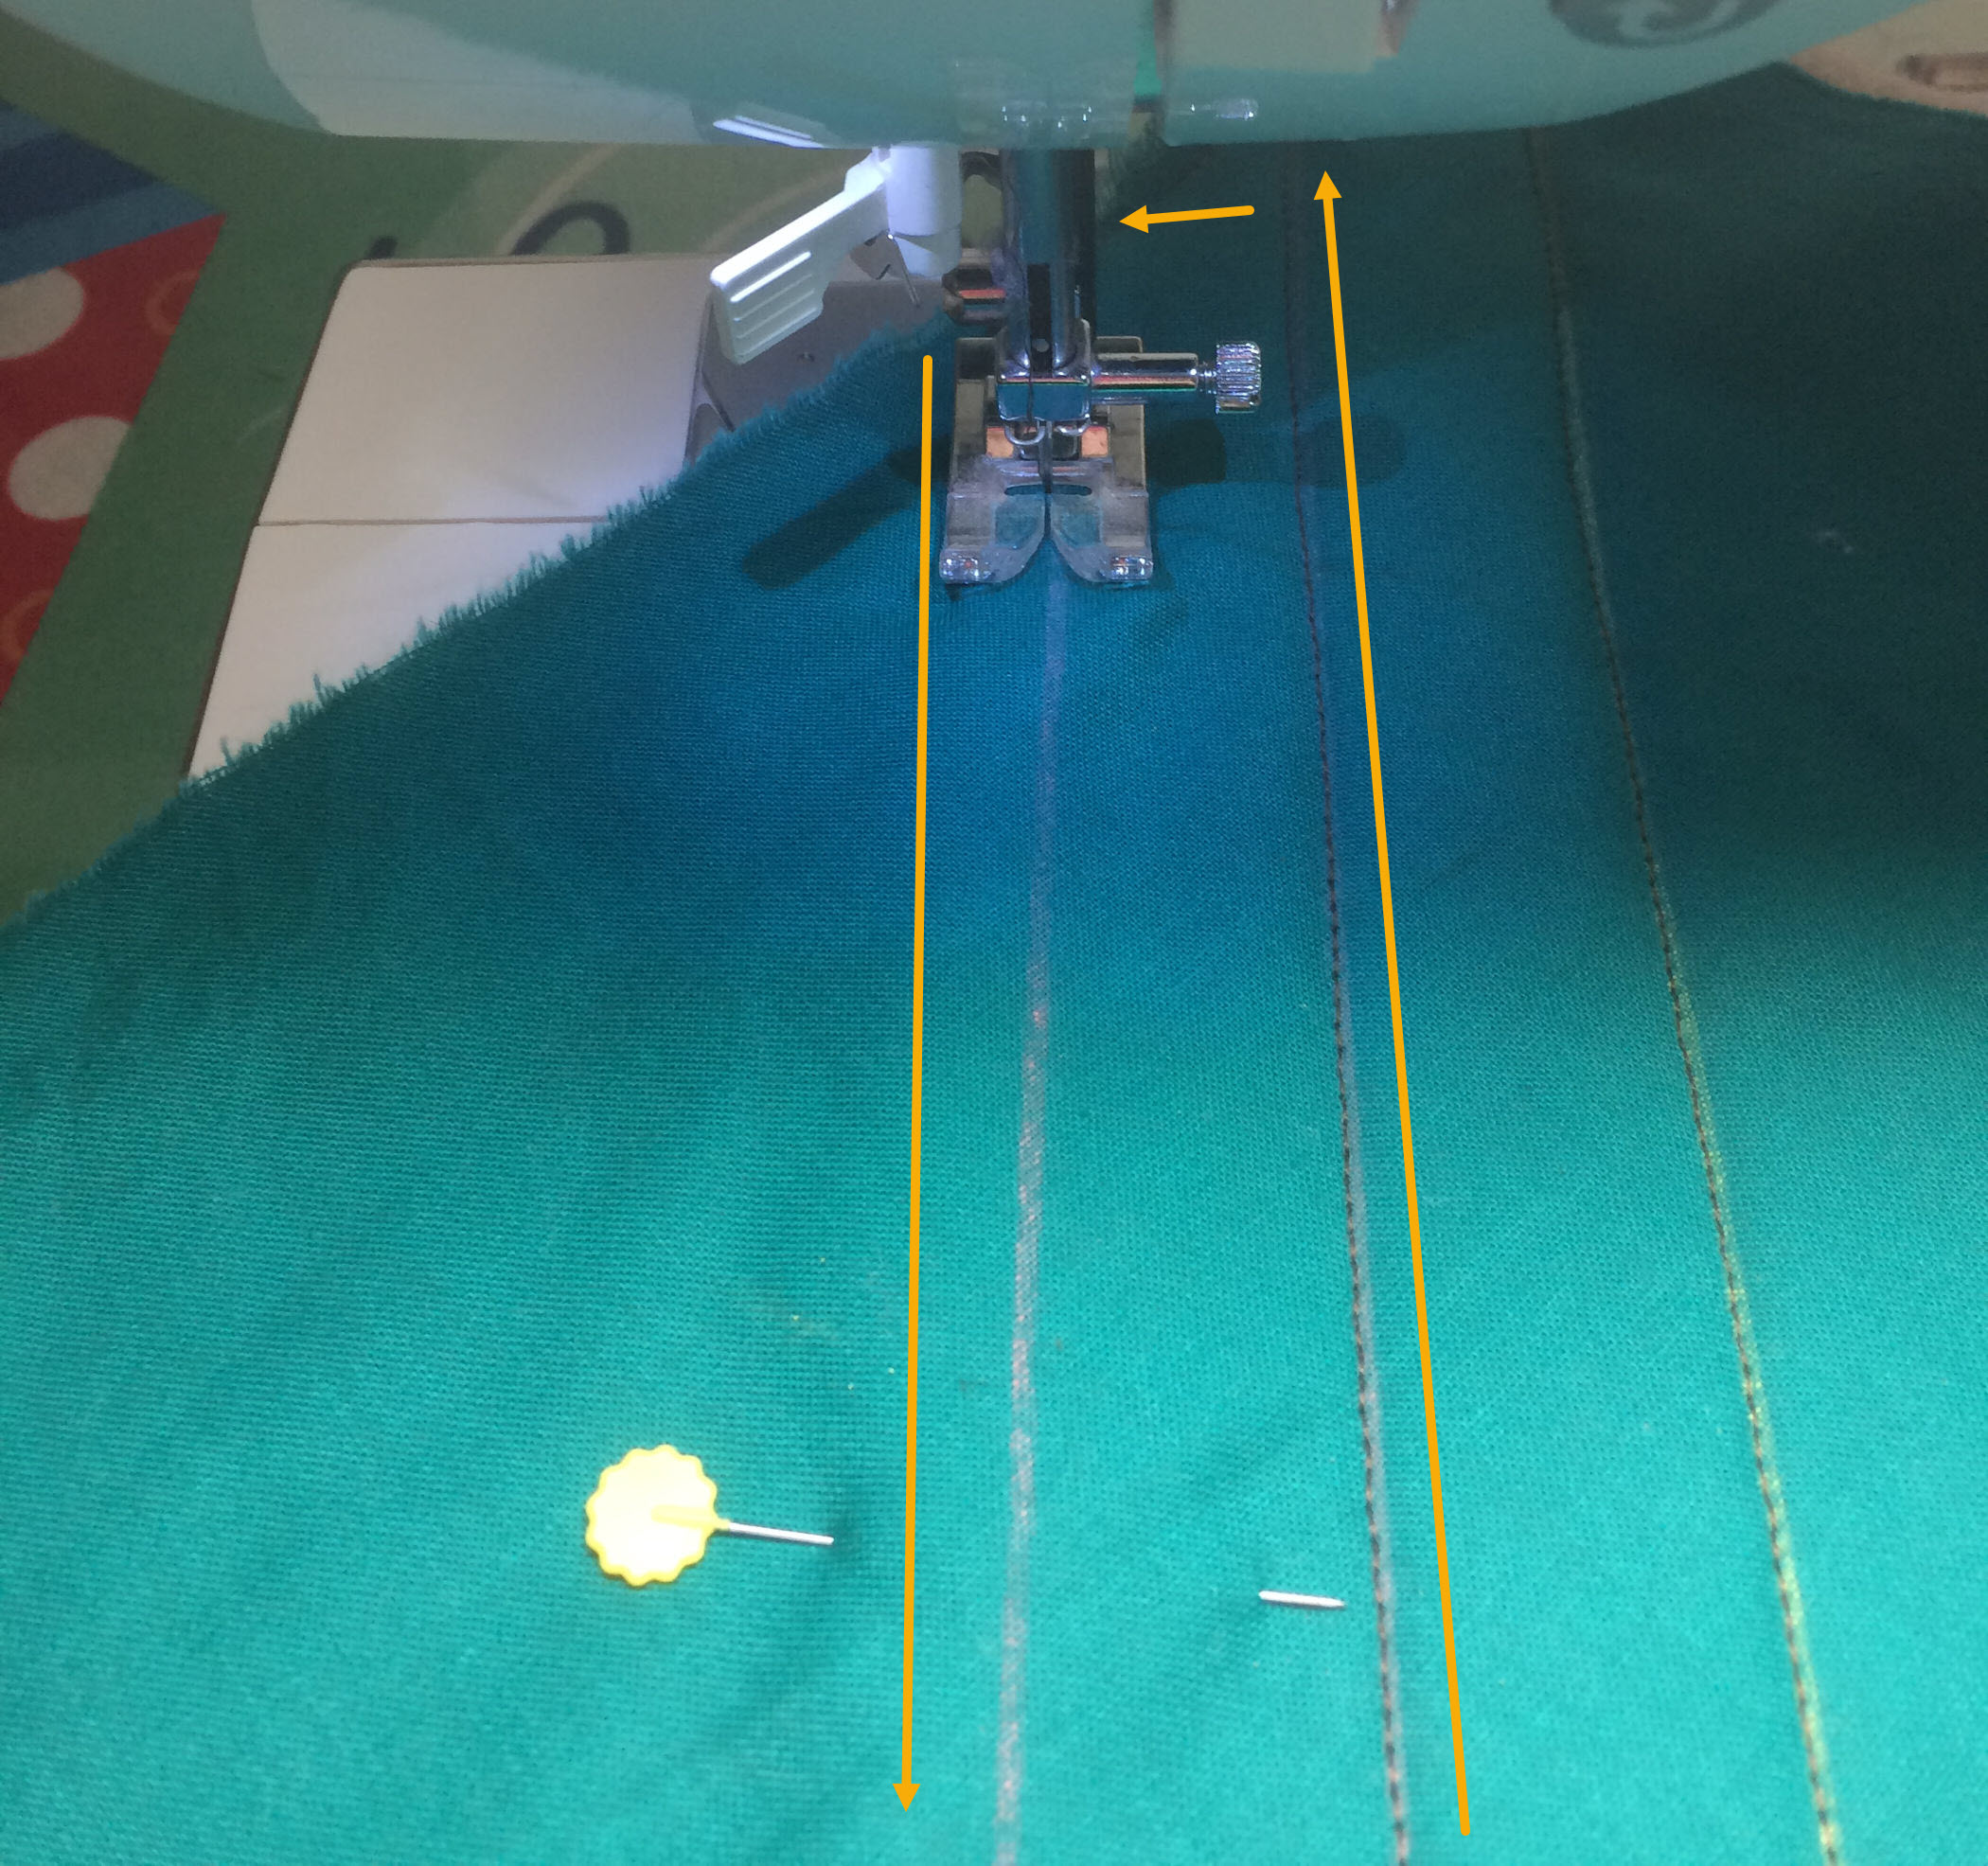
|
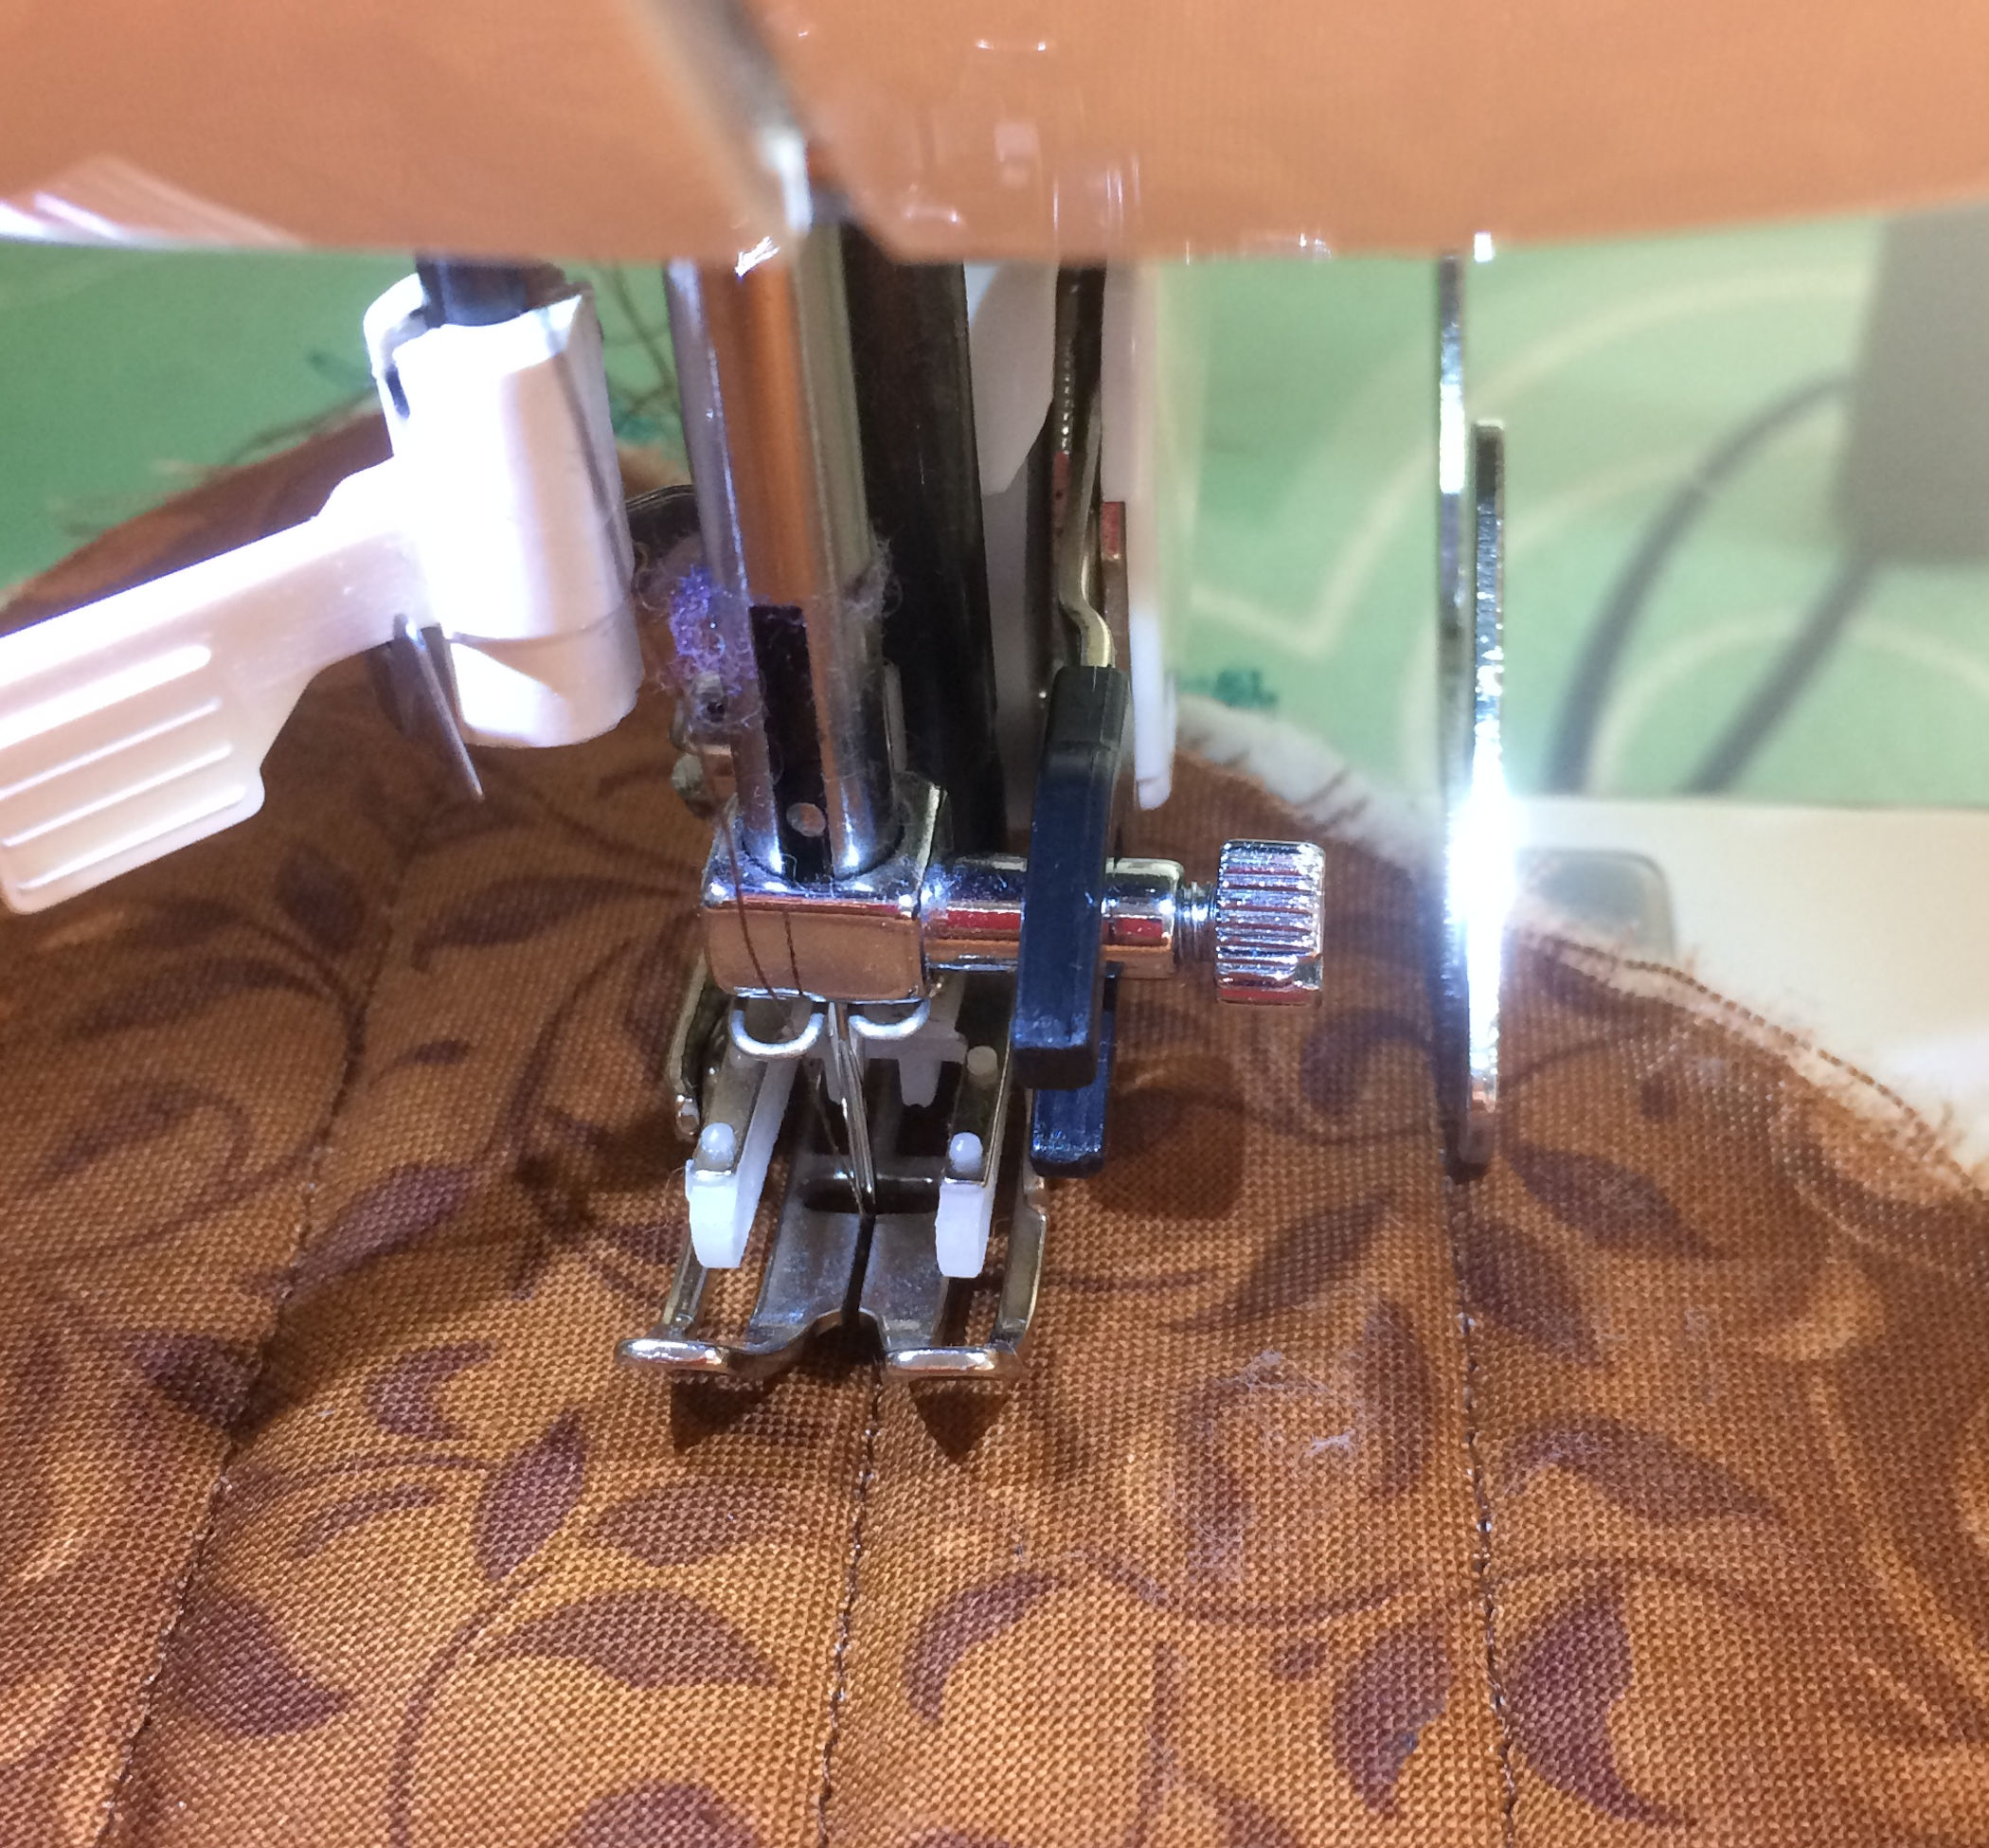
Sewing the grid using a walking foot with a rod guide:
   The web tutorial from which I first learned to sew parallel lines with a rod guide taught to stitch a parallel line, switch the rod guide to the other side of the walking foot, travel along the edge, followed by stitching the next parallel line an inch away from the previous sewn parallel line. Each time the rod guide is switch to another side of the walking foot the width between needle and rod guide has to be remeasured. That is a lot of switching and measuring when stitching a 16-inch square grid. Plus I found that an inch on my short 6-inch plastic ruler is slightly less than an inch measured on my carpenter (steel) ruler. |
|
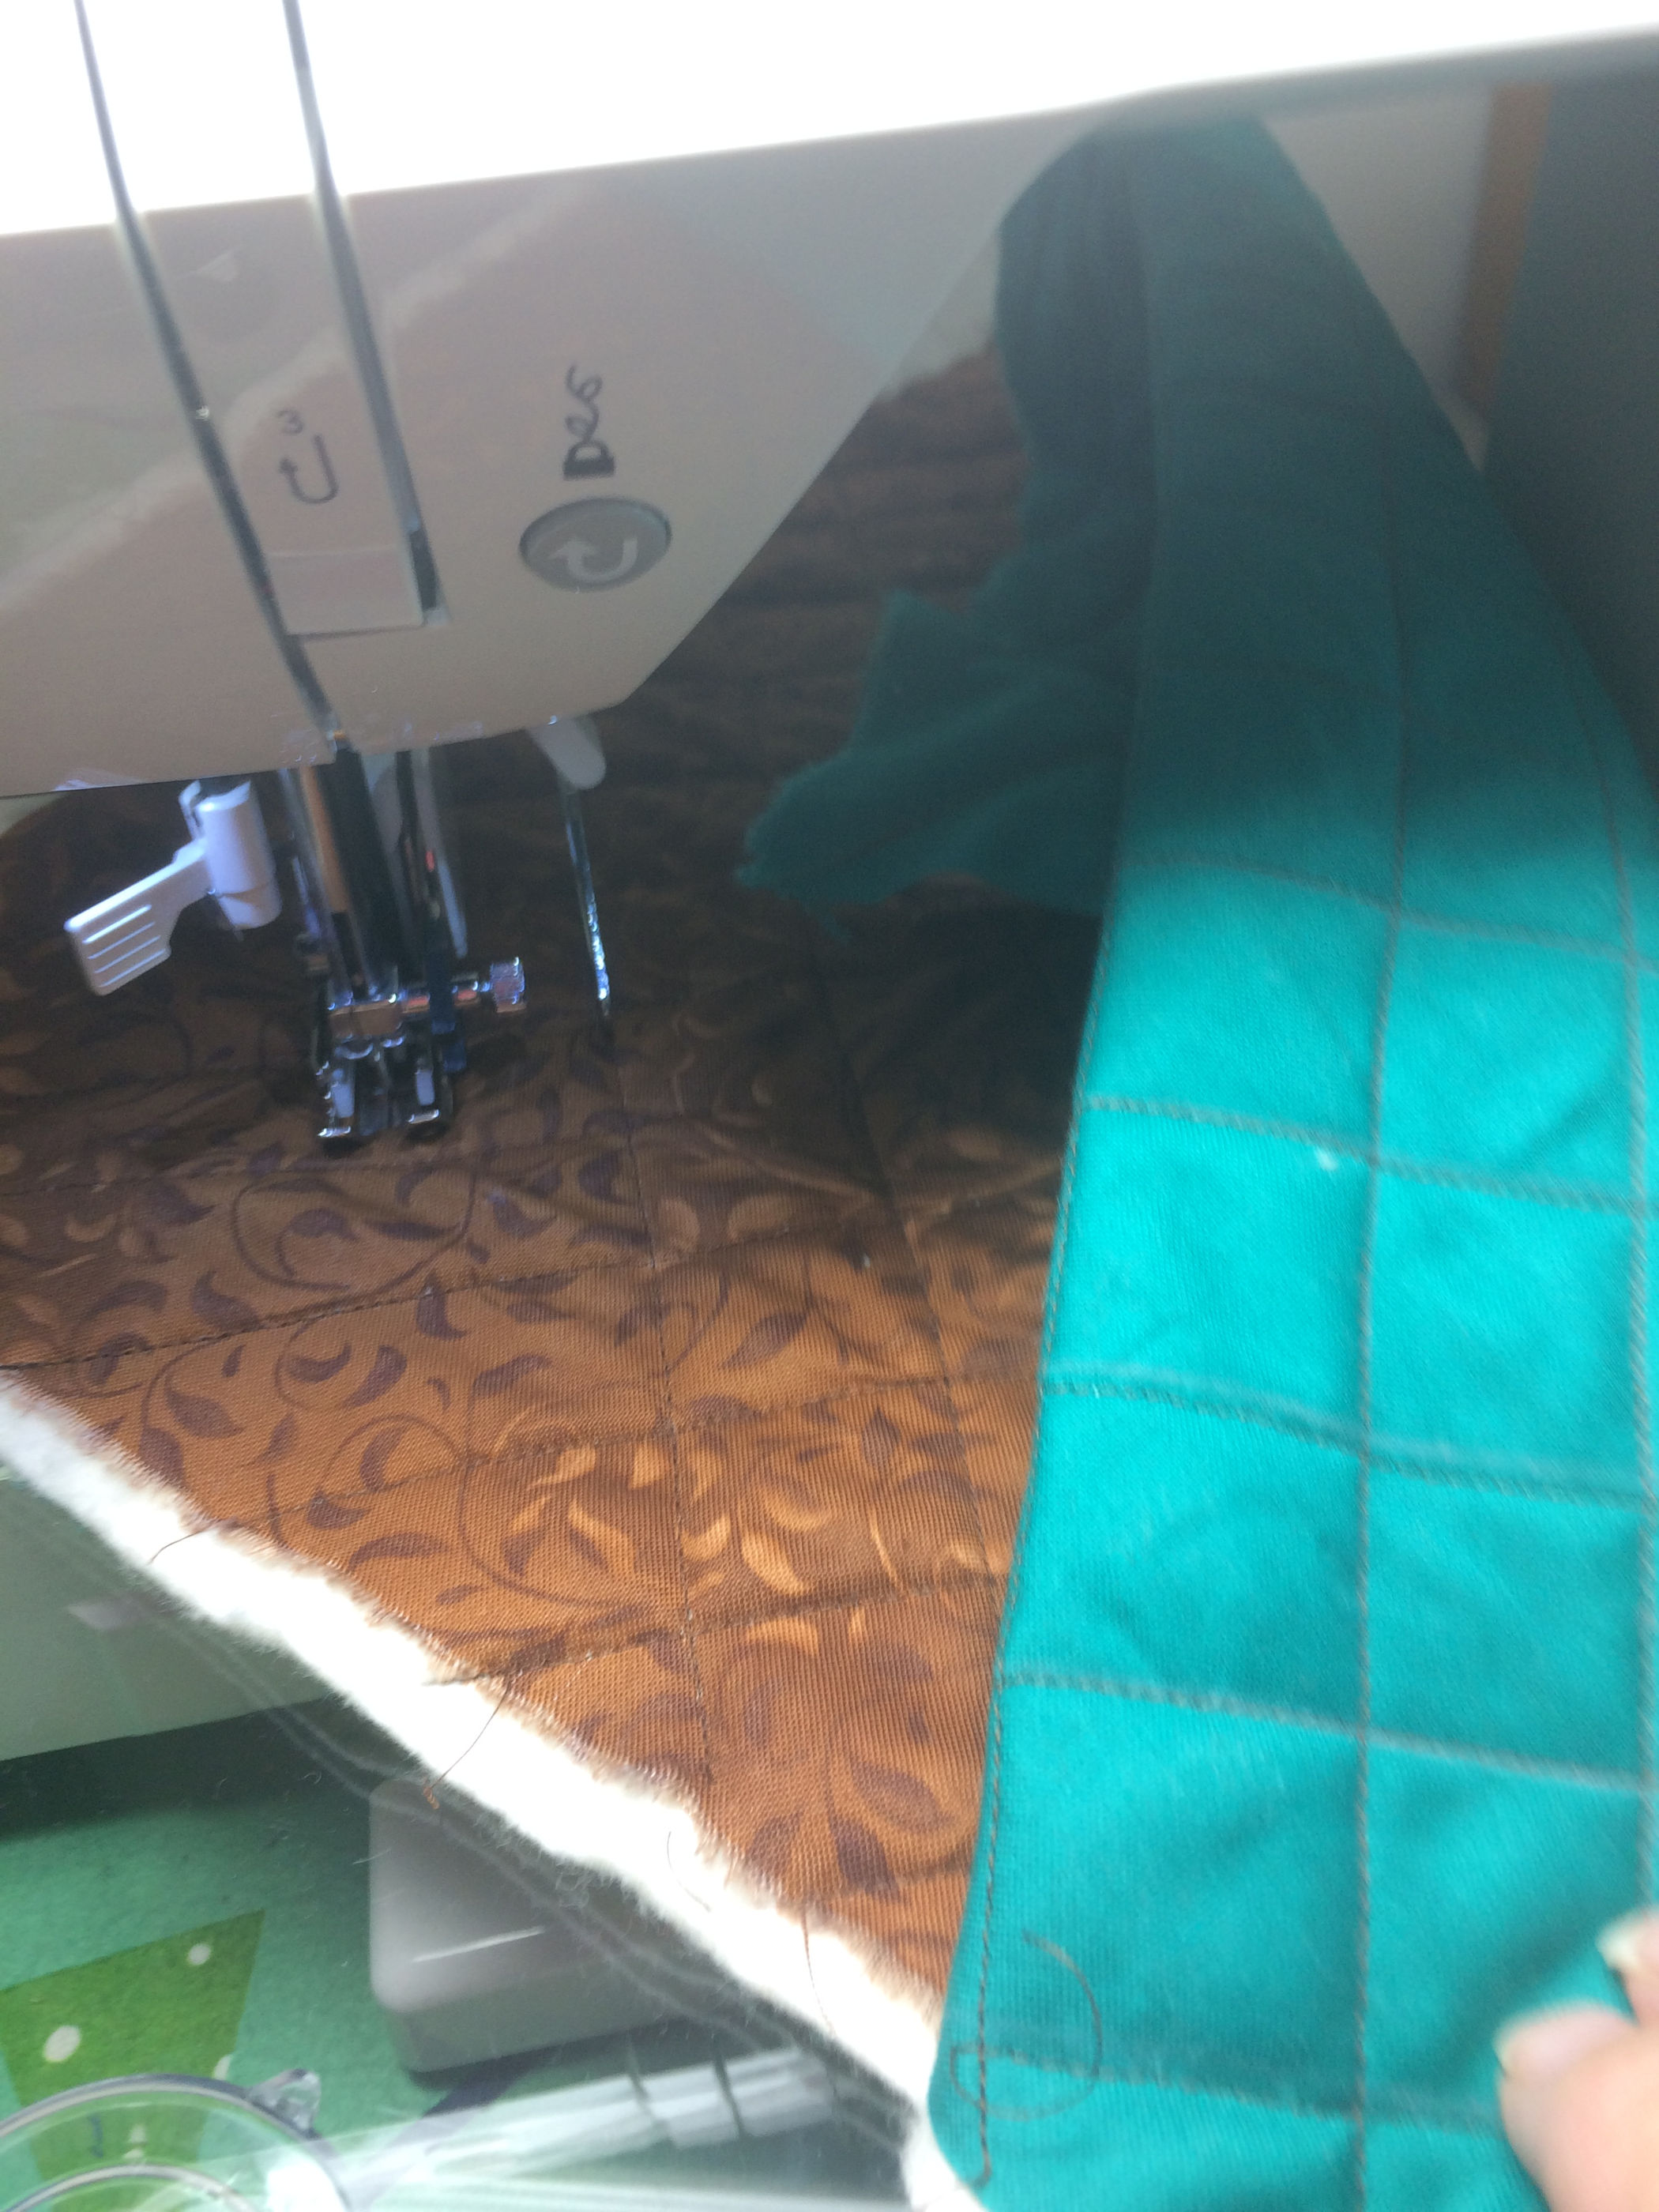
Choices are:
Pro: the flip of the sandwich on every other parallel line gives me the chance to check that the “just sewn” line has not puckered either side of the fabric. |
 A few things to point out:
Quilting is not a race. Stitch slowly.
.
|

Pressure feet:
 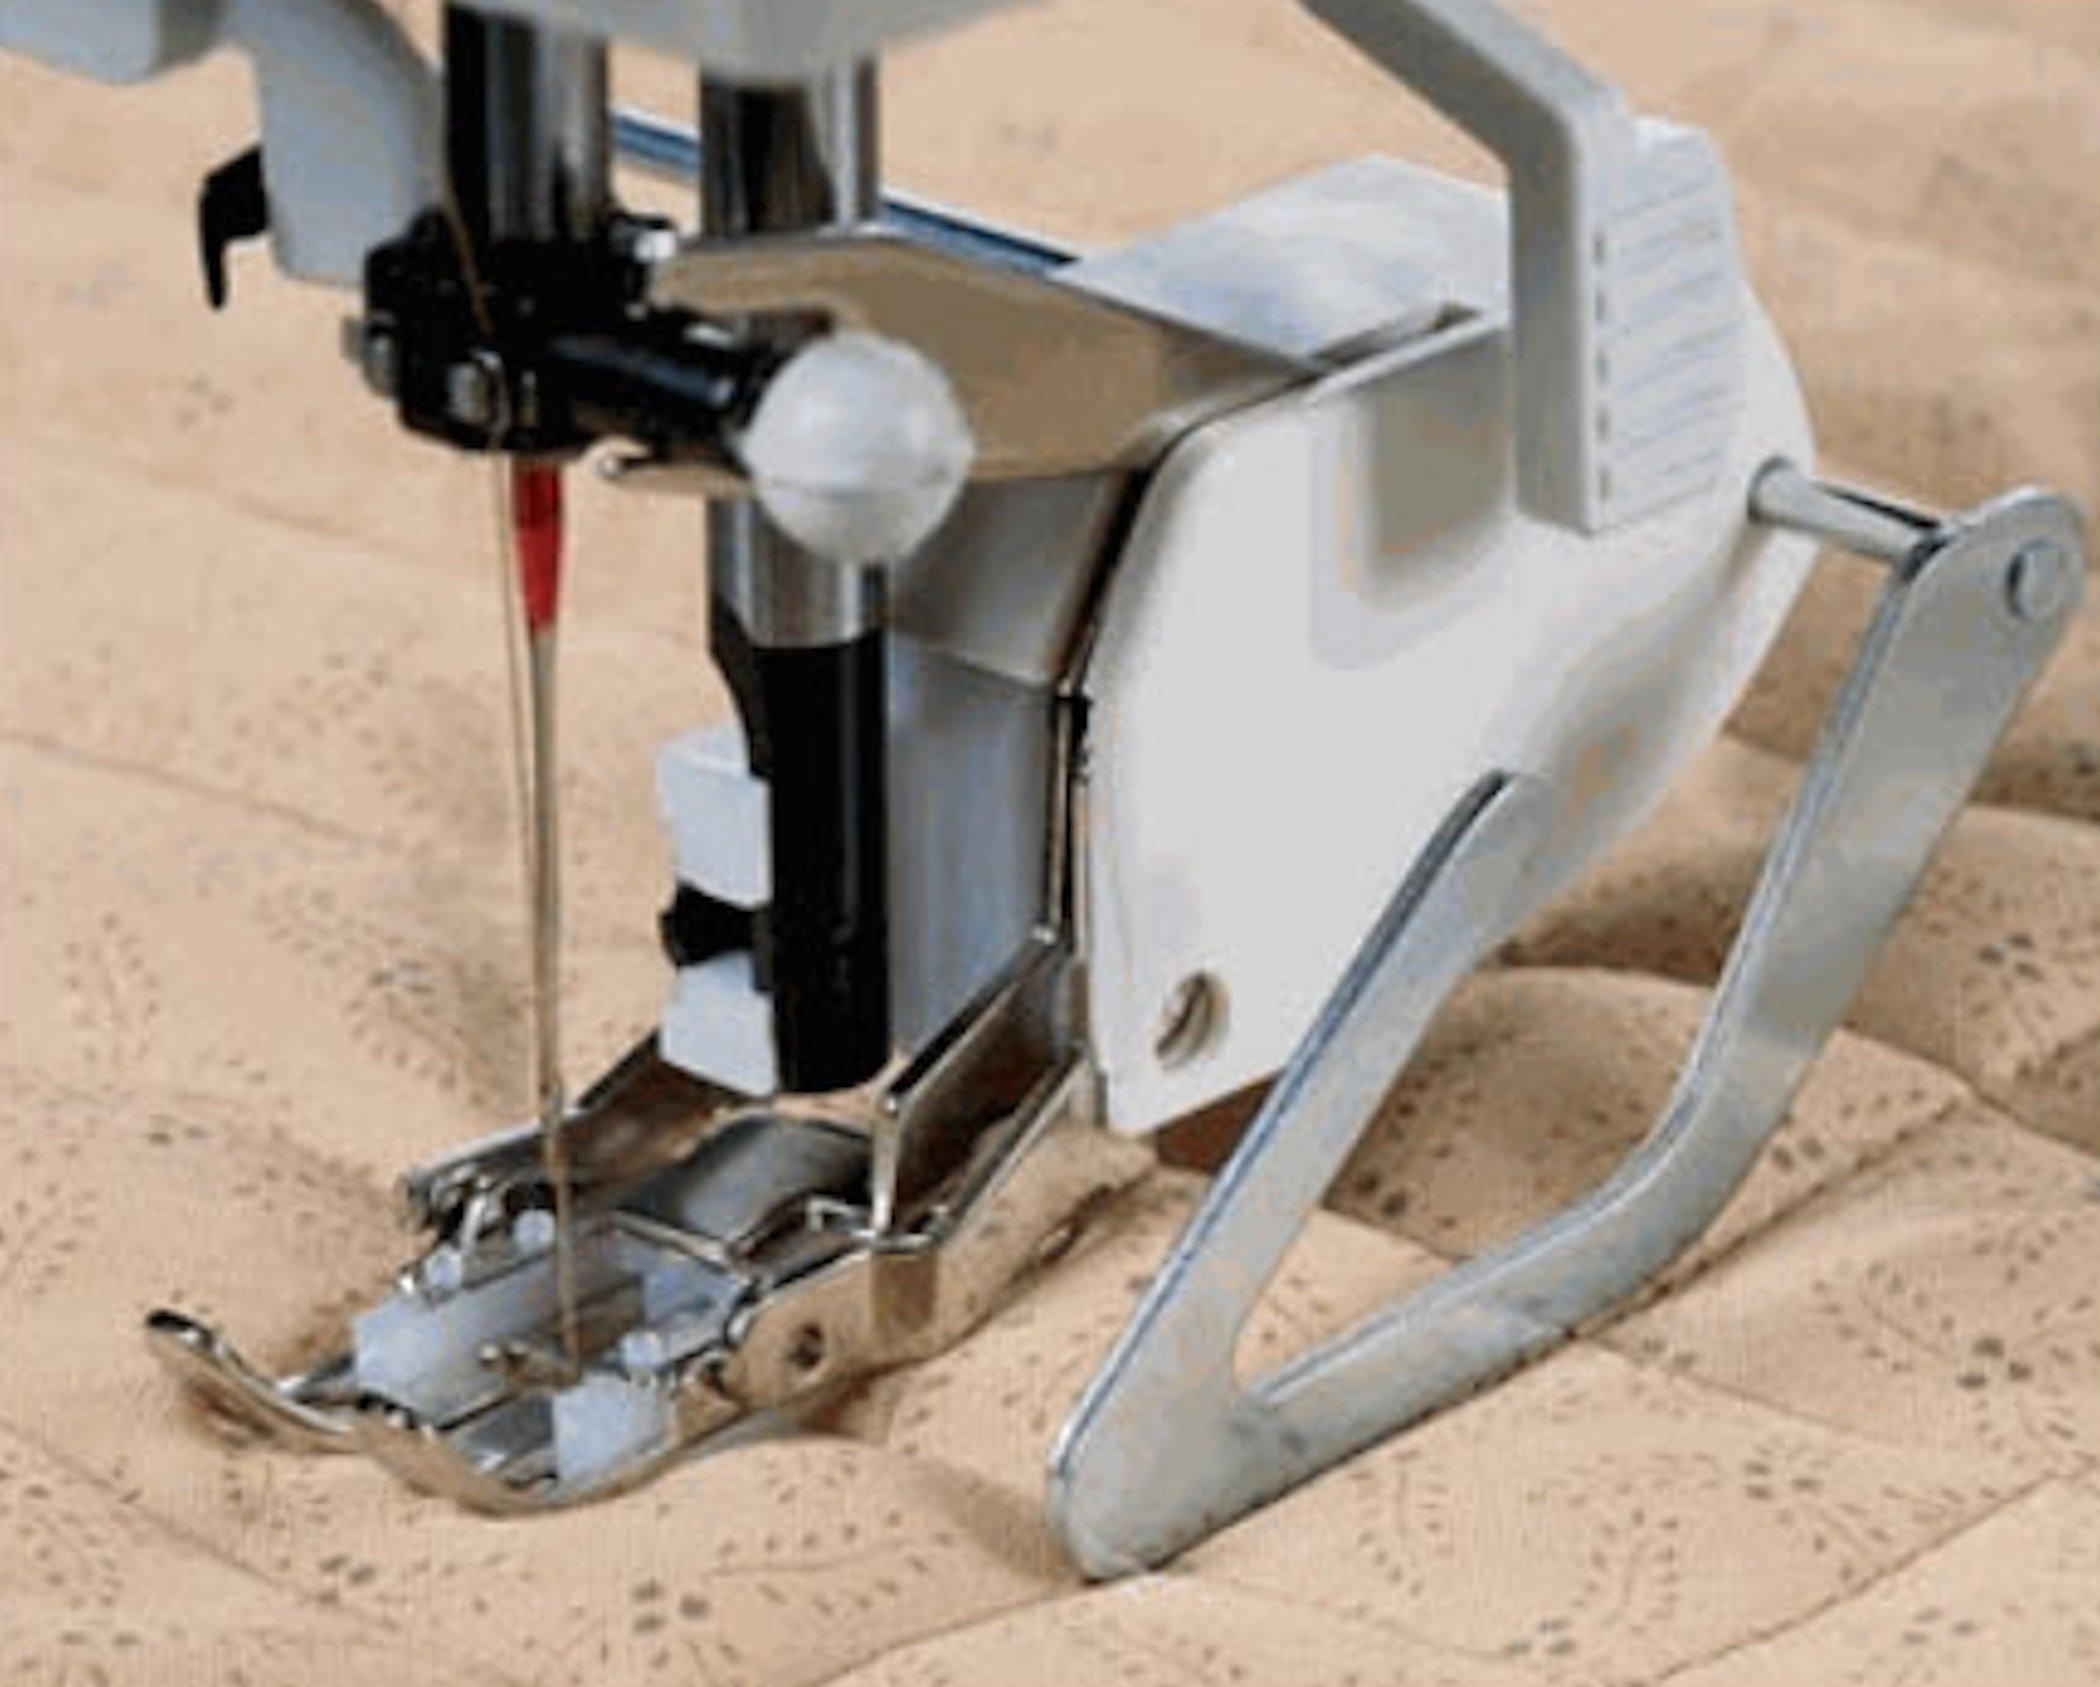 The first shown pressure foot has a clear acrylic area so I can view my chalk marked lines. The walking foot is an odd looking pressure foot but (1) I can use a rod guide with it and (2) it has feed dogs that work in sync with your lower feed dogs. With a standard foot, as in the right photo, as you quilt your sandwich moves through “pulled” by the machine’s lower feed dogs and your standard foot rests atop your quilt. Unless you baste or well-pin your sandwich your top fabric (of the sandwich) will probably move, “walk” as you stitch.. With the walking foot, there are feed dogs on the bottom of the walking foot that work in sync with the lower feed dogs of the machine. These lower and upper feed dogs move the sandwich evenly through as you stitch. If you quilt or use knit and silk fabrics in your machine sewn projects you probably already have a walking foot. When first using this pressure foot, I viewed several web articles and youtube video’s that showed how to attach the walking foot and how to use it. My go to web site for this is Leah Day’s where I repeatedly viewed her blog articles and tutorial videos. https://leahday.com/pages/machine-quilt-gridlines-walking-foot (near last two minutes of this video Leah discusses bringing bobbin thread to the top). I purchased this walking foot from www.singeronline.com. In the comment section of the order form I entered that I wanted a walking foot with rod guide for a Singer Confidence 7640Q. |