There are several edges that I have seen on Hardanger worked pieces: turned hem, fringed and buttonhole. I mainly finished my worked Hardanger designs with a buttonhole worked edge so that I can trim off excess fabric.
This stitch edge can be worked in buttonhole stitch (where the needle is worked pointed out towards the edge of the design area) or blanket stitch (where the needle is pointed inwards). And before I get emails about this, I have seen the definitions of buttonhole and blanket exchange in that the needle is pointed opposite to what I wrote.
Whatever way one wants to define the position of the needle (pointed in, pointed out) the buttonhole or blanket stitch is used to form a snuggly worked edge that forms a loop over the fabric edge against which, with a super sharp embroidery scissor, you can closely trimmed off excess fabric (without snagging or cutting stitching threads).
I call the edging stitch that I use, The Buttonhole Edge Stitch. I added the word ‘edge’ to differ it (within my mind) from an embroidery surface buttonhole stitch. Hardanger or surface, the buttonhole stitch is about the same except in surface I use the buttonhole stitch to make lovely curved flowers that I work with a quite bit looser tension than I do Hardanger stitching.

There are numerous styles to a Hardanger buttonhole worked edge. Well worth doing a web search for Hardanger images and see all the wonderful buttonhole edge style that have been created. Also I like to work different style buttonhole edges on my Hardanger designs. These can be viewed by clicking the Available Designs button above in the header.
|
|


I have read blog postings of Hardanger stitchers who like to machine stitch one or two lines on the fabric that will be underneath the to-be-worked buttonhole edge. This might be a good idea if you are unsure of your thread tension or plan to hand wash your finished piece now and then.
Working a buttonhole edge: At first, as I stitched, I headed to the left but then realized, for me, headed to the right gives me a nicer looking line of stitches.
For each stitch, after pulling the thread all the way through, I give the thread 2 or 3 light tugs to settled the loop then go onto the next stitch. This is because you do want each stitch to be uniform in tension and in-line with its neighbor plus a snug loop helps to lock each stitch.
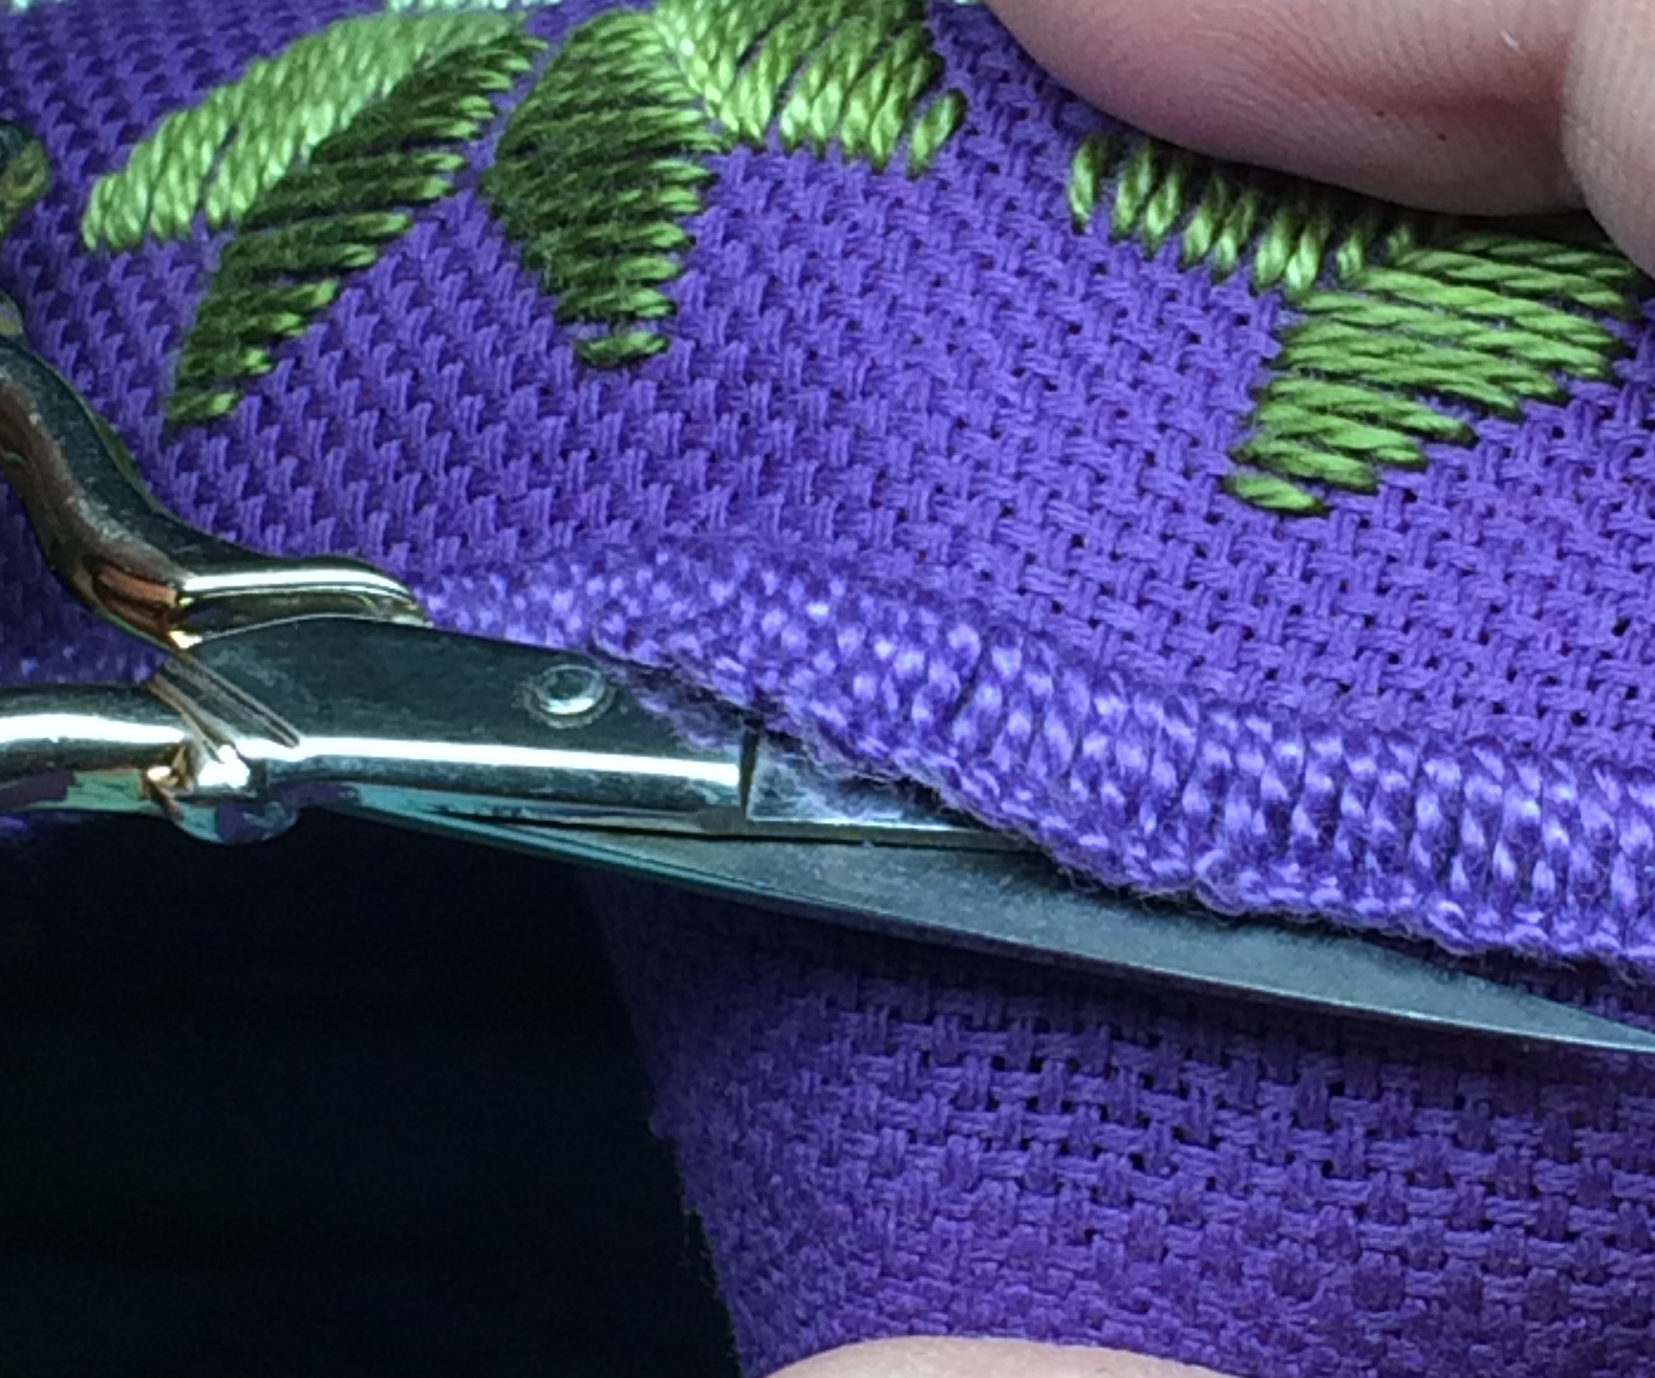 As I mentioned on a previous photo, I had to work several Hardanger projects before I build up the confidence to take a scissor and trim excess fabric from the buttonhole stitched edge. So I can quite understand anyone who hesitates about taking a scissor to their embroidery but once you get the confidence. When you snip be sure to use super sharp bladed embroidery scissors. Click here to view my discussion of scissors. |
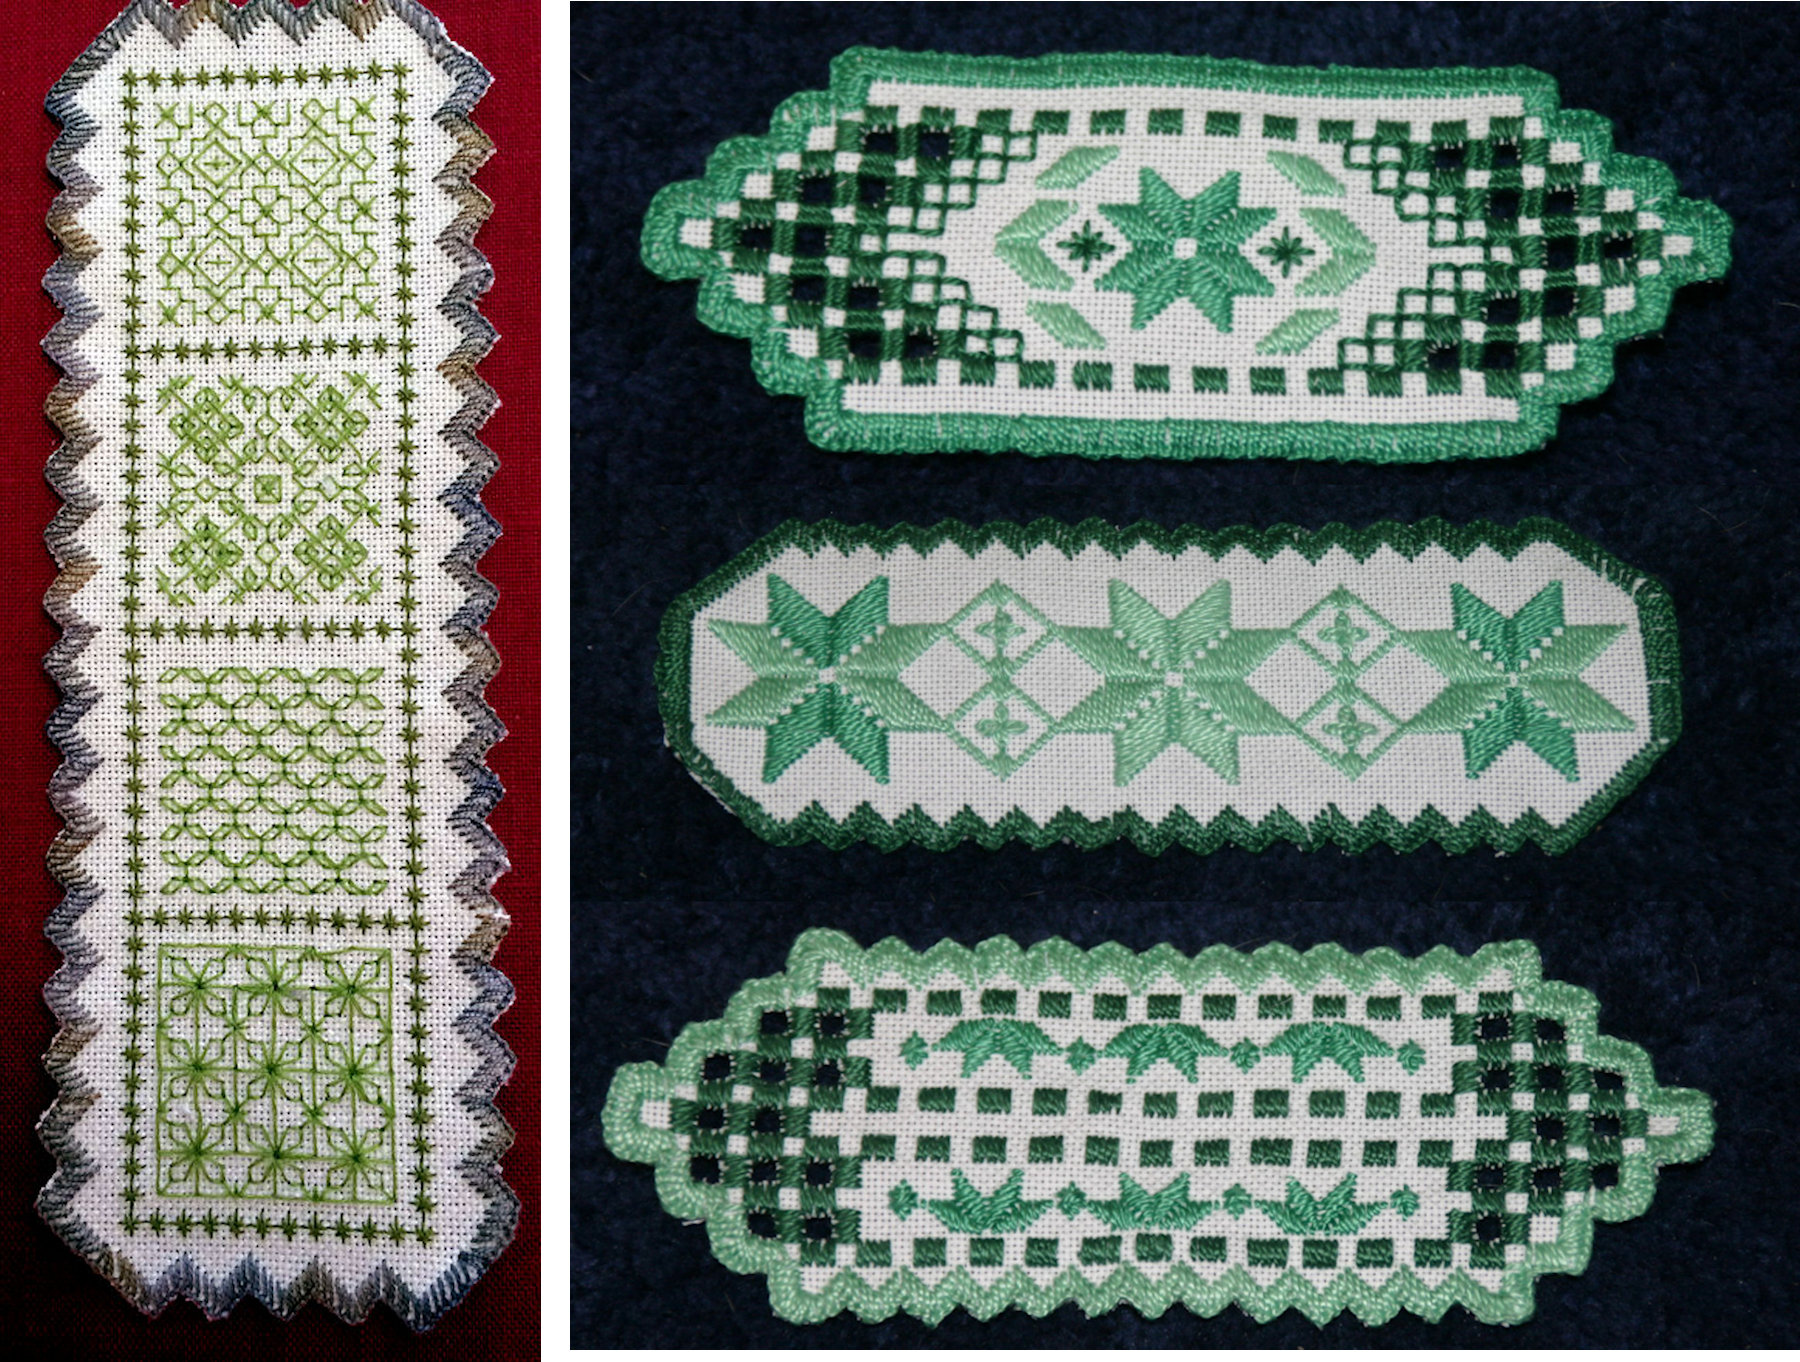
I found working small projects like these, where I had buttonhole edges, gave me a lot of practice and build my confidence. I like to add spots of color about the house by displaying small stitched items on the tops of my cabinets. I have worked several bookmarks using stash threads and fabrics.
The leftmost one was a great way for me to stitch the designs from a blackwork pamphlet that I had purchased a few years ago but never came up with an idea for using the patterns.
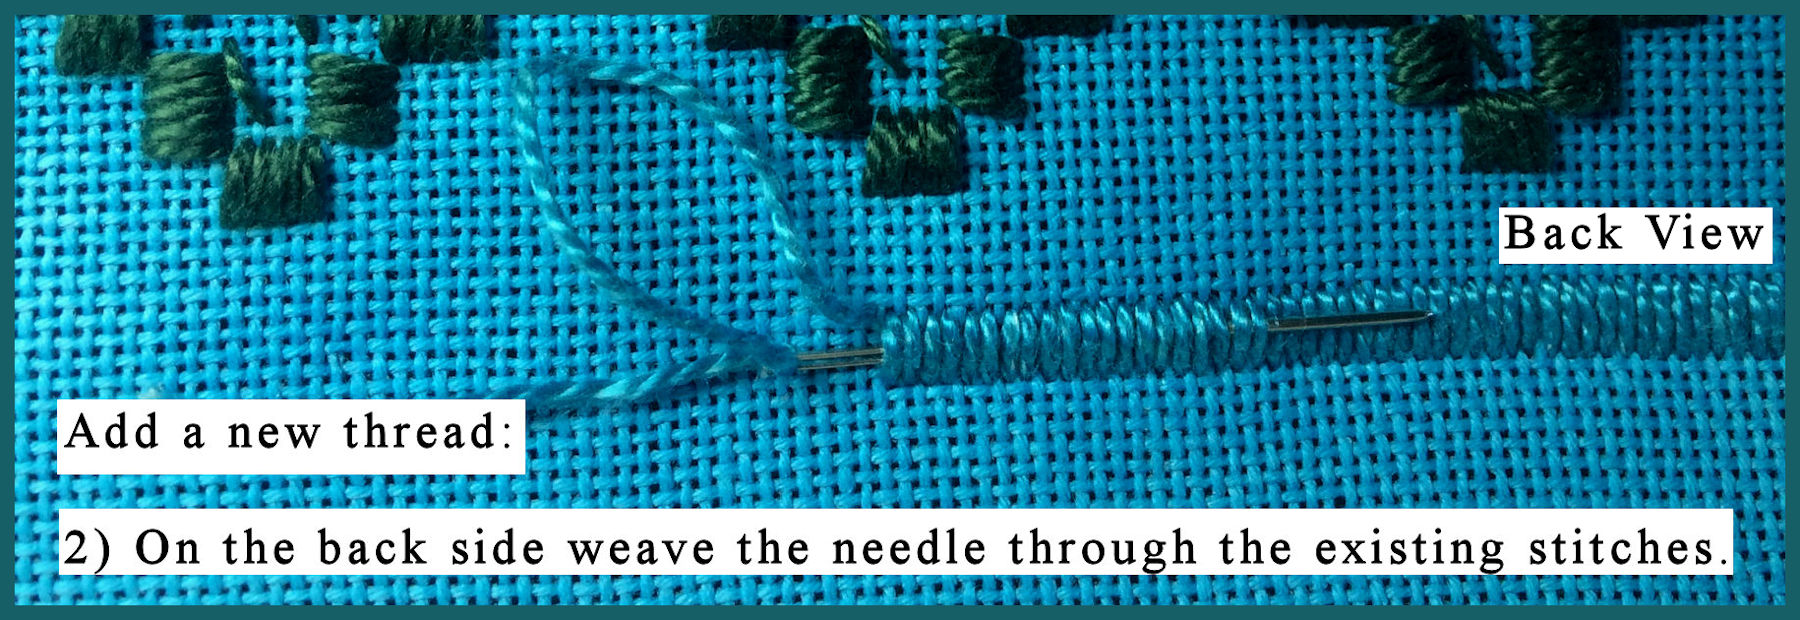
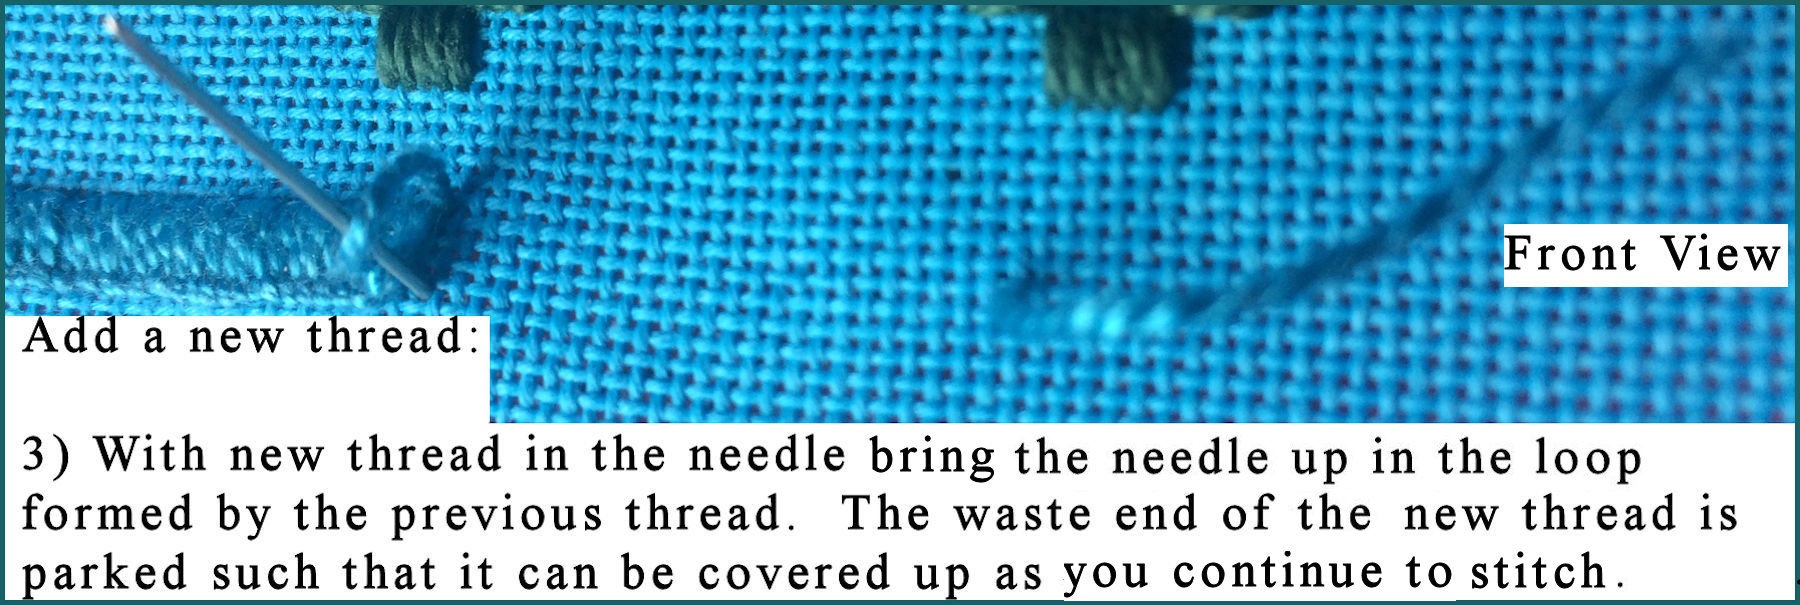
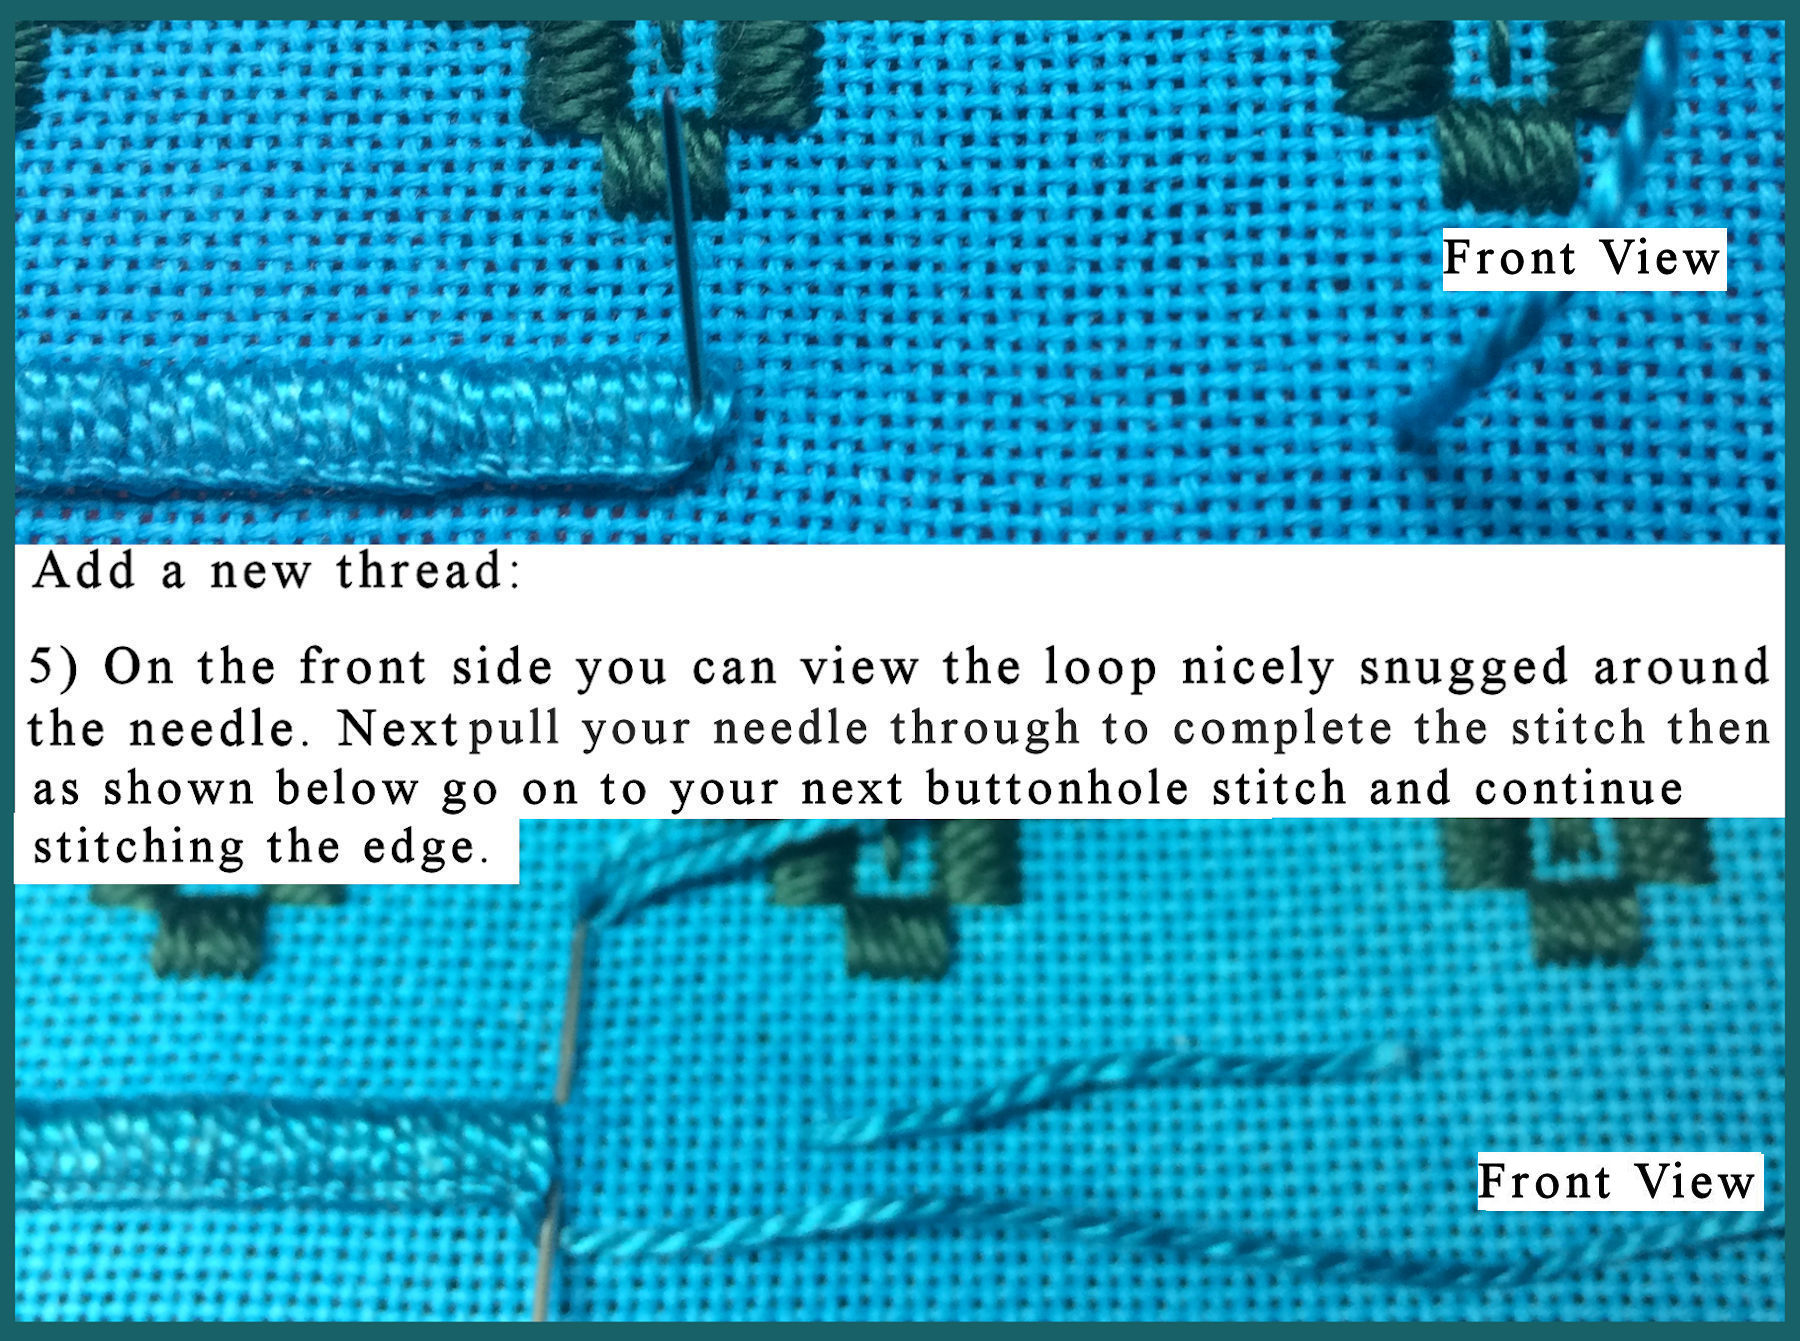
| Two things tripped me up when I first begun stitching buttonhole edges. (1) was starting the first stitch and (2) adding a new thread. So I wrote the below “reminder to myself” as a sort of journal entry that I could refer.
|