My sister likes to work in hand or with a hoop. I like using a lap stand and my fabric tautly tacked onto stretcher bars. Using the lap stand is fine, until I do a project larger than 14-inch square. Currently I am stitching a 18- by 20-inch crewel piece. It is too large for my lap stand but it is tacked onto wood stretcher bars. In either case, able to use the lap stand or not, I find I use the tacks of the stretcher bars for two other purposes then holding the fabric to the wood bars.
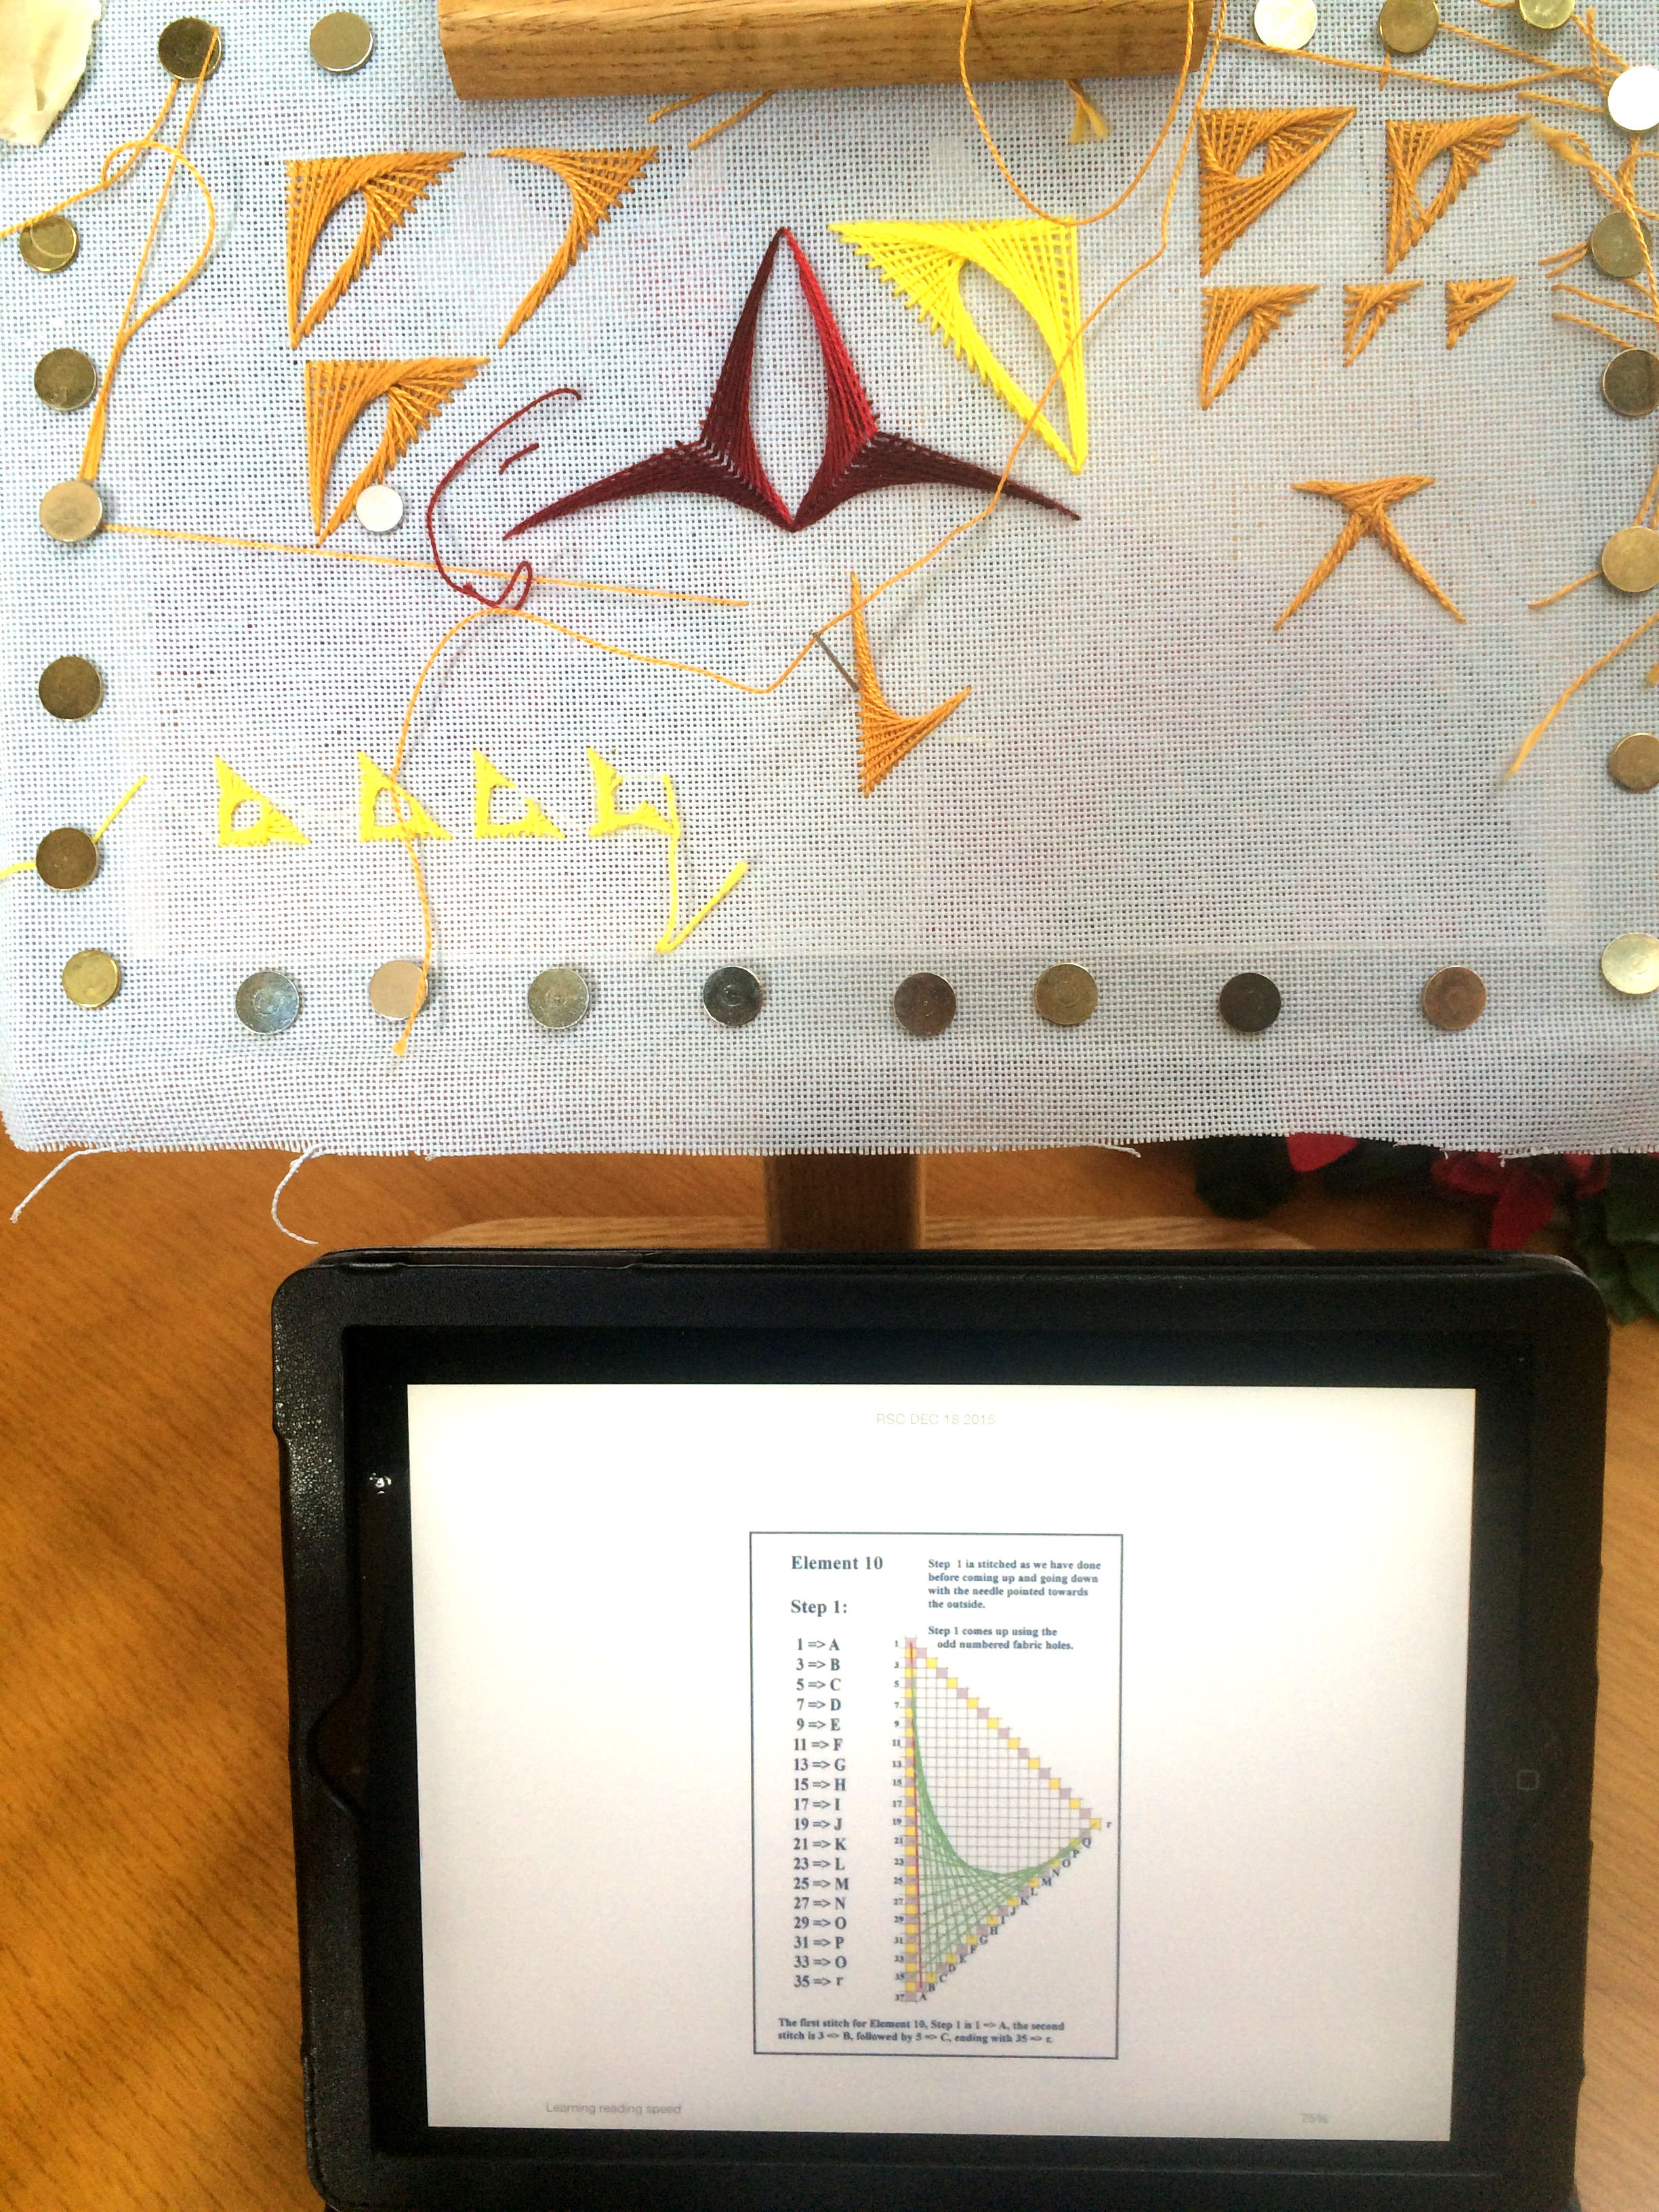
First, I have found the tacks are a great place to wrap the waste end of my thread when I first start using a different stitching thread. In the below photo you can see where I have several ‘beginning ends’ of my stitching threads wrapped around tacks.
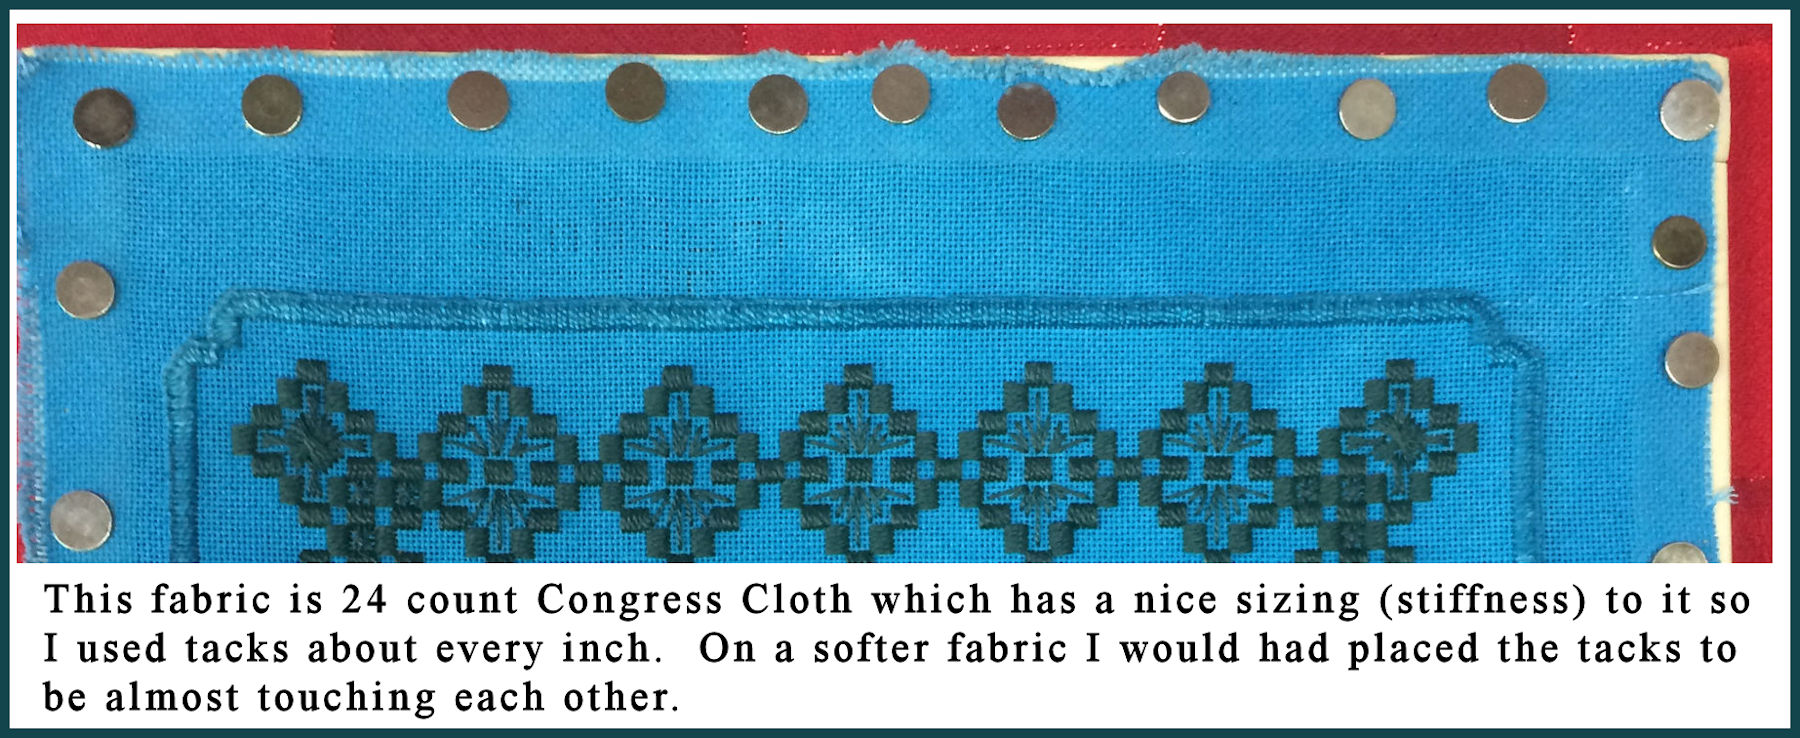
Second, especially when I am working on stiff canvas, I used magnetic discs when I park my needles. If you look right of the center red stitched Rhodes element on the photo you can see the magnetic discs, one on front, one behind the fabric. I seldom work with more than one needle ‘in play’ at a time, but when I do need to have thread through a second needle I will split the magnetic discs apart and stick each of magnetic disc on their own tack top and placed my threaded needles there, out of the way.
This photo of my doodle canvas and iPad was taken for my blog entry about checking your work (to ensure you are on pattern) but it is a good photo to show the fabric tautly tacked onto stretcher bars.

Stretcher bars:
Edmunds wood stretcher bars come in two thickness: 1/2 and 3/4 inch.For the 6-inch and shorter I like the 1/2-inch ones. For longer lengths ones I purchased the 3/4-inch. A write-up blurb on these bars states:
Manufactured from soft pine with eased edges, they eliminate the need to block your work. Simply combine any two sizes to form the exact size frame for your project. The stretcher bars eliminate movement and keep your work taut and clean. Sold by the pair – two pair make a frame.
Well, that’s all isn’t quite all true. They do not always eliminate the need to block your work. That depends on if you keep the frame squared as you work, if you don’t rest your hand on the fabric (pressing against the fabric can stretch it) and another factor would be your stitching tension. If you are a bit tight as you stitch you can pull your worked piece askew. And most important is that you tack your fabric correctly onto the wood frames.
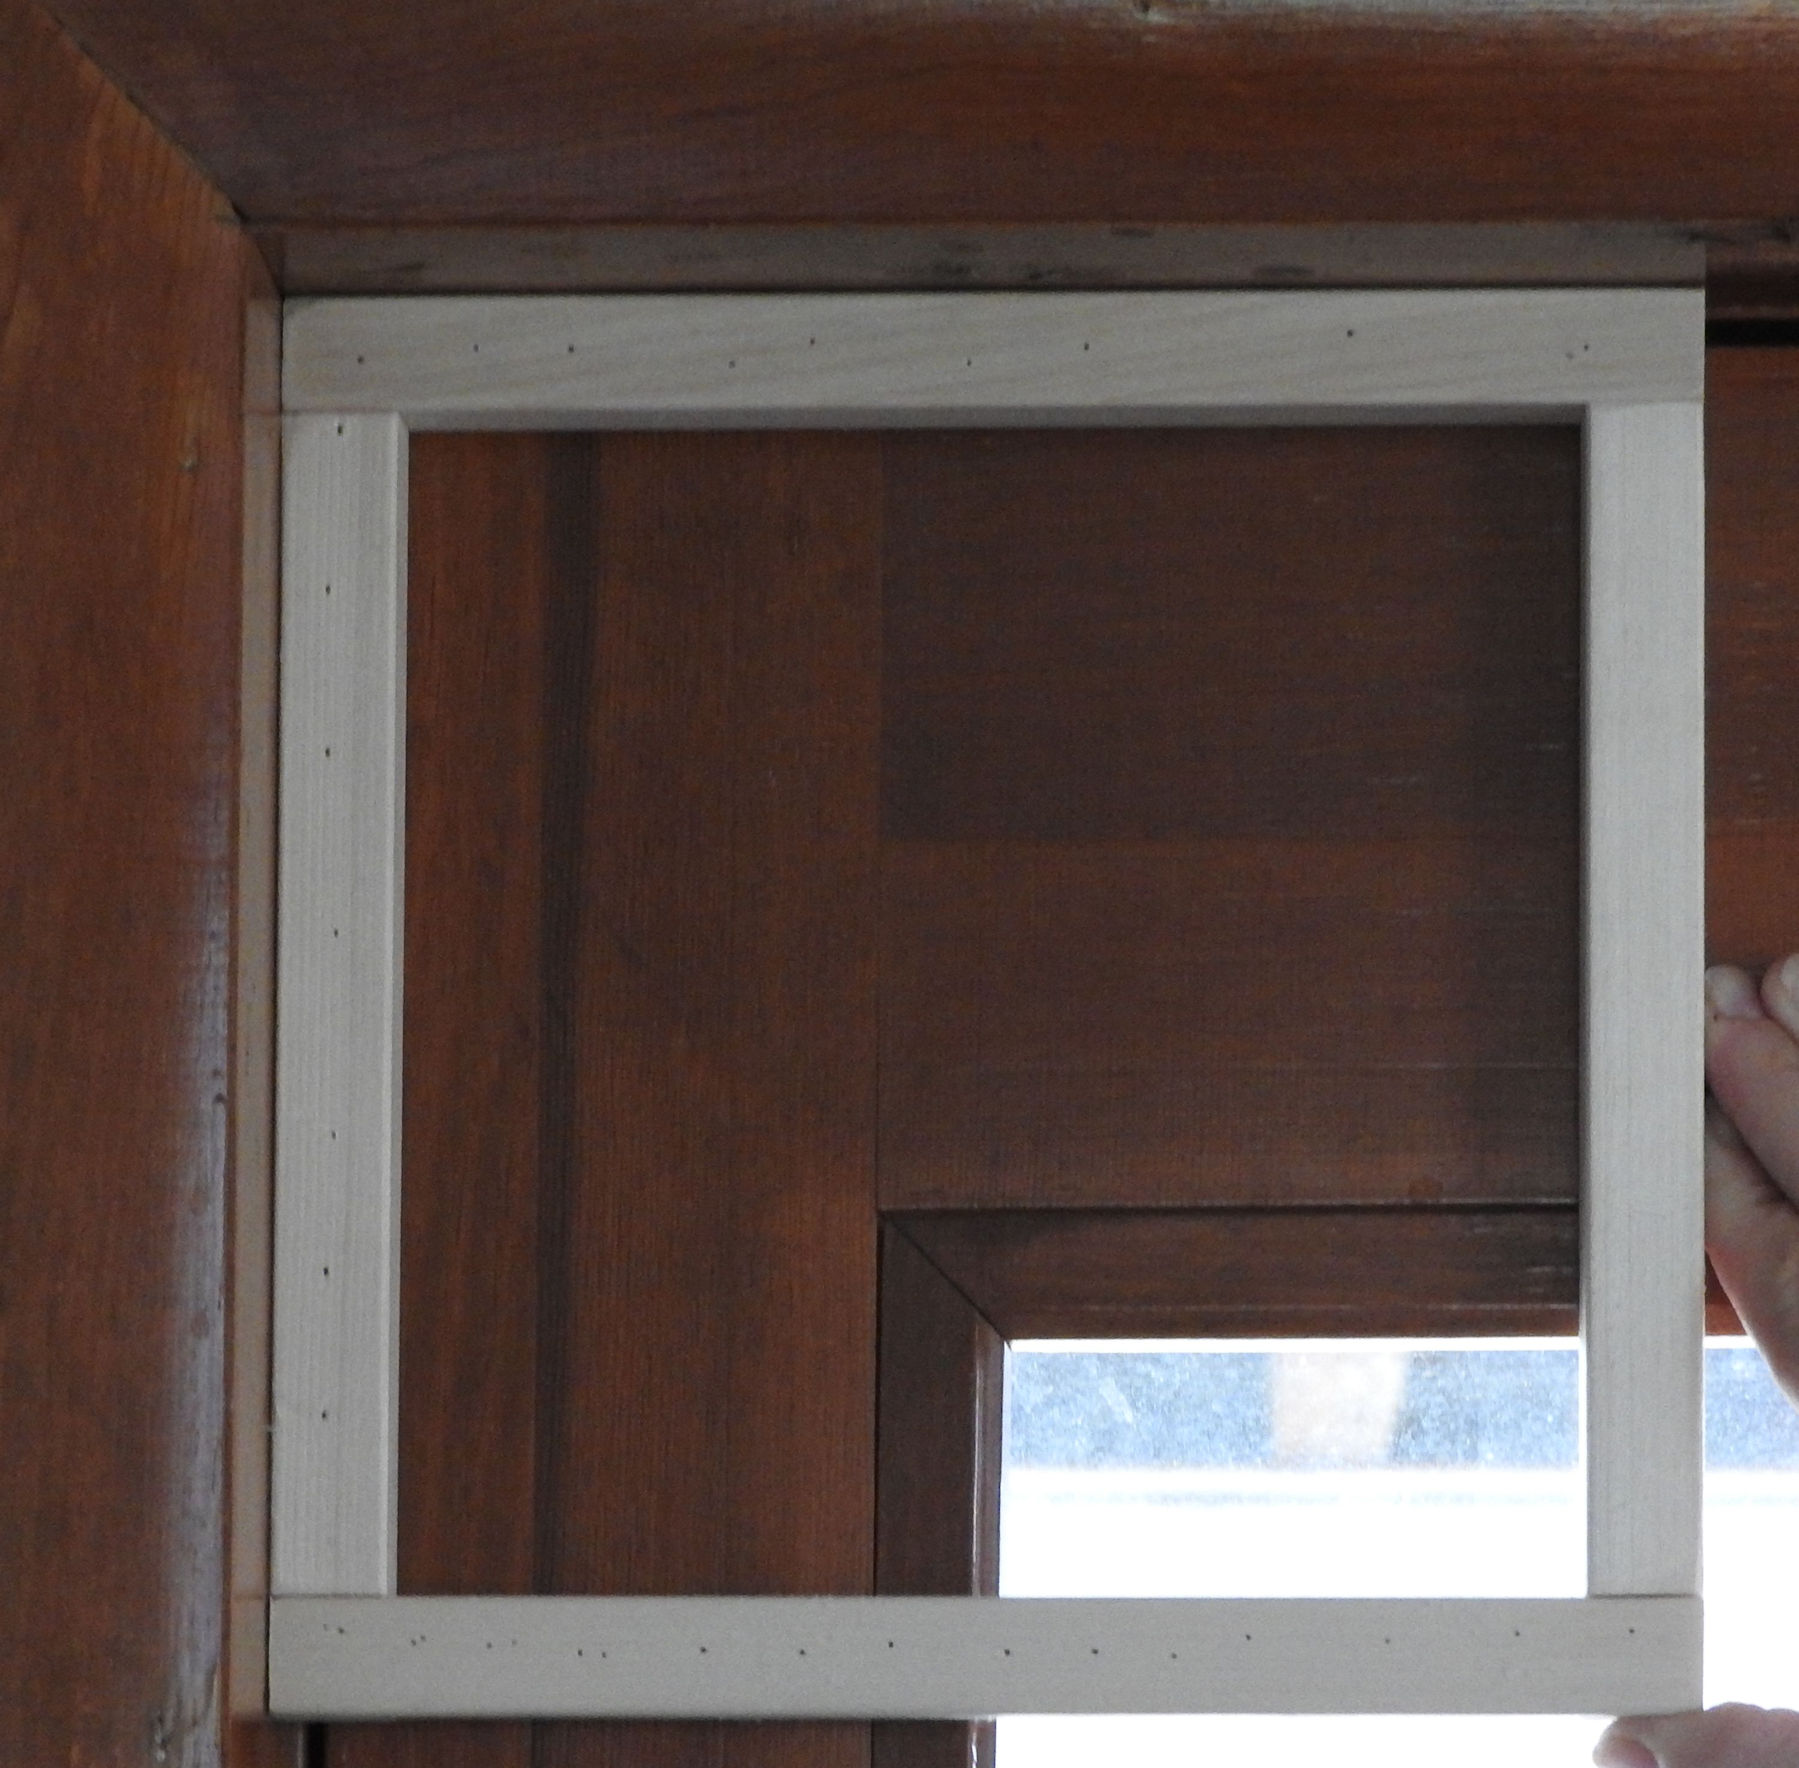
After I put 2 pairs of stretcher bars together to create a frame I next gently tap the ends with a wood mallet to settle the corners nice and snug.
Next I head for a doorway and, pushing each corner of the frame into the doorway’s top corner, I check that the frame is square.
Before tacking your fabric piece onto the frame make sure the fabric is squared by making long running stitches straight down a column or row of fabric holes on each side of the rectangular work area for the design. I put those long running stitches where the tacks will go through the fabric. Then I use a carpenter’s steel framing square (flat, L shaped ruler tool used for measuring cuts on wood) to determine whether the area is truly rectangular. If I find that the work fabric is skewed, I start over on a different work fabric.