Kloster Blocks

Ruby Rosette

Kloster blocks

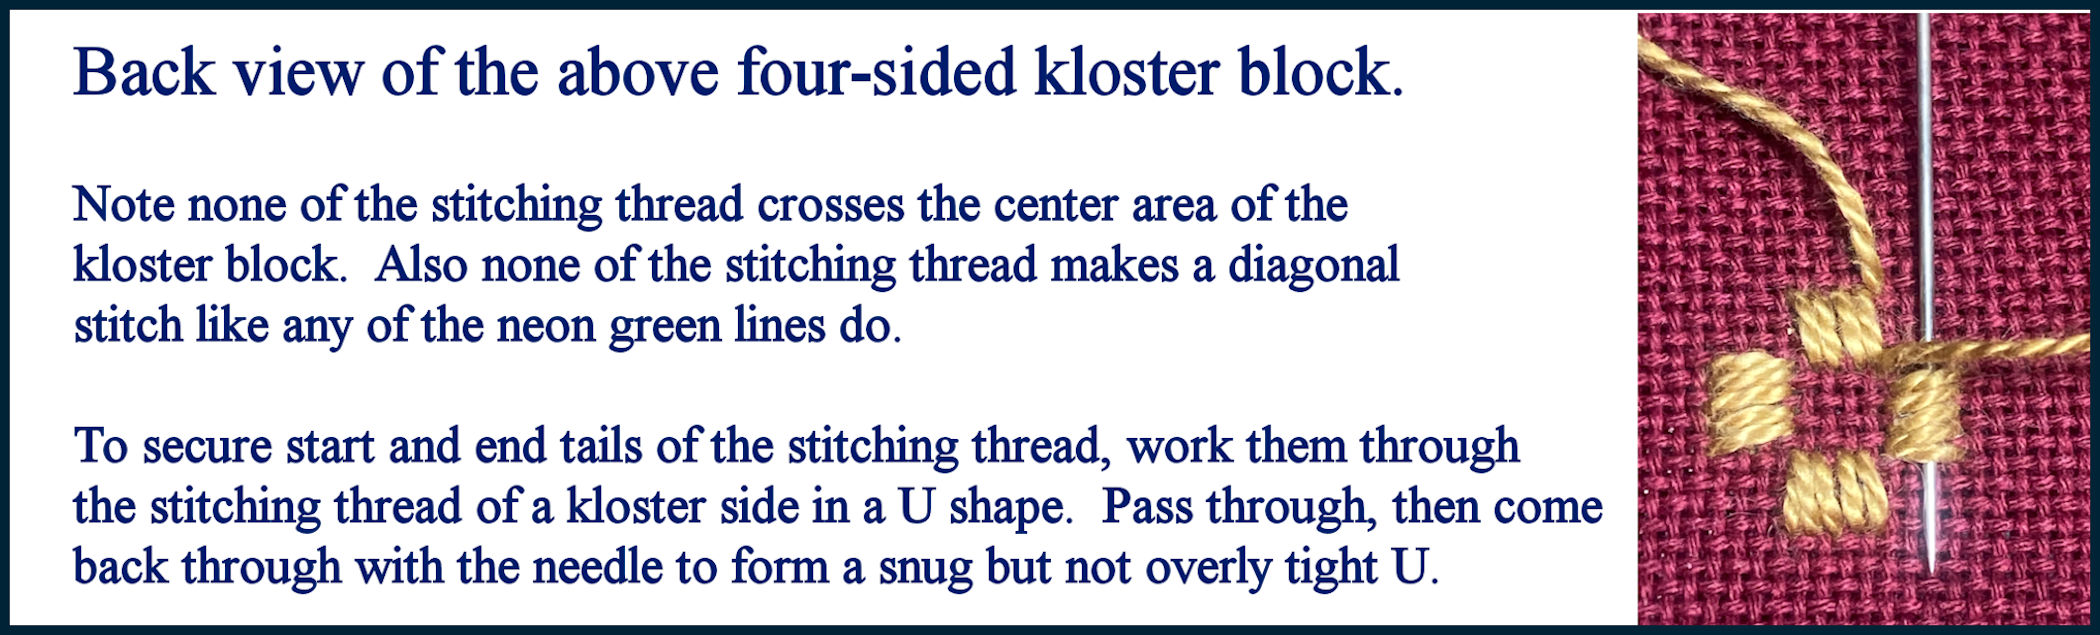
Traditional hardanger embroidery is characterized by hardanger satin stitch blocks (kloster blocks) and hardanger satin stitches formed into geometric designs.  Within the kloster blocks the cutting and withdrawal of threads creates grid(s) of fabric threads which normally are embellished with needle weaving and filling stitches.

In order to be a kloster block:
– each stitch is a hardanger satin stitch
– adjoining sides are perpendicular and must share a common corner fabric hole
– behind the fabric no stitching thread crosses over an open (unworked) area

In order to be a kloster block for openwork each side has a mirror-image opposite side.

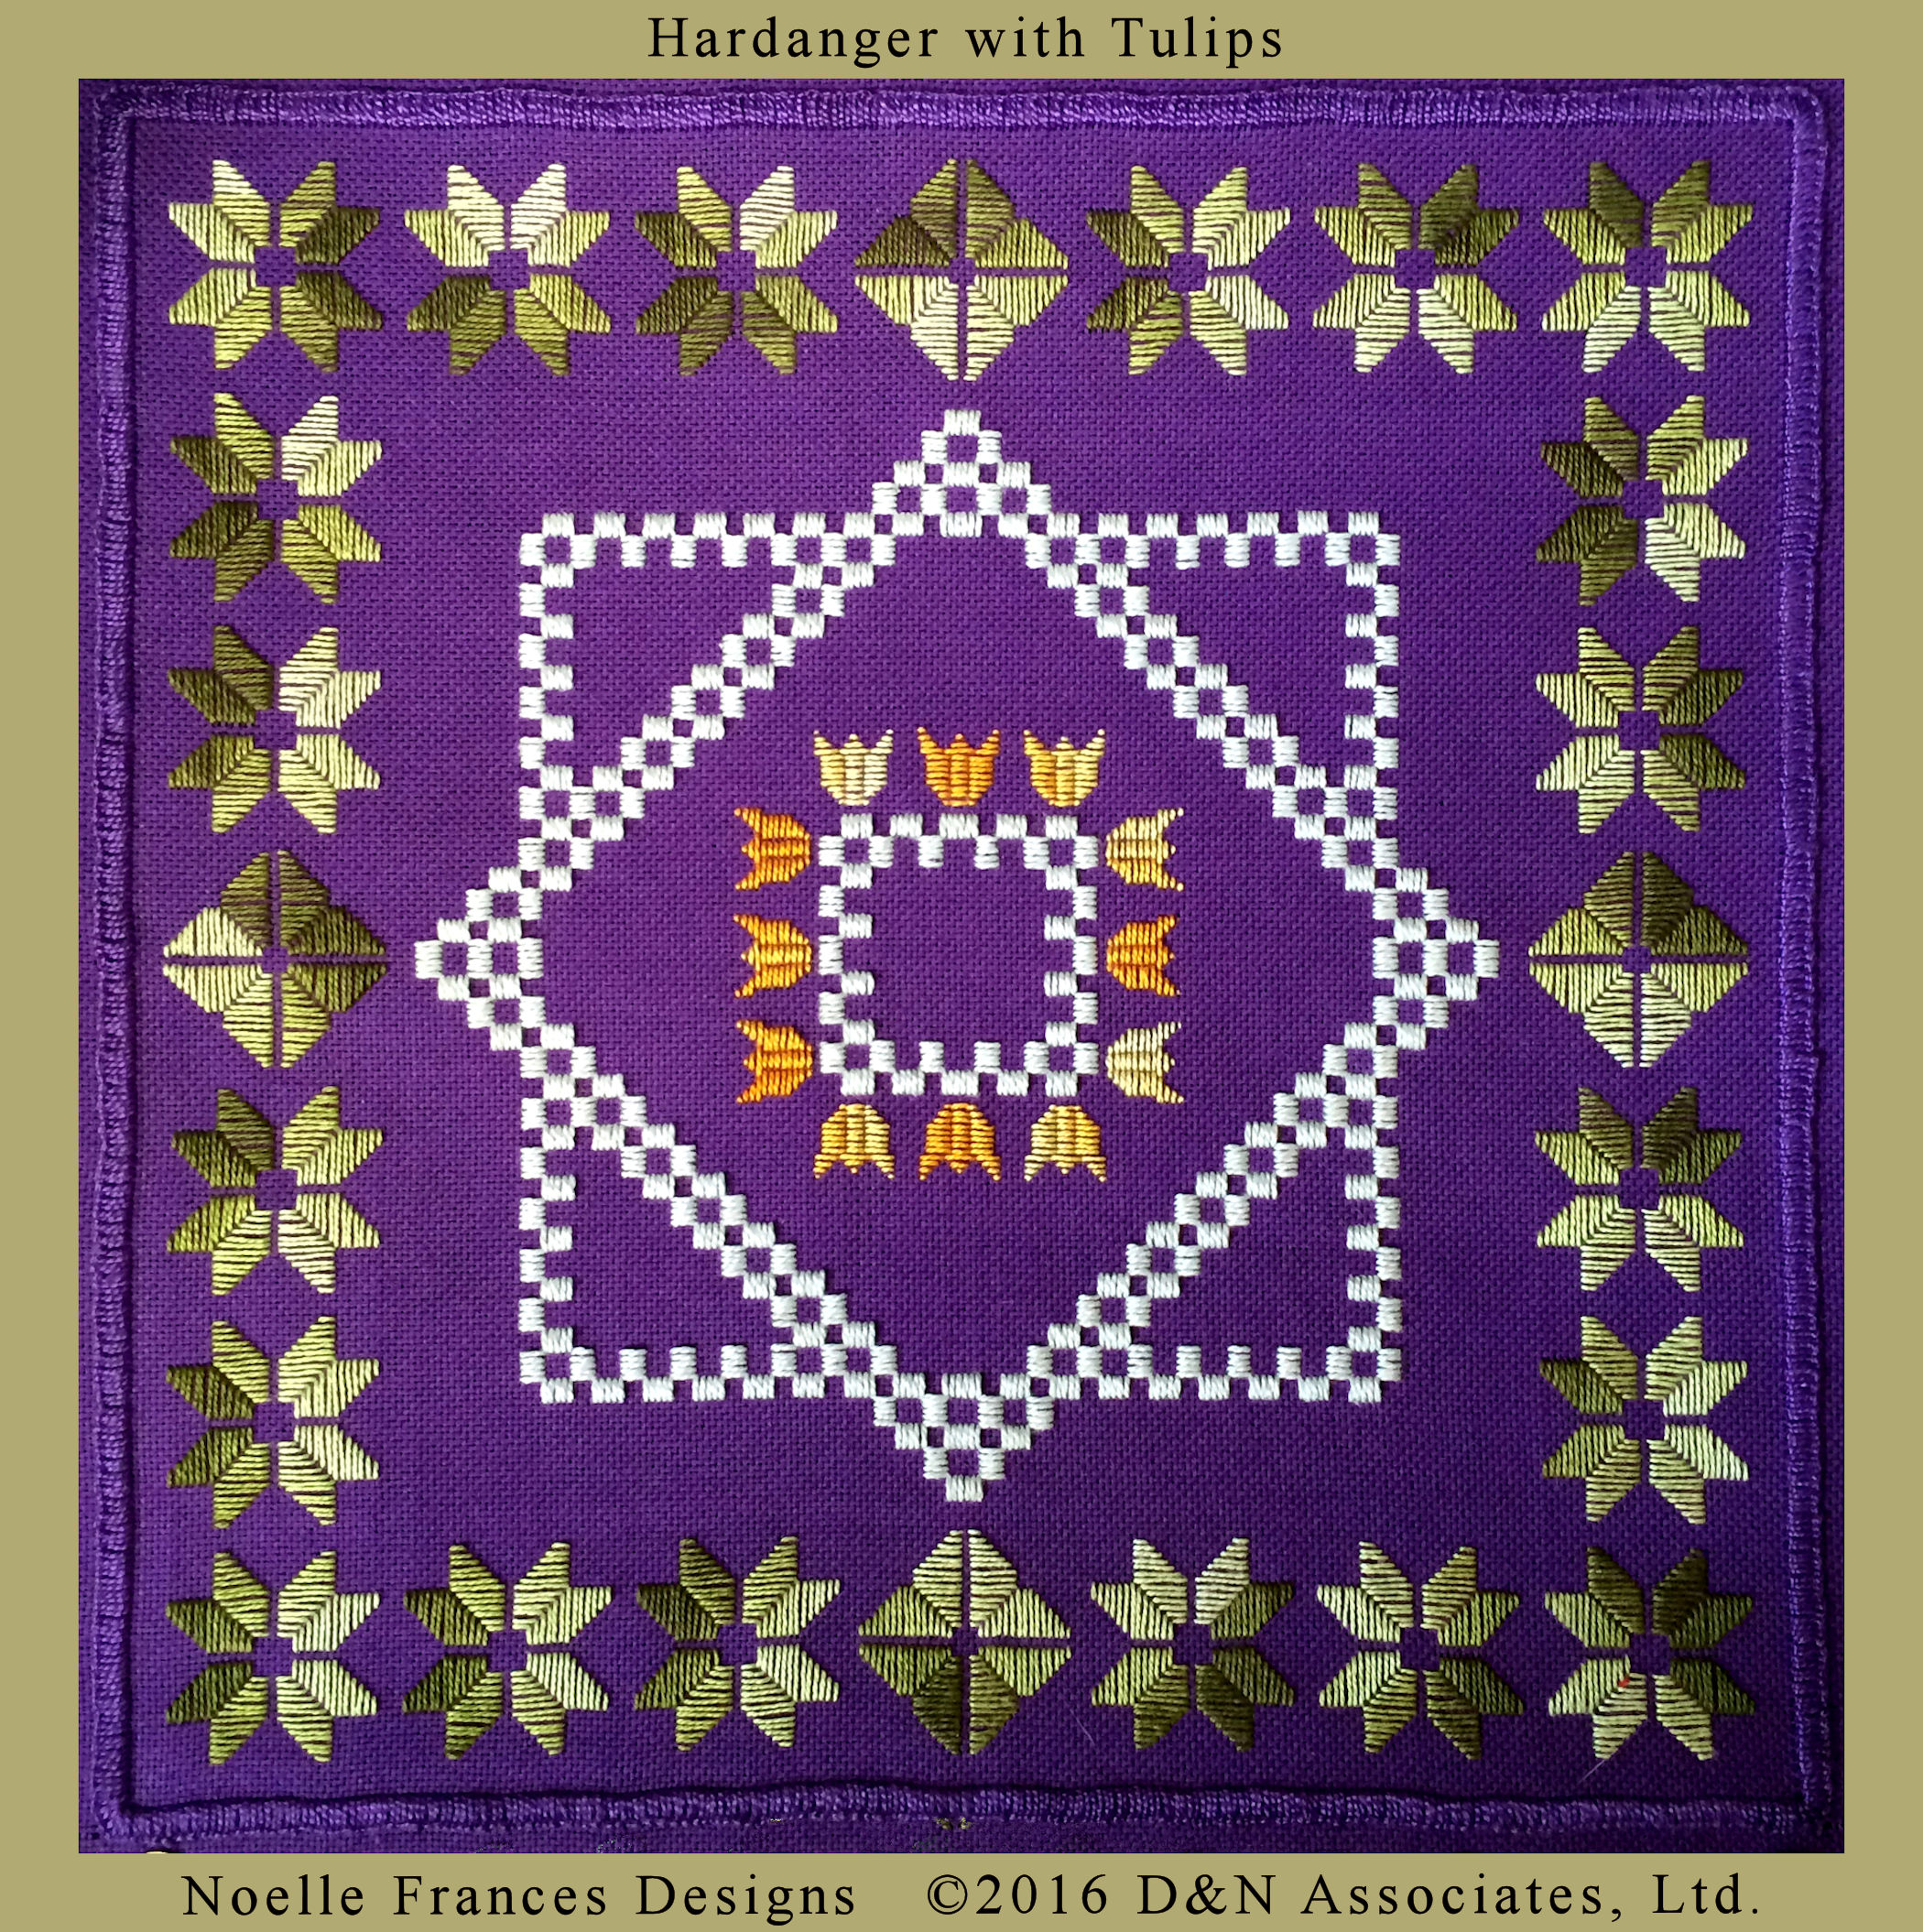
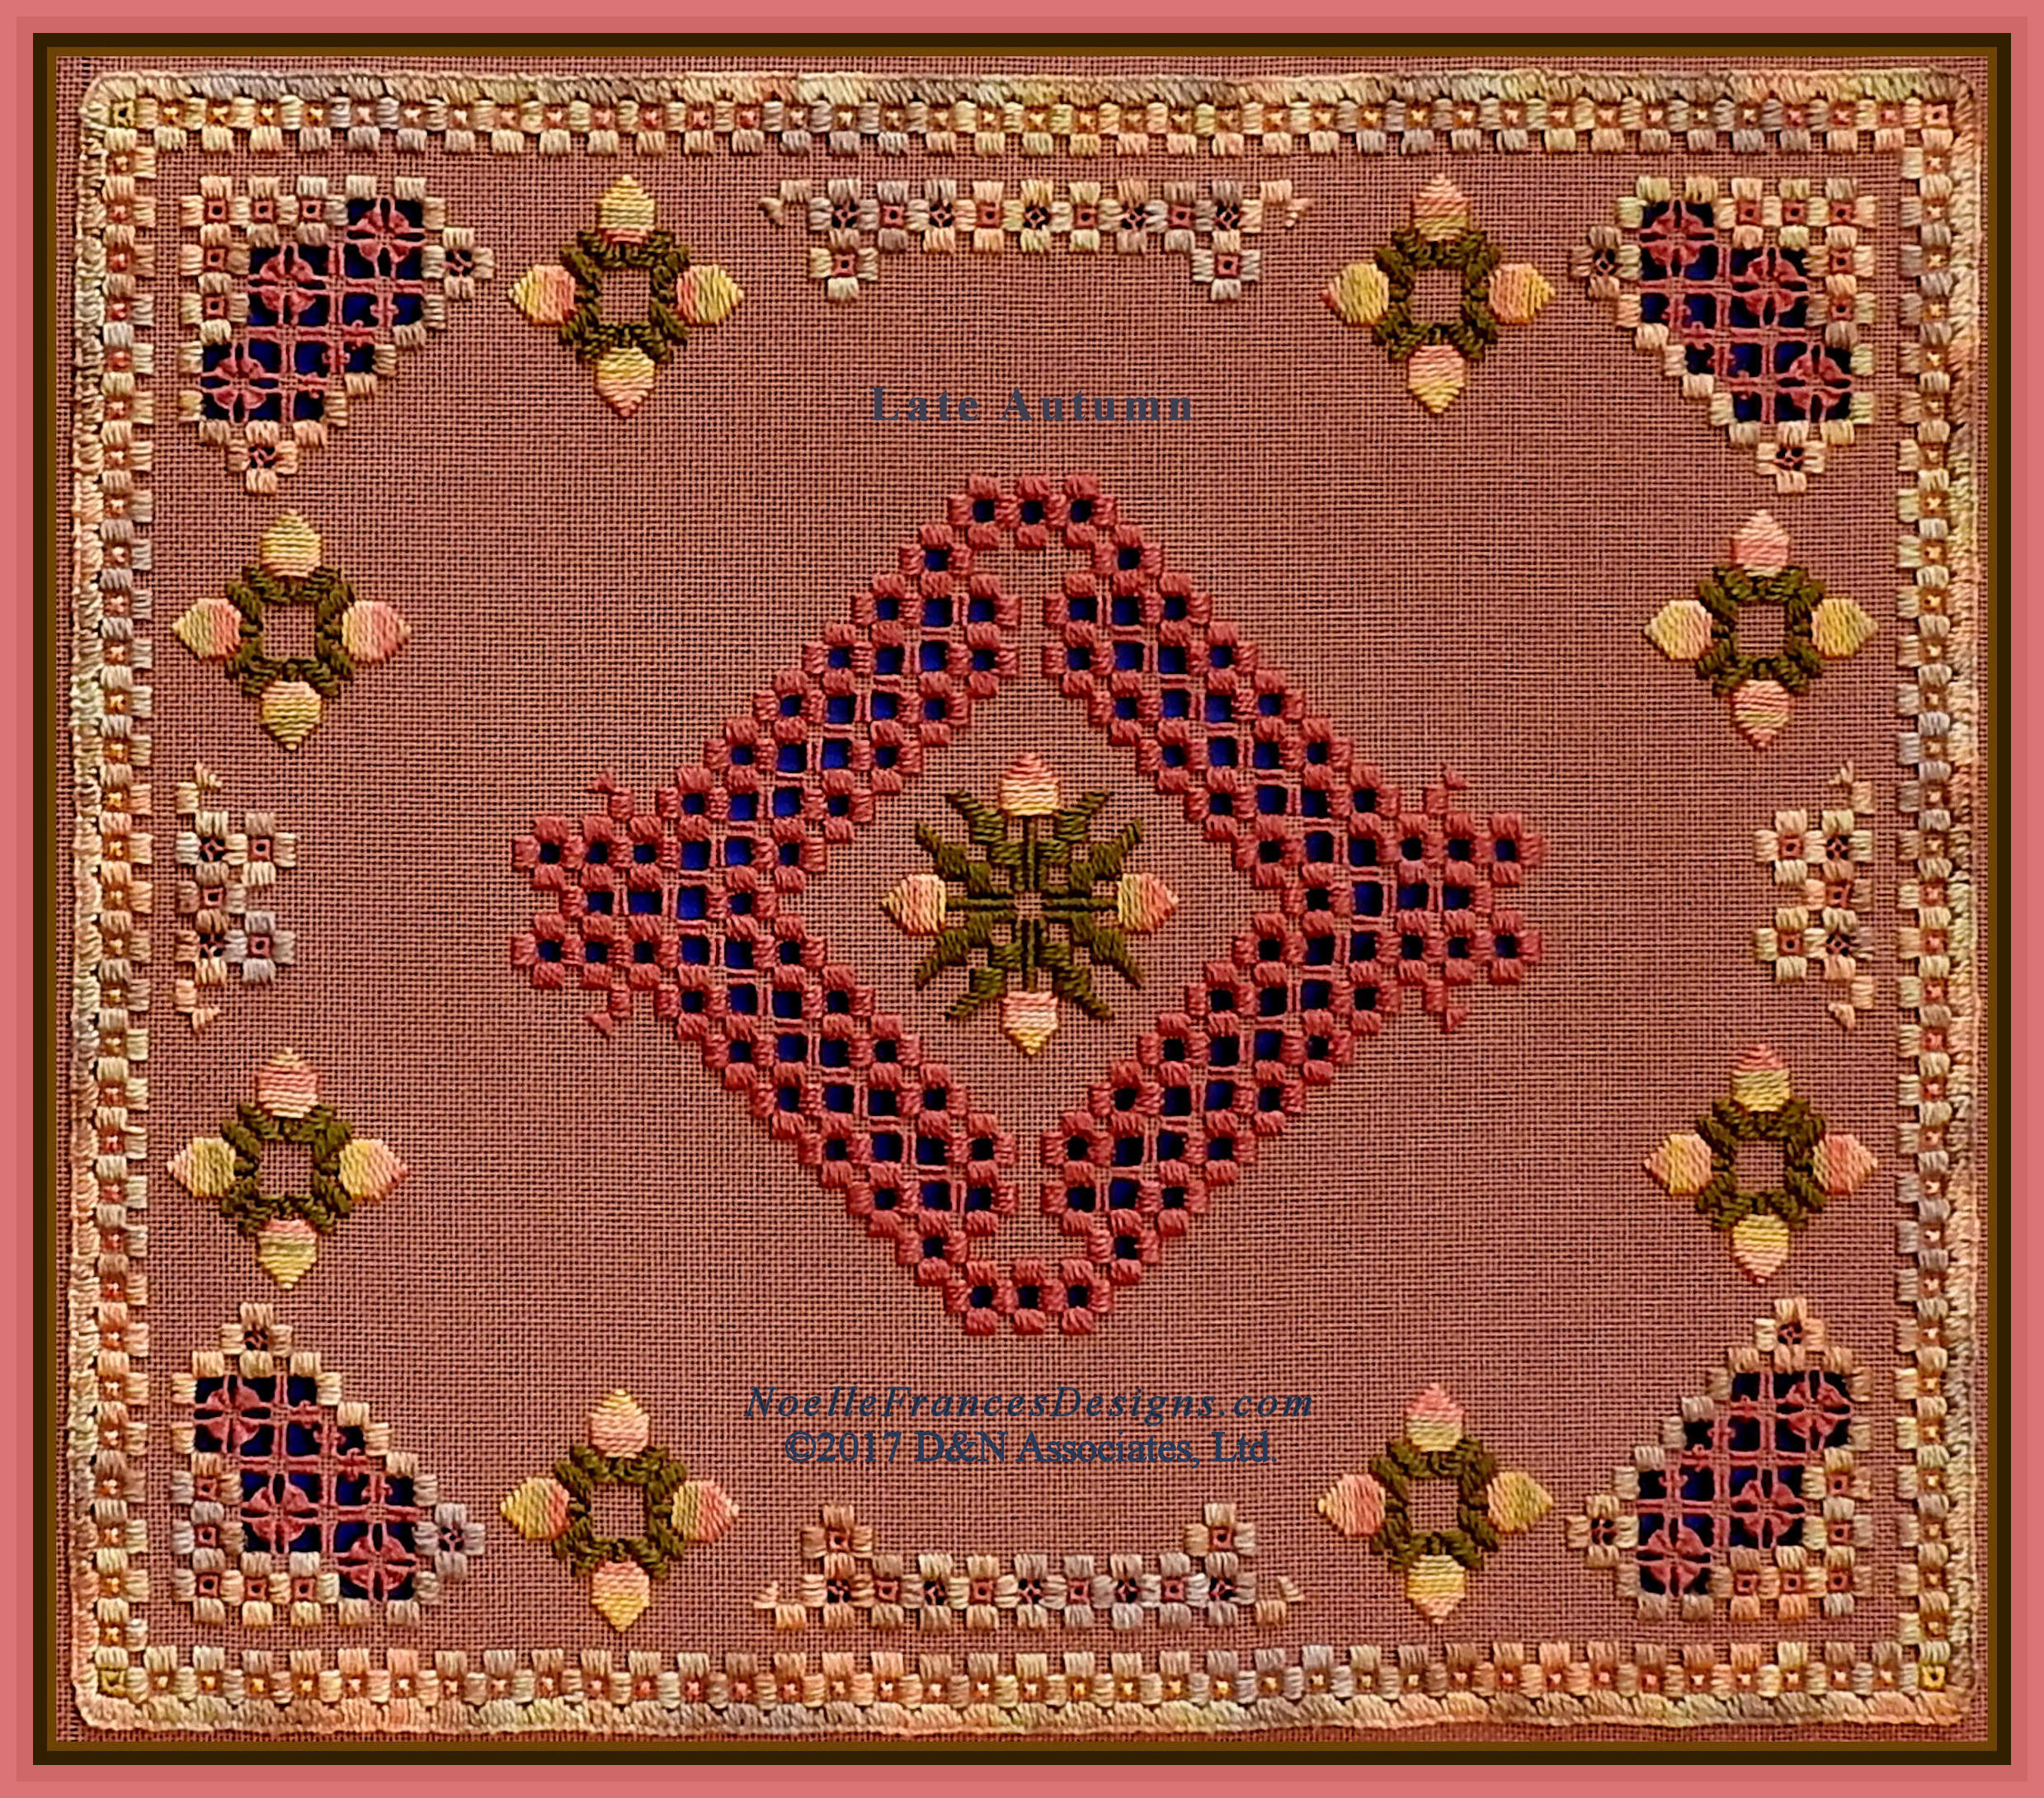
Samples of designs with kloster blocks:

Caribbean, Hardanger design with no openwork

Caribbean, Hardanger design with no openwork

Hardanger with Tulips, no openwork

Hardanger with Tulips, Hardanger design with no openwork

Late Autumn, Hardanger design with openwork

Late Autumn, Hardanger design with openwork

Hardanger satin vs straight stitches

Hardanger satin vs straight stitches

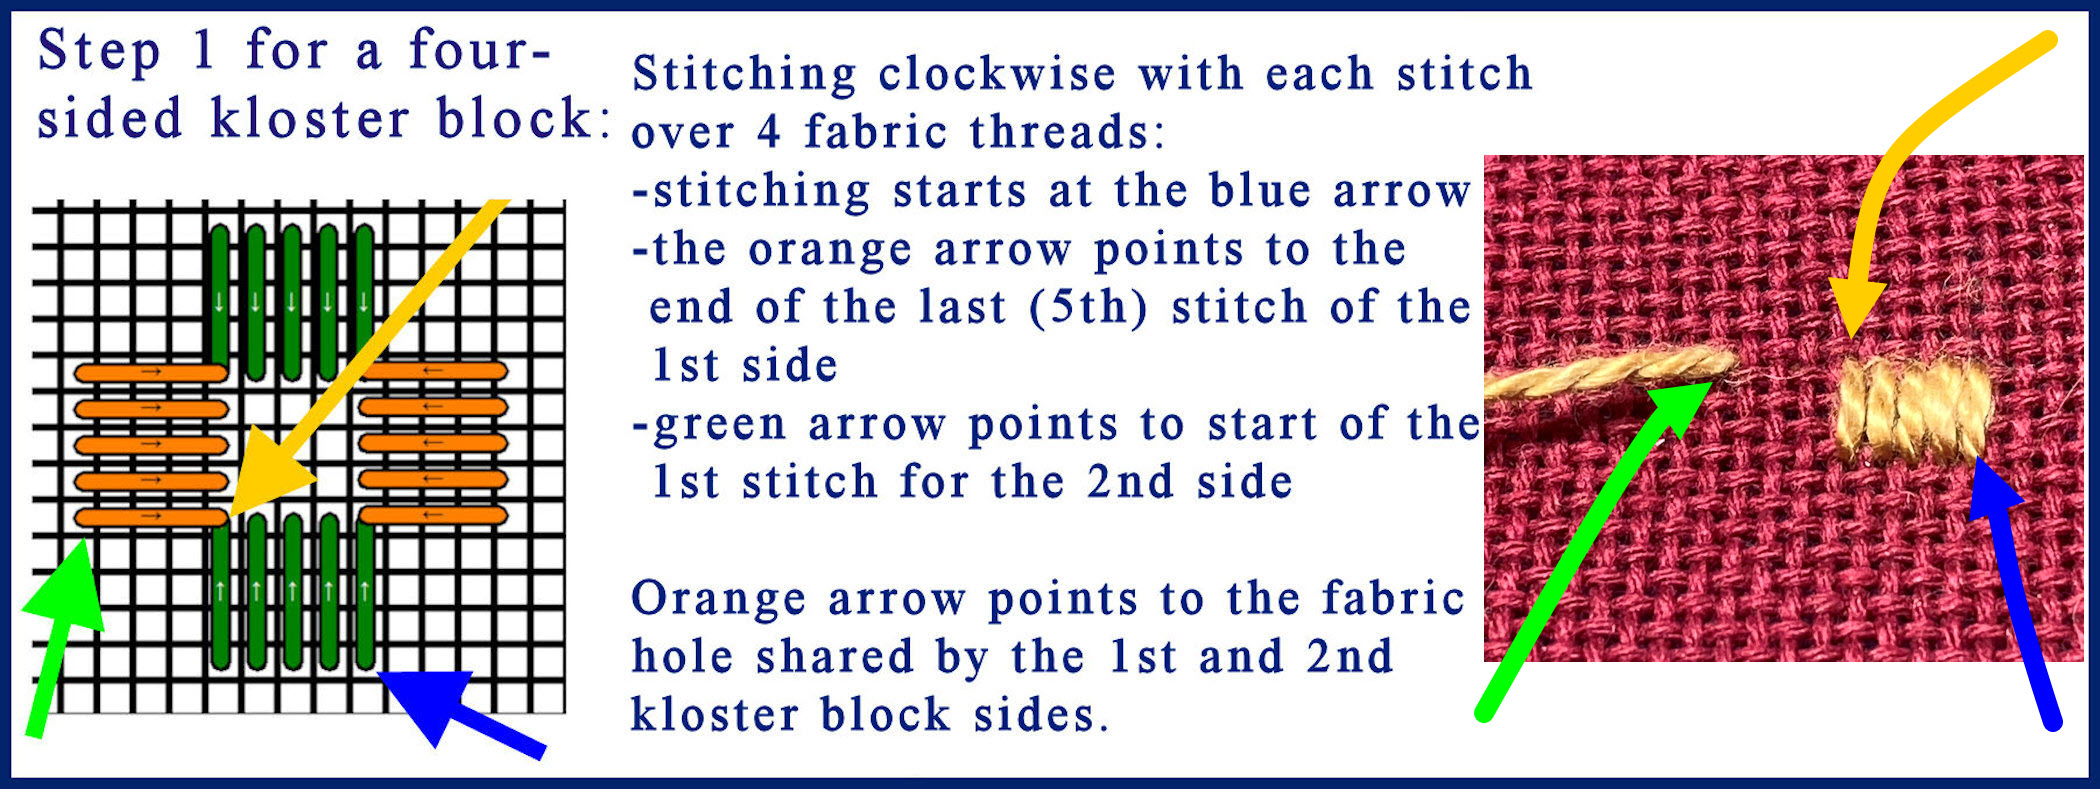
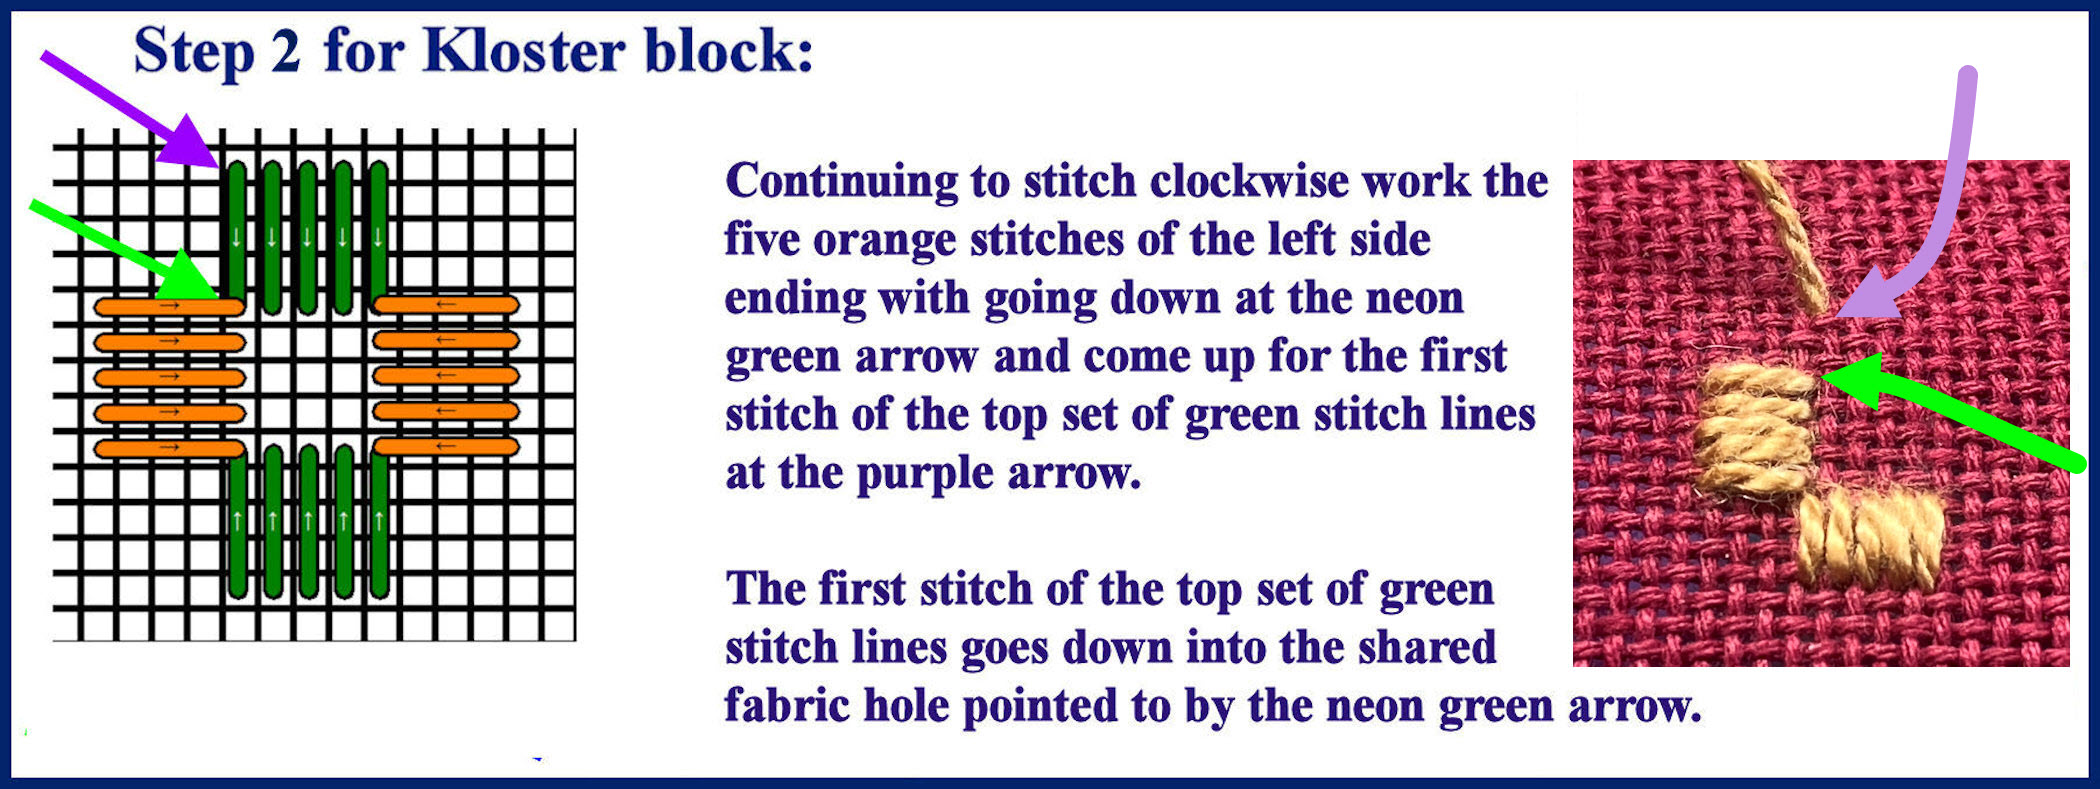
Below are steps for stitching four-sided and twelve-sided kloster blocks. 
Viewing these below photos you may notice that the stitching thread seems looser than it should. On a 22 count fabric I would normally use a size 5 stitching thread for kloster blocks but for these photos I decided to use a size 8. This is so you can view (I think easier) which fabric holes are shared and which are not. Note: When two sides of a kloster block meet to form a corner they share a common fabric hole at the corner.
Step 1 - four-sided kloster block

Step 1 – four-sided kloster block

Step 2 - four-sided kloster block

Step 2 – four-sided kloster block

Step 3 - four-sided kloster block

Step 3 – four-sided kloster block

Back view of four sided kloster block

Back view of four sided kloster block

adding a 12-sided kloster block

adding an adjoining 12-sided kloster block to the existing 4-sided kloster block

Adjoining a 12-sided kloster area to the 4-sided kloster block created above.

  • The 4-sided kloster block was worked above and is greyed out on this chart
  • The 12-sided kloster area is comprised of four three-sided kloster blocks and is worked clockwise (orange then purple pathway arrows)
  • The top 5-stitch (green stitch lines) is designated as the 1st side of the 12-sided kloster area.  This 1st side shares a fabric hole at the common corner with the adjoining (grey-out) side of the 4-sided kloster block and shares a fabric hole at the common corner with the adjoining 2nd side (orange stitch lines) of the 12-sided kloster area
  • Working clockwise, the fourth three-sided kloster block is near the purple arrow tip.
Check alignment

Check alignment

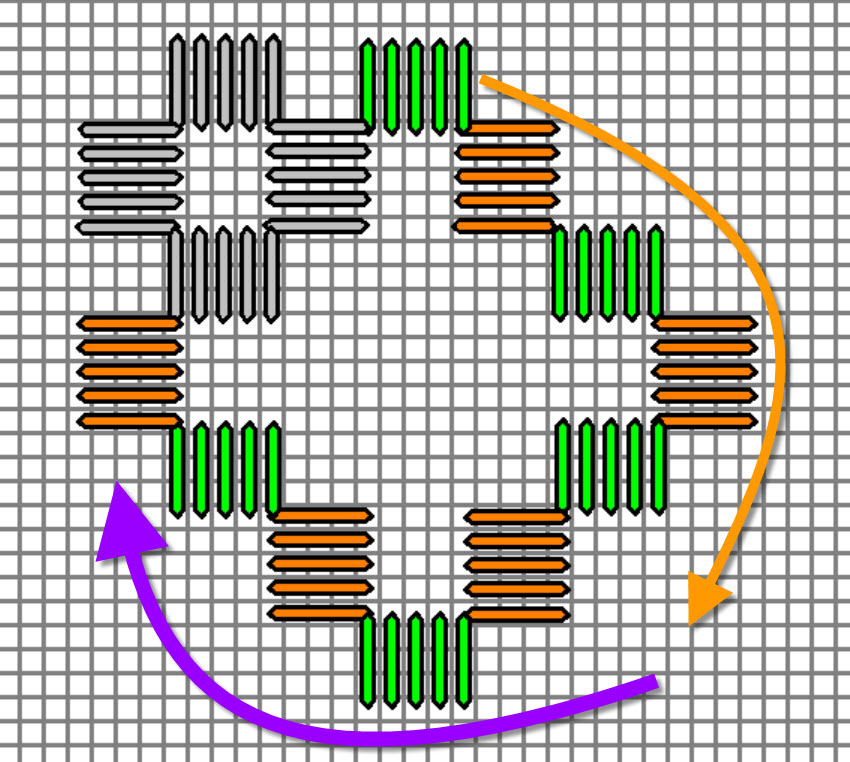
As you work check your positional alignment.

  • Make sure adjoining kloster sides are perpendicular to each other and share a corner fabric hole (see the two neon green arrows on the left photo).
  • Behind the fabric (right photo) no stitching thread crosses over an open (unworked) area (such as where the yellow arrow crosses the green arrow
  • Stitching thread that needs to be carry is weaved through the back side stitching of previous worked sides.
stitching oops

stitching oops

Satin stitch, front and back

No Knots Please! Securing the tails of your thread.