
I get a lot of pleasure embroidering card-sized designs to give as gifts during holiday seasons.
Preparations do not only involve the stitchery work, but also choosing and ordering windowed cards and mats for mounting. The mat boards I use are 5 by 7-inch, 4-ply (.052 to .060- inch) cardstock purchased from a framing supply estore. My size constraint is the size of the envelopes that I have on hand. I have purchased the mats with widows (3 by 5-inch) and blanks (no window cutout).

At this time the Stoney Creek web store carries the tri-fold windowed cards (5 by 7-inch with 3 by 5-inch windows) in white, green and red. The card stock mounting mats are available in 30-40 colors, and you can select the mat size, but keep an eye on the S&H as some e-stores are (to me) rather pricey with their shipping charges.
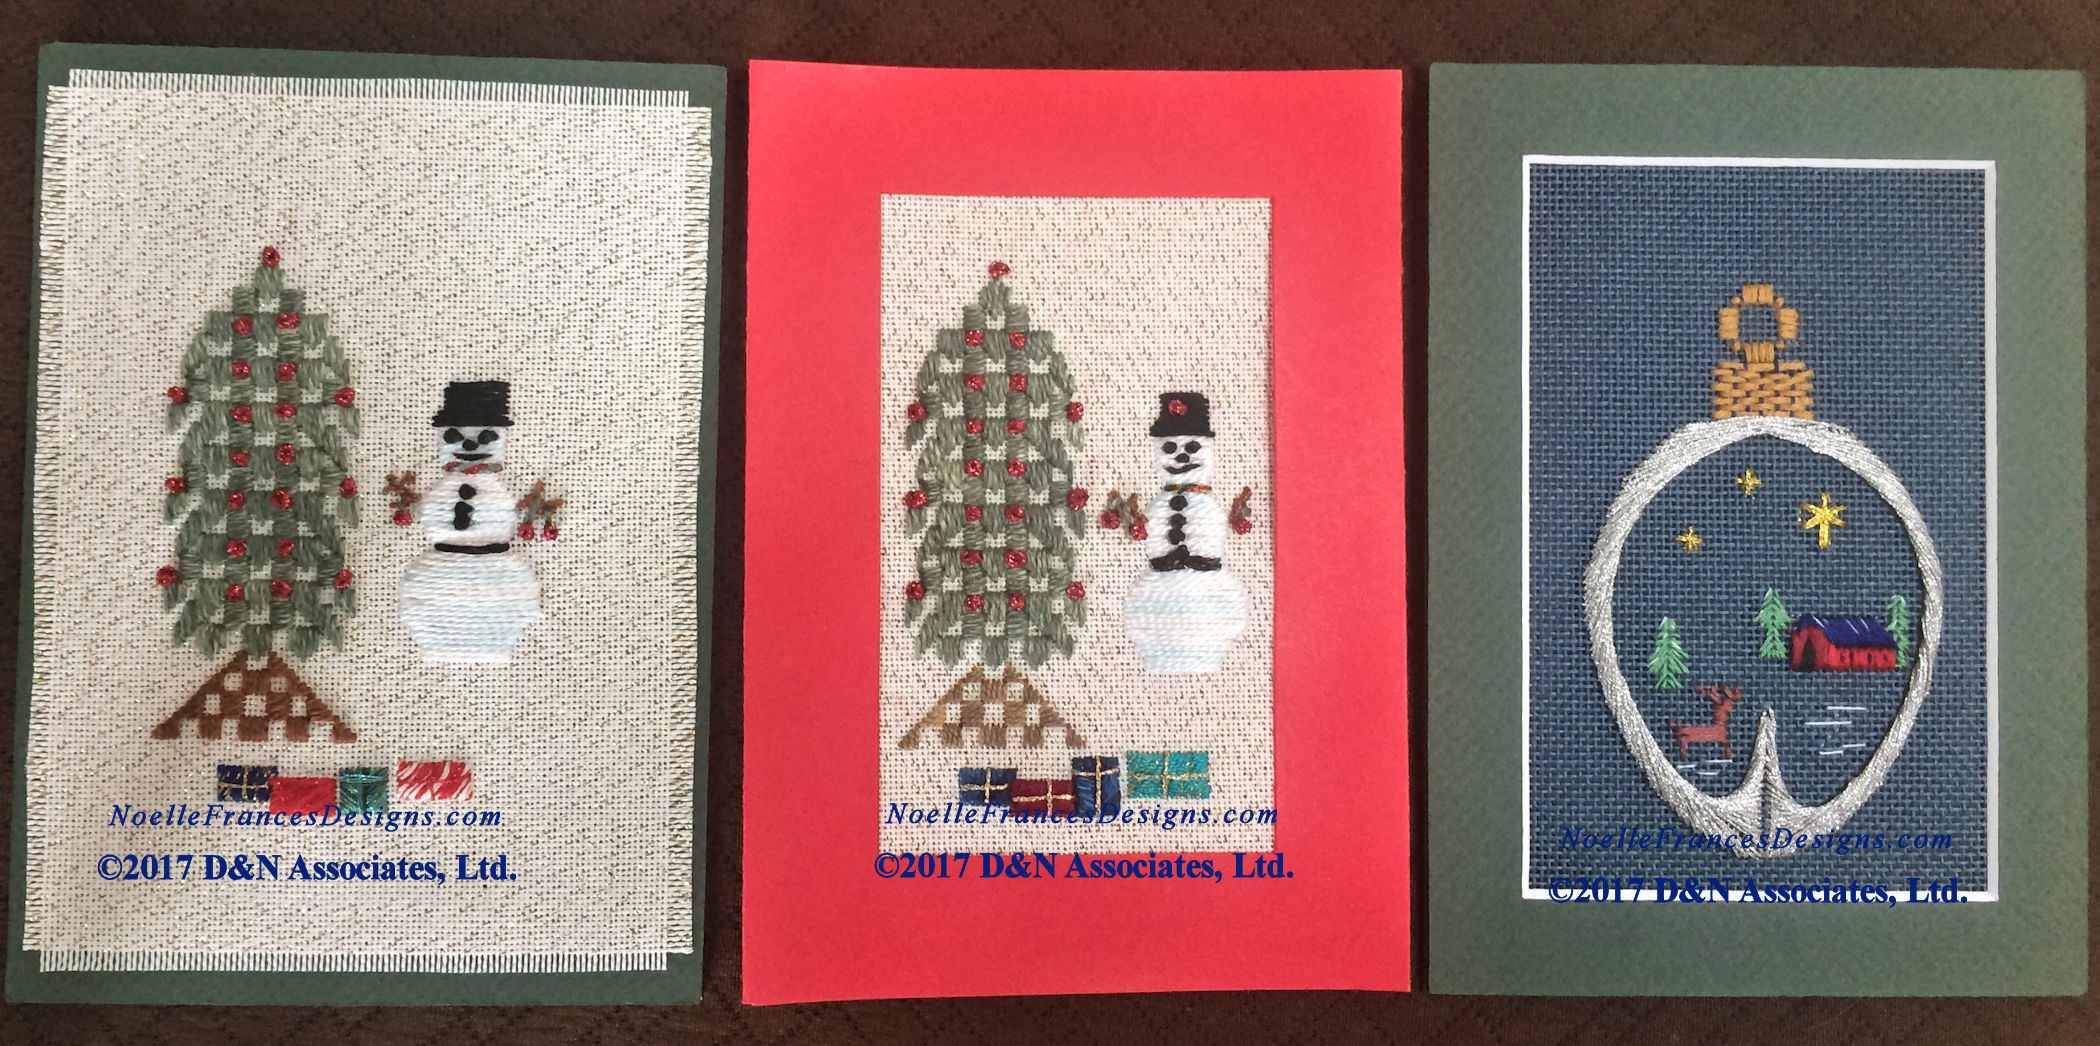
Middle: inserted within tri-fold card.
Right: mounted into window mat.
 Putting it all together: 2) Check that no stitching thread is peeking through behind your embroidered piece (ends of tails, stitching thread carried from one area to another). 3) Layer the front mat, embroidered piece and blank (back mat) to make sure they all align. 4) Trim the finished design’s edge to be slightly smaller than the outer measurement of the card. This way when layered together you will have a thin border of the front card edge touching the backing card (with no fabric between them). I use double-sided archival quality stitchery tape. Shop around for the best price. I have purchased it in 60-inch (0.5-inches wide) and 180-foot (1.5-inches wide) rolls. The 180-foot rolls (1.5-inches wide) cost me about $33.50 a roll (in 2016) including shipping (from USA website 123Stitch) yet I have seen it priced well above $50.00 on other websites. The tape comes off the roll with a bare sticky side and the other sticky side protected by a strip of heavy paper. This tape is very sticky. Paper taped to paper is nearly impossible to part. With paper to stiff fabric you normally have a few minutes where you can carefully (so not to rip the card stock) move the fabric (to change its placement on the card stock). |
 Securing finished piece into a window mat or tri-fold windowed card: Cut strips of the double-sided tape to fit the card stock area of the windowed card or mat. Make sure the tape does not jut into the open window area. Apply the sticky side of the tape to the back side of the windowed card or mat. Remove the heavy protective paper from the tape and adhere the finished design to the front mat. Make sure that the front side of the finished design is facing outwards through the window area. Carefully and quickly align the finished design within the window. I have found I can move the worked fabric around until satisfied with the placement within the window area, but trying to adjust paper taped to paper will generally rip the card stock. Once satisfied with the placement of the finished piece within the window area, apply tape to the back side of the embroidered piece. Note: if you peer through the tape (in this photo), you can see that I trimmed the finished design so that I have an uncovered (no fabric) border of card stock outside of the finished design. In this outside area, when I applied this second layer of sticky tape, it is now sticky tape adhered to sticky tape with the finished design sandwiched in between. |
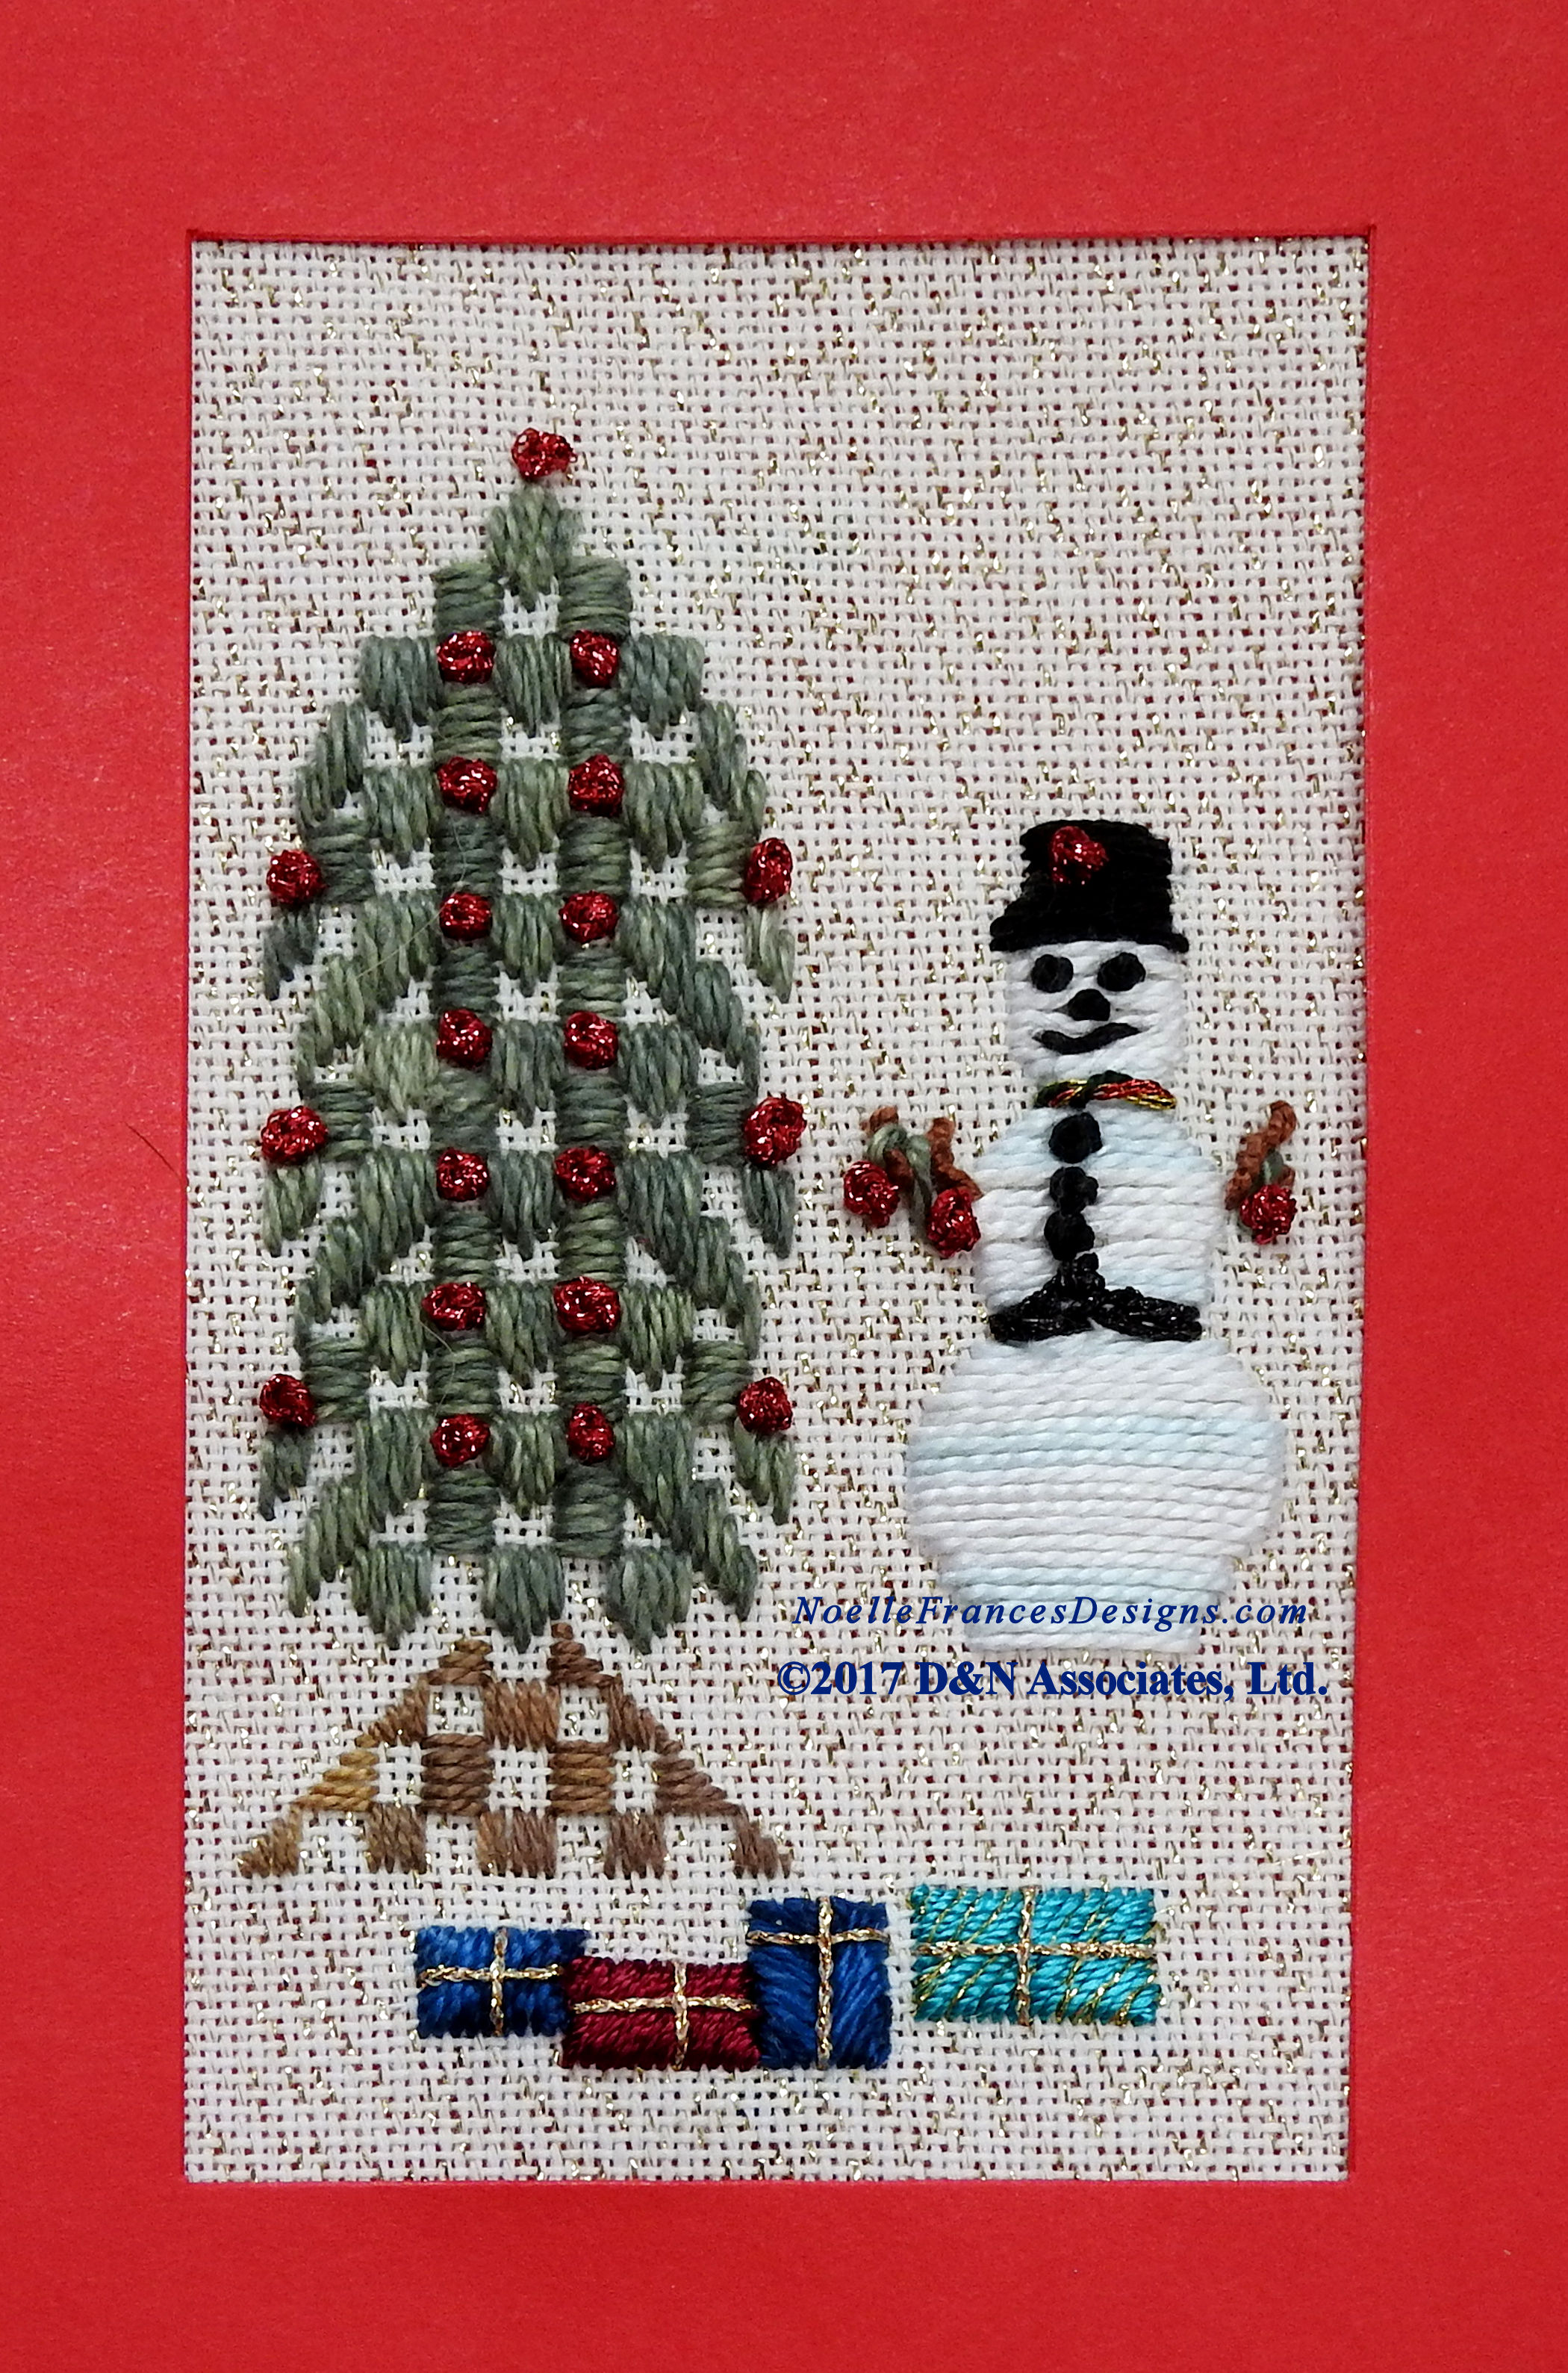
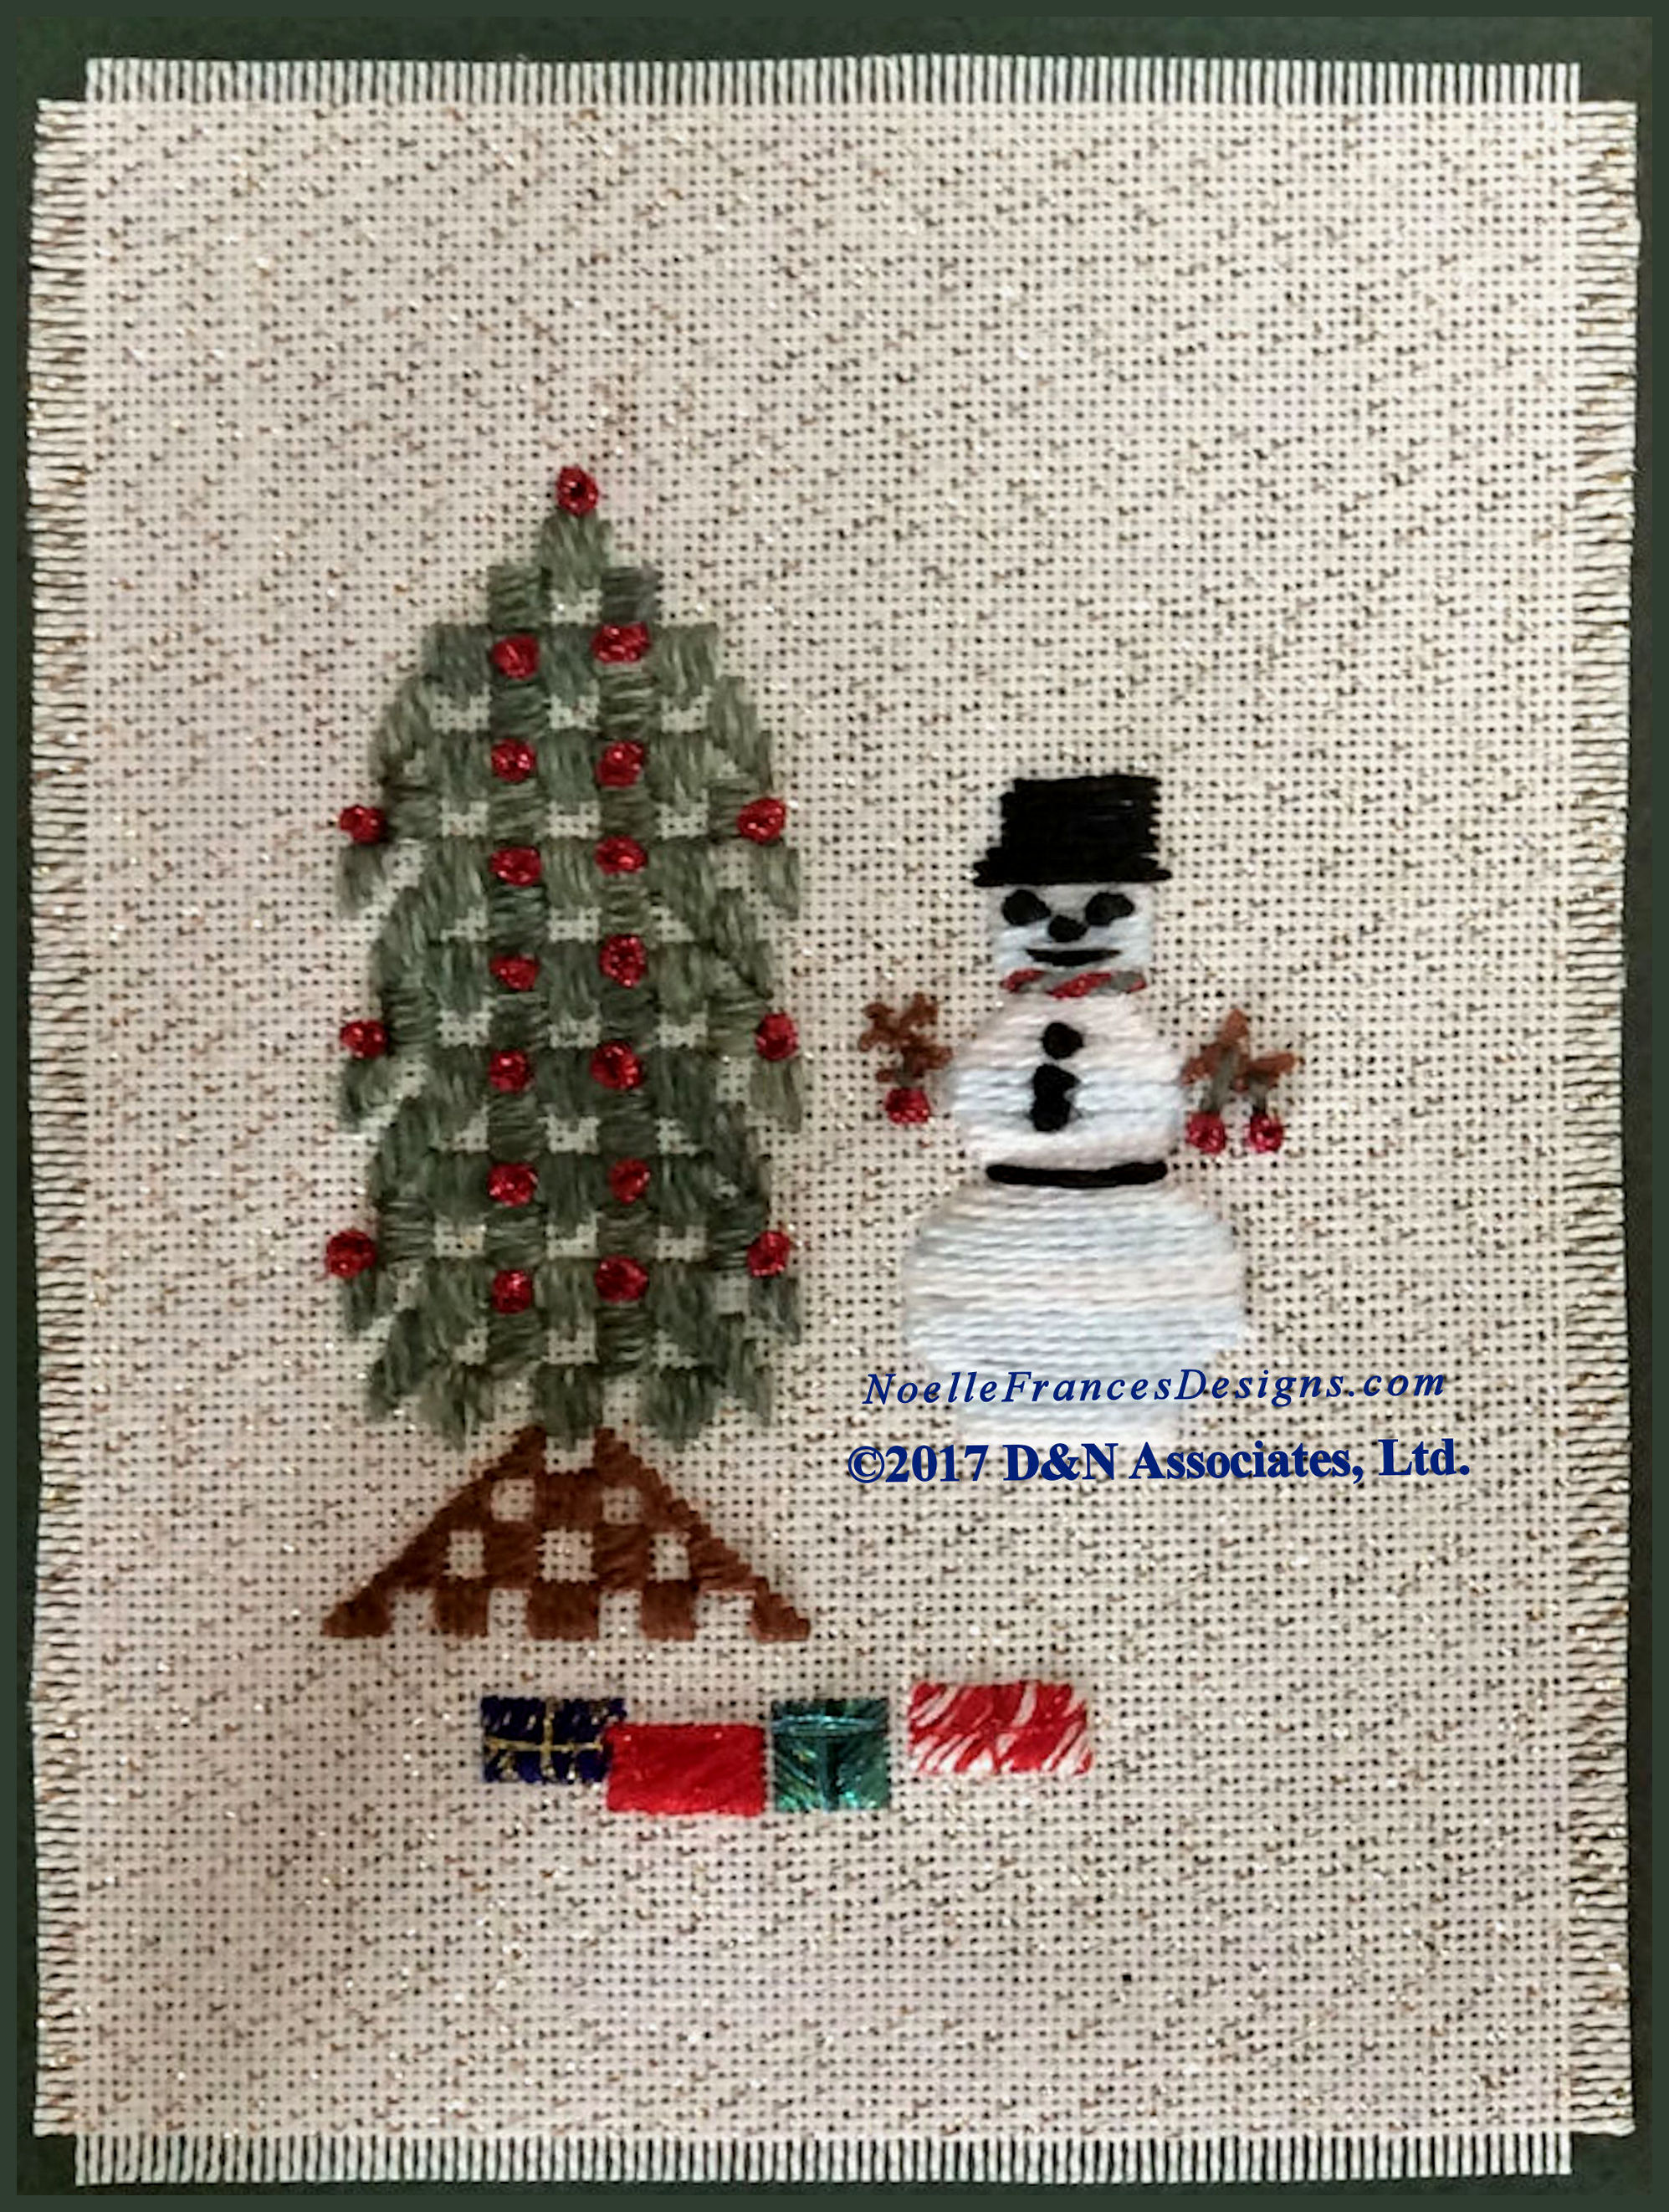
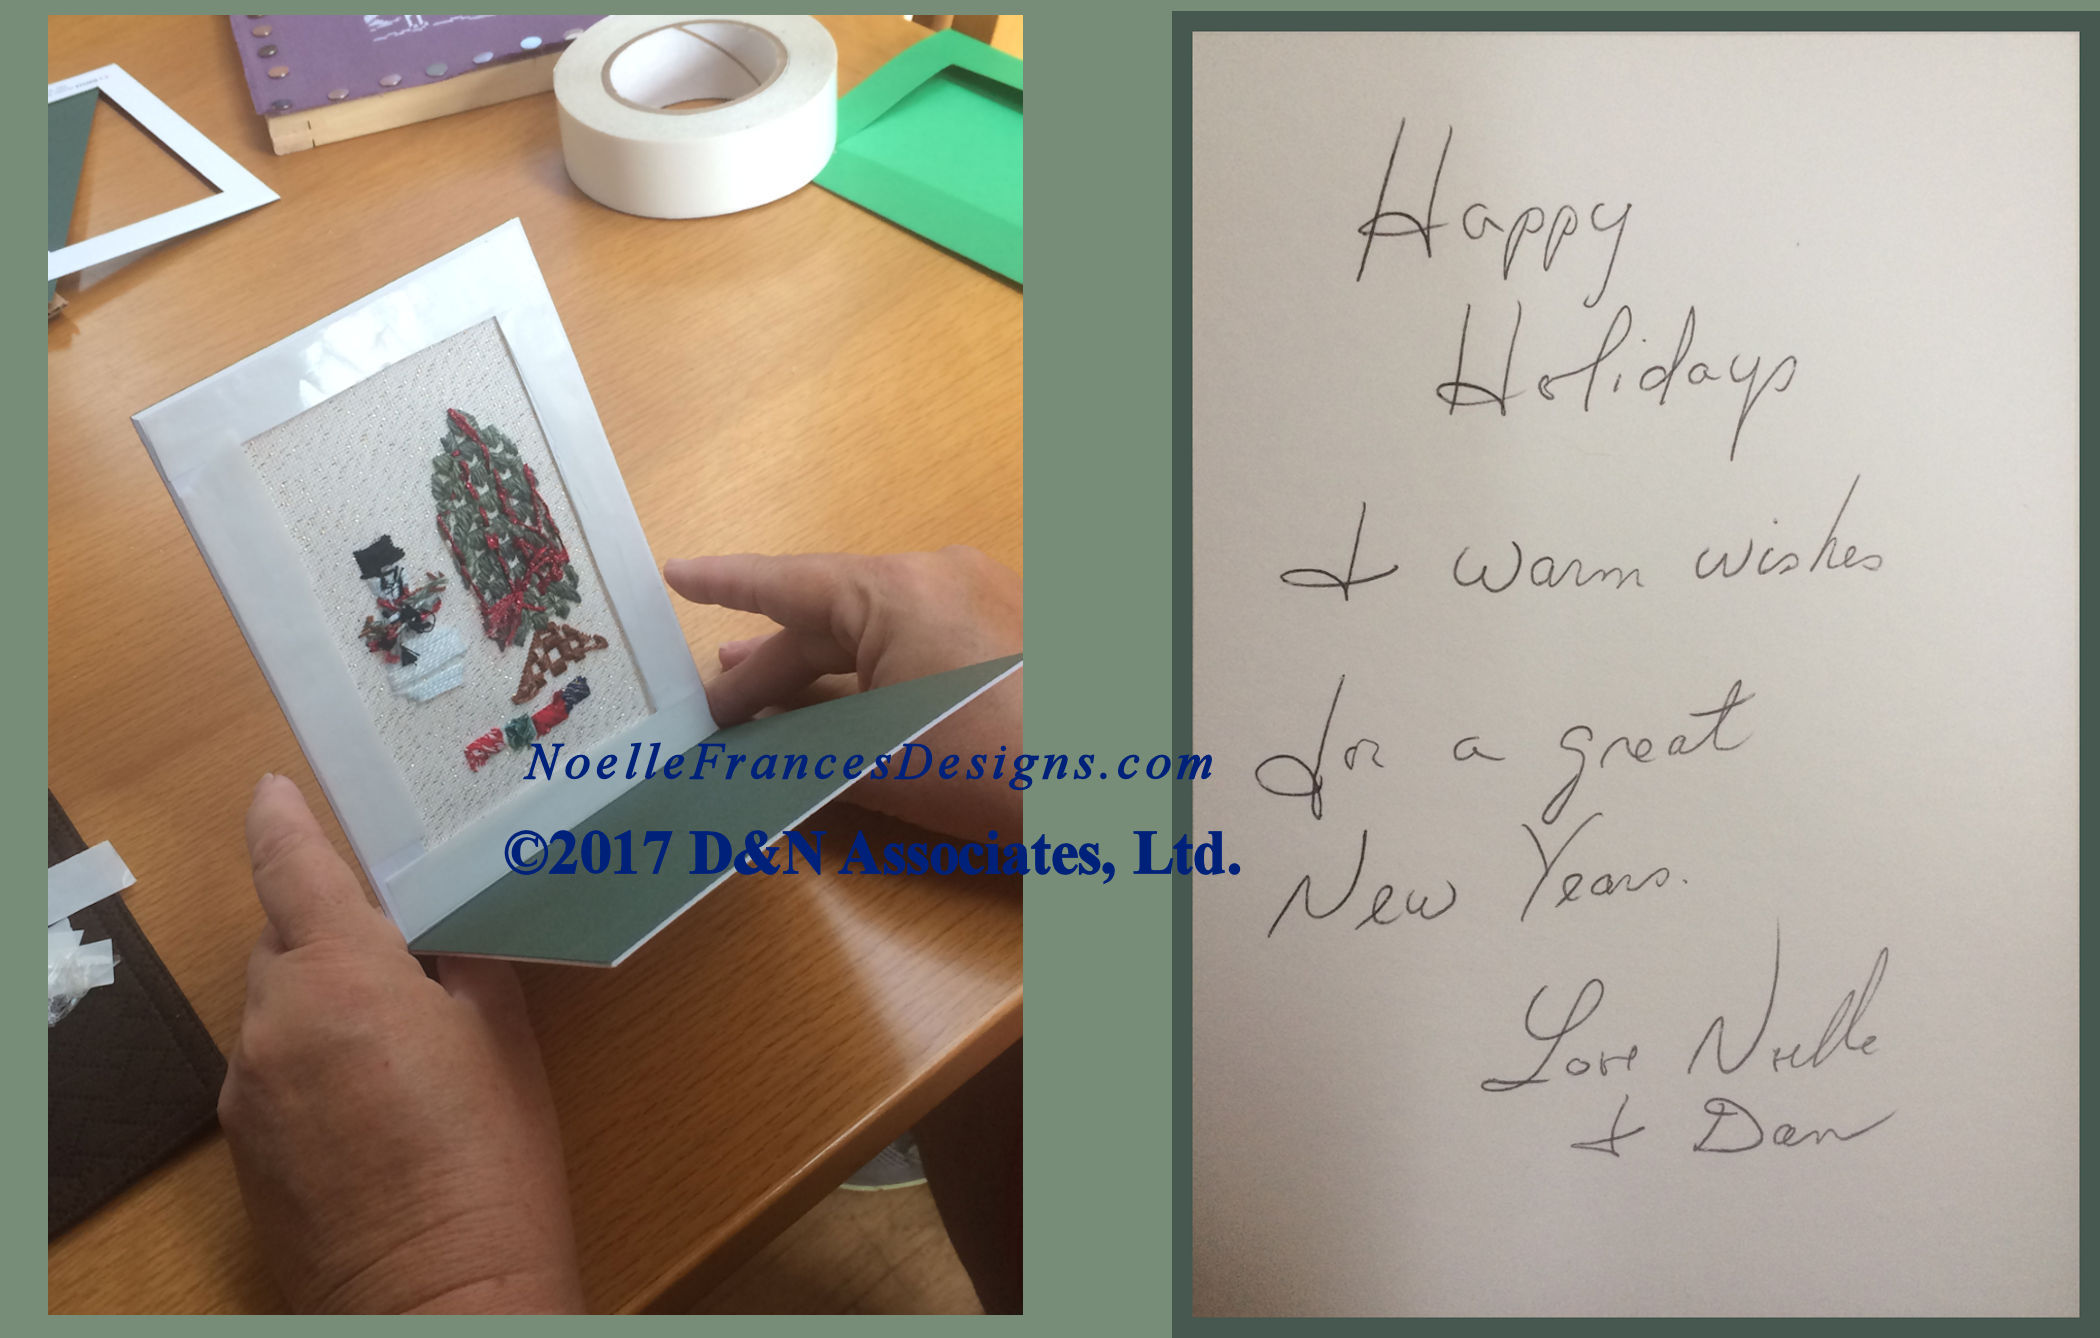 With the protective paper left on the second layer of sticky tape, practice the hand movements for lining up the layered front and the backing card stock. This is also the time to notice if the placement of the backing mat is pushing the worked design outwards. This might happen if you have knots on the back side of the worked design or if you have used a thick metallic thread. In the Snowman Decorating a Holiday Tree Design I used size 16 Kreinik metallic braid. When layered the metallic thread did pushed against the backing mat. To give the back side of my embroidered piece moe room I added a second window mat and taped it to the front layer. In the photo I am about to remove the protective paper covering on the sticky tape (of the back side of the second window mat) and press the backing card stock onto the layered front. Once that is done, the front card stock and the backing card stock will be strongly adhered. The white of the back side of the card stock provides a nice area for a written note. Once or twice each year I mess up writing a note and have to discard the backing blank. Thus, I have learned to write my note and then tape the backing blank to the front layer. Back to layering: Practice the hand motion of settling and aligning the back mat against the front layer. As my photo shows, I align the front layer and backing mat by holding them in my hands and walking the fingers up to align and press the layers together. Practice and practice before removing the protection paper on the sticky tape. When you are comfortable with the hand movements aligning the layers, remove the protective paper on the tape and very lightly align the backing blank mat against the front layers. If you are not happy with the alignment of the layers, you might be able to get the card stocks parted, but do not plan on it. When satisfied, press the layers strongly together.
 Tri-fold Card: With a tri-fold card you have the windowed front piece and two folded blanks (no window). The worked design is taped to the windowed piece; then tape is applied between that layering (windowed front piece and the worked design) and the next layer of the tri-folded card. Once you have adhered the finished design to the front flap, it is pretty much adhered and cannot be moved around. With the finished design taped between the first two flaps, the card opens like a normal card … where you can write a note. At this stage you have a tri-fold card with the layers sort of like this: \:/\ Where \ is the window fold, : is the embroidered piece, / is the backing mat and \ is the back of the card. I have friends who leave the /\ untaped and write a message in there. I like to apply sticky tape between the /\. That way the tri-fold card is completely taped close and I write a message on the back of the card. I do this because I feel it makes the whole unit stronger and because I have watched receivers of my card gifts tried to open up all of the folds of the tri-card thereby about destroying the framing idea of the embroidered piece.
|
Mounting embroidered piece on the front of a heavy card stock (mat):
  These two worked designs are adhered to a single layer, a blank (no window) card stock that is 5 by 7-inches. The front of the card stock is dark green, the back side is white, which is where I write a holiday note. The leftmost photo shows marking an area in which to apply the sticky tape. Previously I used the “guess where” method and applied the tape a quarter inch or more away from the edge of the card. Now I use the window area of a 5 by 7-inch card as a guide placed on top of a blank mat. Running the pointed edge of a scissor around the edge of the window area (blue mat, the top mat) marks an area about 3 by 5-inches (depends on the window size) onto the dark green side of the blank. Windowed card removed, I apply two strips of 1.5-inch width sticky tape within the marked window area on the blank, remove the protective cover from the sticky tape, and press the finished designs onto the blank. It’s faster (to put together) than a windowed mat with a backing mat and costs less since I only am using one mat. |